Weather app Django (original) (raw)
Last Updated : 1 Nov, 2025
This project is a Django-based Weather App that allows users to search for any city and view its current weather details, including temperature, humidity, pressure, and weather conditions. The app fetches live data from the OpenWeatherMap API and displays it in a simple, user-friendly interface.
In addition, the app keeps track of recent searches, allowing users to quickly see their last 5 searched cities along with their weather details. The project demonstrates how to integrate external APIs, use Django models for data storage, and create dynamic templates.
Step 1: Configure App and Define Model
Consider a project named 'weather' having an app named 'main'. After setting up the project and app, add 'main' to the INSTALLED_APPS list in settings.py. Once that’s done, proceed to create a model for the app:
**In main/model.py:
Python `
from django.db import models
class SearchHistory(models.Model): city_name = models.CharField(max_length=100) temperature = models.FloatField(null=True, blank=True) humidity = models.IntegerField(null=True, blank=True) pressure = models.IntegerField(null=True, blank=True) description = models.CharField(max_length=255, null=True, blank=True) searched_at = models.DateTimeField(auto_now_add=True)
def __str__(self):
    return f"{self.city_name} at {self.searched_at.strftime('%Y-%m-%d %H:%M')}"
`
- Stores city name, temperature, humidity, pressure, description, and timestamp of searches.
- Helps track recent searches and optionally cache data to reduce API calls.
After creating this model, we need to run two commands in order to create Database for the same:
_Python manage.py makemigrations
_Python manage.py migrate
Step 2: Create the View
In **main/views:
Python `
import requests from django.shortcuts import render from .models import SearchHistory
API_KEY = "your_api_key_here"
def index(request): weather = None error = None recent_searches = SearchHistory.objects.order_by('-searched_at')[:5] # last 5 searches
if request.method == "POST":
    city = request.POST.get('city', '').strip()
    if city:
        url = f"https://api.openweathermap.org/data/2.5/weather?q={city}&appid={API_KEY}&units=metric"
        try:
            resp = requests.get(url, timeout=5)
            data = resp.json()

            if resp.status_code == 200:
                weather = {
                    'city': f"{data['name']}, {data['sys']['country']}",
                    'temperature': data['main']['temp'],
                    'humidity': data['main']['humidity'],
                    'pressure': data['main']['pressure'],
                    'description': data['weather'][0]['description'].title(),
                    'icon': data['weather'][0]['icon'],
                }
                # Save search to DB
                SearchHistory.objects.create(
                    city_name=data['name'],
                    temperature=data['main']['temp'],
                    humidity=data['main']['humidity'],
                    pressure=data['main']['pressure'],
                    description=data['weather'][0]['description'].title()
                )
                # Refresh recent searches
                recent_searches = SearchHistory.objects.order_by('-searched_at')[:5]
            else:
                error = data.get("message", "Could not fetch weather data.")
        except requests.RequestException:
            error = "Network error. Please try again."
    else:
        error = "Please enter a city name."

return render(request, "main/index.html", {
    'weather': weather,
    'error': error,
    'recent_searches': recent_searches
})
`
- **index(request): Main view function that handles both GET and POST requests for the weather app.
- **requests.get(url, timeout=5): Sends an HTTP request to the OpenWeatherMap API and retrieves real-time weather data in JSON format.
- **resp.json(): Converts the API response into a Python dictionary for easy access.
- **SearchHistory.objects.order_by('-searched_at')[:5]: Fetches the five most recent city searches from the database.
- **SearchHistory.objects.create(...): Saves a new weather search entry (city name, temperature, etc.) to the database.
- **render(request, "main/index.html", {...}): Renders the HTML template and passes weather data, recent searches, and error messages as context variables.
**Note: Obtain API key from OpenWeatherApp. Replace "**your_api_key_here" in views.py with actual API key.
Step 3: Configure URLs
In **weather/urls.py:
Python `
from django.contrib import admin from django.urls import path, include
urlpatterns = [ path('admin/', admin.site.urls), path('', include('main.urls')), ]
`
Step 4: Define URLs for main App
Create **main/urls.py and add:
Python `
from django.urls import path from . import views
urlpatterns = [ path('', views.index), ]
`
Step 5: Create the Template
Create **main/templates/main/index.html:
HTML `
Weather AppWeather App
{% csrf_token %} Get Weather{% if error %}
<div class="error">{{ error }}</div>
{% endif %}
{% if weather %}
<div class="weather">
<h2>{{ weather.city }}</h2>
<p>Temperature: {{ weather.temperature }} °C</p>
<p>Humidity: {{ weather.humidity }} %</p>
<p>Pressure: {{ weather.pressure }} hPa</p>
<p>Conditions: {{ weather.description }}</p>
<img src="https://openweathermap.org/img/wn/{{ weather.icon }}@2x.png" alt="Weather icon">
</div>
{% endif %}
{% if recent_searches %}
<div class="recent">
<h3>Recent Searches</h3>
<ul>
{% for search in recent_searches %}
<li>{{ search.city_name }} - {{ search.temperature }}°C - {{ search.description }}</li>
{% endfor %}
</ul>
</div>
{% endif %}`
- ******: Sends the entered city name to the Django view via a POST request.
- ****{% csrf_token %}**: Protects the form from Cross-Site Request Forgery (CSRF) attacks.
- ****{% if error %} ... {% endif %}**: Displays an error message if one exists in the context.
- ****{% if weather %} ... {% endif %}**: Dynamically shows the fetched weather details (city, temperature, etc.) when available.
- ****
 **: Displays the weather icon based on API data.
 - ****{% if recent_searches %} ... {% for search in recent_searches %}**: Lists the last five searched cities with temperature and weather description.
- **Inline CSS: Handles basic styling for layout, buttons, text, and spacing to keep the UI clean and readable
Step 6: Run the Project
Start the development server:
python manage.py runserver
Visit development server: "http://127.0.0.1:8000"
**Output:
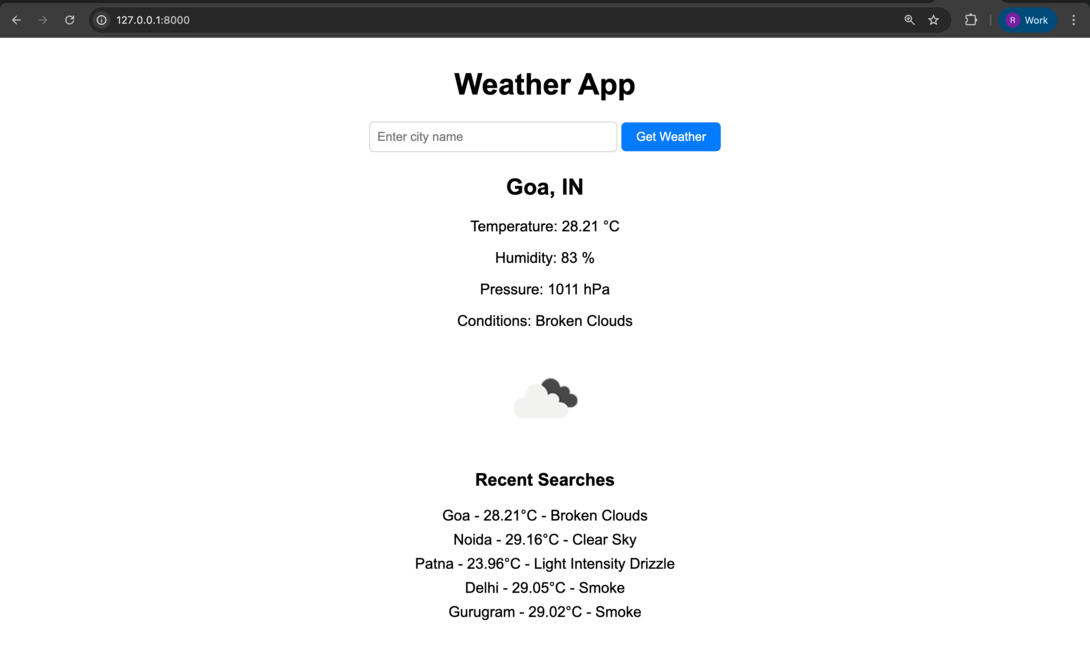
weather-app
The project is now fully functional, allowing users to search for cities and view current weather details. The UI can be customized with CSS and additional styling to make the app more user-friendly and visually appealing.