How to Create Partitions on Windows 10 (original) (raw)
Last Updated : 15 Jul, 2025
Creating partitions in Windows 10 allows you to organize your data, and separate operating system files from personal files. You can use different methods to perform the disk partition in Windows 10 and manage your data efficiently. Follow this guide to learn how to **partition a hard drive in Windows 10 and optimize your computer.
Before your Start:
- Ensure to have sufficient free space on your hard drive.
- Backup your data
- Should have admin access
1. Using Disk Management
This is an in-built tool provided by Windows OS helps you to manage system drives (including partition). Let's see how you can do it in a few easy steps:
Step 1: Open Windows Disk Management Settings
Press **Win + X and click on Disk Management, or alternatively you can press **Win + S and type "Computer Management" and hit enter, now navigate to "Disk Management" from the left-side menu bar.
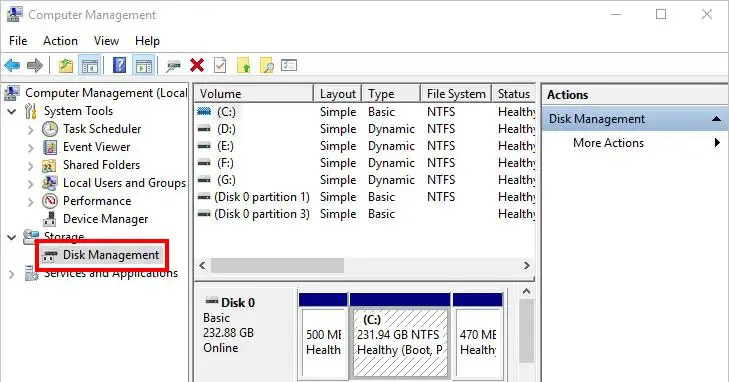
Disk Management
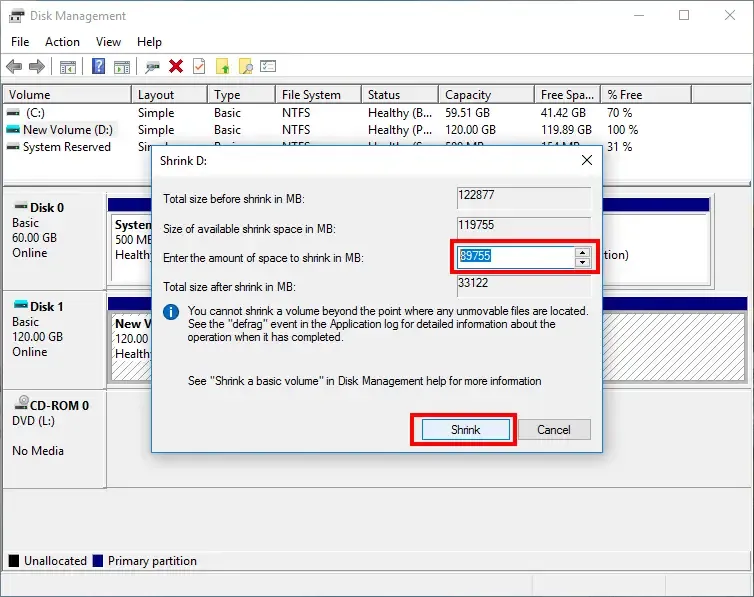
Step 2: Shrink Volume of the Selected Drive
Make a right-click on the existing partition (for example E:) and click on "Shrink Volume". You can now enter the space as per your convenience and click "Shrink".
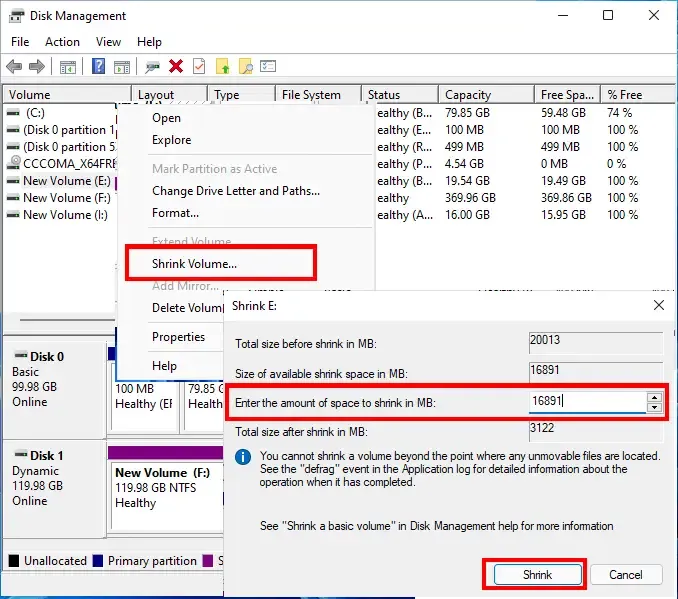
Shrink Volume
Step 3: Create a New Volume
Make a right-click on the unallocated space and select "New Simple Volume". Follow the instructions and assign the new drive with (A,B,D,G, etc.) and choose file system as NTFS.
Shrink Volume
Step 4: Format and Complete the Process
Click on "Format" and later "Finish" to create a new disk partition in Windows 10 PC.
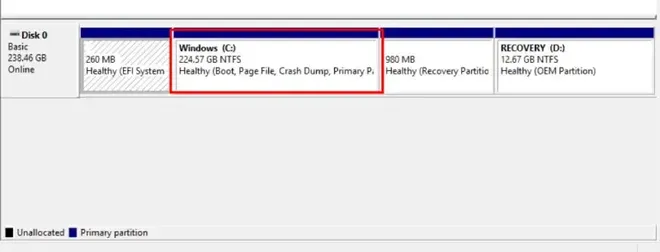
Partition Complete
2. Using Command Prompt
This is an alternate method specially for advanced users who want to have more control while making disk partition. Here's a break-down of steps to create partition using command prompt.
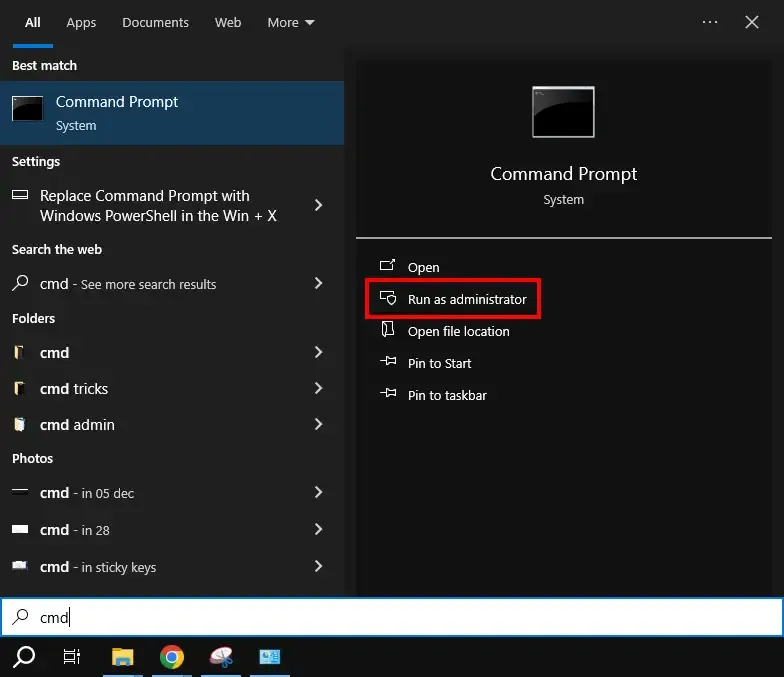
Step 1: Open Command Prompt with Admin Rights
Press Win + S and type "Command Prompt" and select "Run as Administrator"
cmd as admin
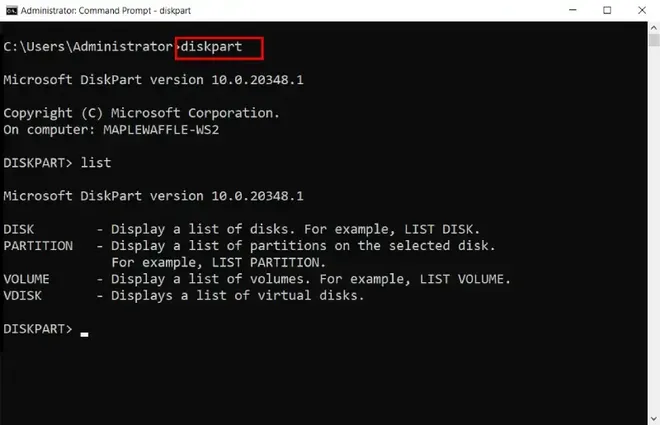
Step 2: Run Diskpart and List Disk
Once you access the command prompt with admin rights. Run the following command:
diskpart
list disk
*list disk - to display all the available drives
Step 3: Select the Disk you want to Format
Now type the following command to select the desired disk:
select disk A
(A : disk name)

Select Disk
Step 4: Create the Partition, Save and Exit
Tyoe the following command to assign the disk size, disk name and disk format
create partition primary size=20480
assign letter=H
format fs=ntfs quick

Complete the partition
3. Using Third-Party Tools
If have find it difficulty in creating disk partition using the above methods, you can simply get a trusted third-party software to perform this action. Here are some of the best tools:
- MiniTool Partition Wizard
- AOMEI
- EaseUS
Conclusion
By following the steps to **partition a hard drive in **Windows 10, you can better organize your files, create separate spaces for different data types, and even prepare for multiple operating systems. With **Windows 10 disk management, partitioning becomes a straightforward task, allowing you to **create new partitions and manage your storage efficiently.