Control restricted content with Office 365 sensitivity labels (original) (raw)
Article 2 of 4
Part of: Helpful management tips for new Office 365/Microsoft 365 admins
Learn to work within the compliance portal or use PowerShell to create and publish the labels your organization needs to maintain control over restricted content.
Whether on purpose or by accident, restricted content will leave the organization's control, but Office 365's sensitivity labels feature can help prevent these leaks.
With more employees working remotely due to the coronavirus pandemic, more company information is leaving the safety of the private network and traveling across the internet. With this increase in employees who handle corporate content outside the office comes more risk. Administrators who manage Office 365 or Microsoft 365 should look at implementing sensitivity labeling as one way to prevent unauthorized access to restricted information.
Understanding the sensitivity label capabilities
Companies that use either Office 365 or Microsoft 365 are likely to have a significant amount of private and sensitive data hosted in Microsoft's cloud, including confidential email stored in Exchange Online, important contracts in OneDrive or SharePoint, or sensitive communication in Microsoft Teams or Office 365 Groups.
IT needs to secure this information, but this can be difficult due to the speed the data is created and its sheer volume. One approach is to use automatic sensitivity detection and labeling of content. This functionality is a component of the Azure Information Protection Plan 2 and flags content with the option to apply protections based on predefined policies in the compliance portal.
Once Information Protection detects any of the predefined labels, it performs one, or several, of the following tasks:
- Detects potentially sensitive information, such as health data or financial information, in Microsoft Office documents and then applies a watermark to the file or adds text signifying confidential content in the footer or header.
- Blocks the user from attaching sensitive files to email or enforces encryption to the file as it is sent.
- Restricts access to documents labeled as sensitive to external users when stored in SharePoint, OneDrive or Microsoft Teams.
- Uses the data governance platform Azure Purview to restrict users from seeing database table columns or files in blob storage.
- Receives alerts when the system detects sensitive data in the Microsoft 365 or Azure environment.
How to start the sensitivity labeling process
To start with sensitivity labels in Office 365, define the specific compliance requirements the organization needs. These can be industry specific or requirements from human resources or the compliance team. Define these data privacy parameters through the following questions:
- What data elements generated and stored within the company's systems require restrictions?
- What label name should the data have?
- Which services can host the data in question, such as Exchange, SharePoint, OneDrive, Teams, Office 365 Groups and Azure?
- What actions should be applied when the system detects sensitive data? These can include encryption, blocking data sharing, restricting access to just internal users and alerting a compliance officer.
- Is there a current standard operating procedure to educate the users on the restriction associated with this data type?

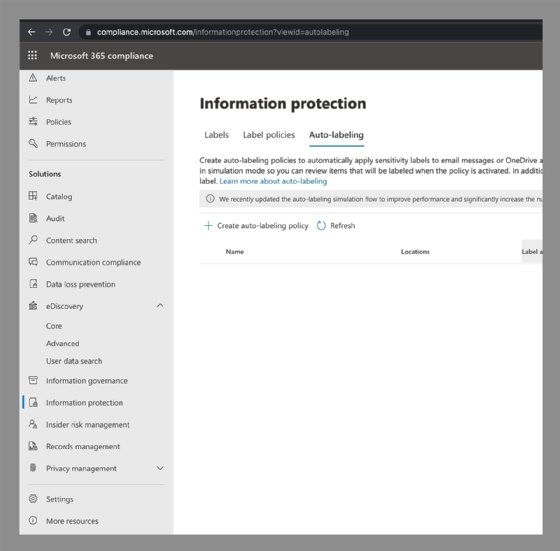
Set up sensitivity labels in the information protection section in the Office 365 or Microsoft 365 compliance center.
Next, admins can build out the labels and policies in the Office 365 compliance center at the compliance.microsoft.com URL.
Office 365 can detect content types in several key categories:
- Financial. The system can find a range of financial data stored as text in content, including routing numbers, bank accounts, credit card information and tax identification numbers.
- Medical and health. Content that contains personal health information that may be regulated under HIPAA or other privacy rules.
- Privacy. Microsoft's system detects data based on regulations specified by other countries, including the European Union's General Data Protection Regulation, Canada's Personal Information Protection and Electronic Documents Act, and personally identifiable information policies in France, Canada, the United Kingdom, Germany, Israel, Japan, Saudi Arabia and the United States.
- Custom labels. This category allows for customization to let the organization define its own set of content types based on its criteria. For example, a company can detect its product numbers or other specific text patterns in documents and have them flagged as sensitive.

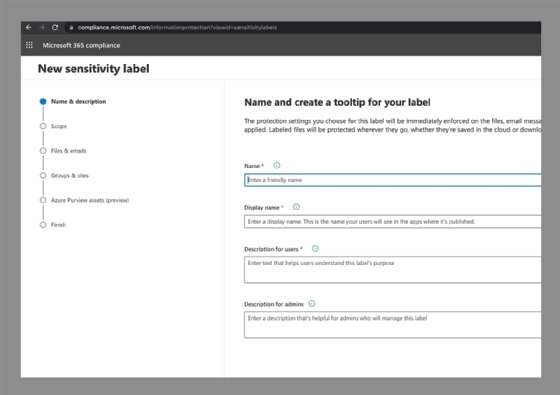
Define the name and other parameters for the sensitivity label.
After selecting the label, admins can configure the system to detect and label sensitive content. The next step is to define the policy that dictates the actions to take with data that meets the label definition.
Working to protect content in common containers
While sensitivity labels can help classify content based on specific criteria at the file level, Microsoft introduced custom labels to protect content at a container level, meaning a Microsoft Team, Office 365 Group or SharePoint site. This functionality creates a policy against the containers that may be marked as sensitive or have a sensitivity label applied to them with the following features:
- privacy settings (private or public) for Office 365 Group, Microsoft Team and channel based on the sensitivity label policy;
- restricting access to all external users from accessing the different containers based on policy;
- restricting content sharing with external users outside of the existing membership within the containers;
- restricting access to content from unmanaged devices that are either personal or noncompliant devices; or
- restricting content sharing link behavior that is sent or generated when a file is shared from one of the containers.
How to use PowerShell to work with Office 365 sensitivity labels
The compliance center cannot run all the available sensitivity label functionality. Admins must use PowerShell to adjust some configurations, such as the sharing controls for documents in SharePoint and OneDrive.
In the following example, an administrator wants to define a policy to restrict edits or permissions changes for content labeled corporate R&D when it is shared in SharePoint or OneDrive.
First, create the label either through the web portal or via PowerShell:
New-LabelPolicy -Name "Research and Development" -Labels "R and D","R and D Management"
Next, determine the globally unique identifier (GUID) of the label:
Get-Label | Format-Table -Property DisplayName, Name, Guid
In this example, the command outputs the following GUID:
8facd7b8-8d20-38a3-8e42-0f96321a848e
Next, use the GUID to change the permissions set on the files if and when they are shared via SharePoint or OneDrive through a link. The permissions options include DefaultShareLinkPermission. The available values are:
- View. Sets the default link permission for the site to view permissions.
- Edit. Sets the default link permission for the site to edit permissions.
In this example, the system will set shared files flagged as Corporate R&D to view only so the recipient cannot make edits to the file or link. The final command is:
Set-Label -Identity 8facd7b8-8d20-38a3-8e42-0f96321a848e -AdvancedSettings @{DefaultShareLinkPermission="View"}
Sensitivity labels give organizations an easy and effective way to use automation to protect content of more than just one workload within the Office 365 subscription. Not only does this help guard information that meets specific criteria, such as health-related or financial data, but it can also apply to the container level in Microsoft Teams, SharePoint sites and Office 365 Groups.
Dig Deeper on Microsoft messaging and collaboration
-
 Compare SharePoint 2019 vs. SharePoint Online
  By: Laurence Hart
 -
 9 SharePoint best practices
  By: Reda Chouffani
 -
 How to avoid Microsoft 365 management pitfalls
  By: Liam Cleary
 -
 6 SharePoint Syntex use cases
  By: Christine Campbell
Part of: Helpful management tips for new Office 365/Microsoft 365 admins
Article 2 of 4