How to install a motherboard (original) (raw)
(Image credit: Tom's Hardware)
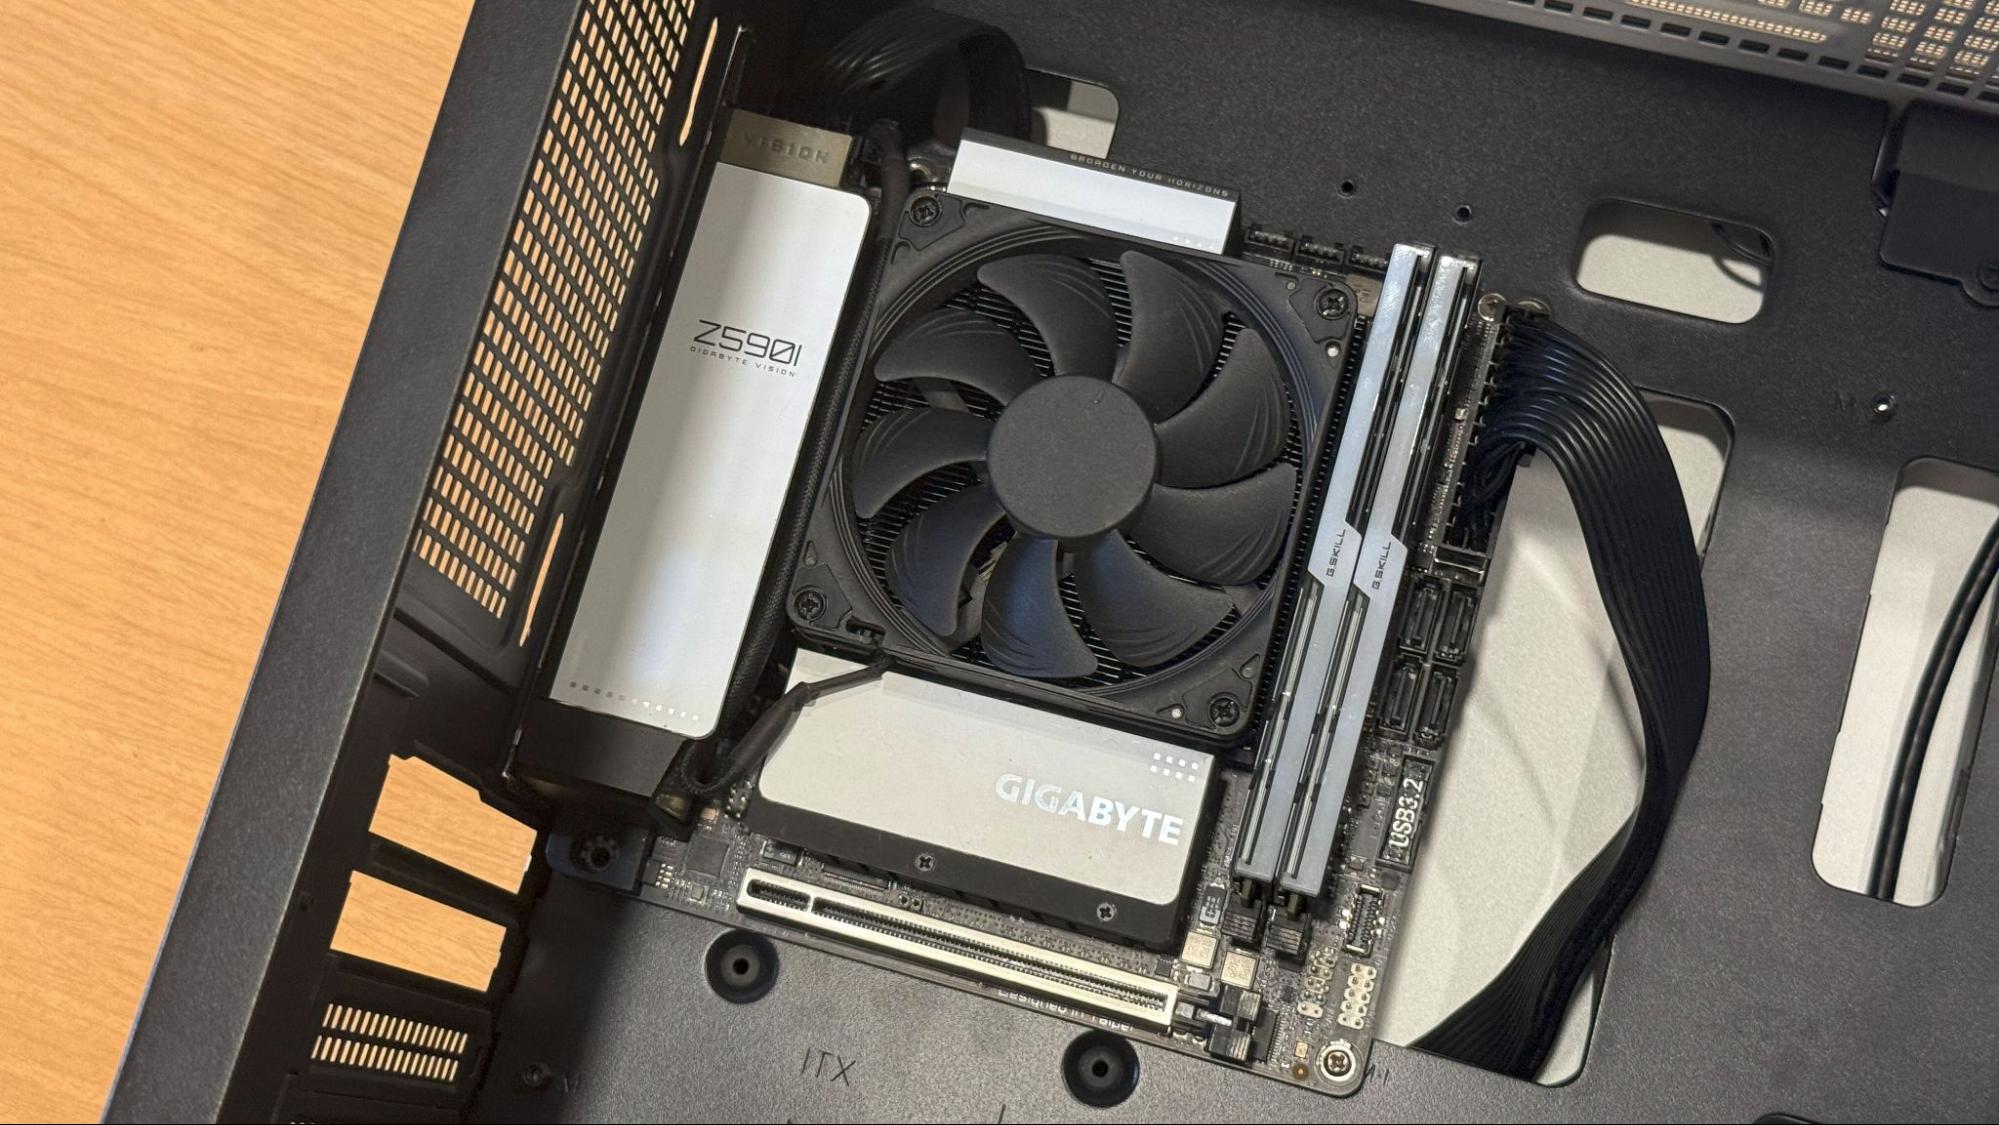
Installing a motherboard is one of the most critical steps in building a computer. The motherboard is the backbone of your system, connecting to and powering all the other components. Some of the best motherboards may offer advanced features, but a well-installed motherboard should lead to stability, proper functionality, and efficient cooling. This guide takes you through the entire process, from preparation to testing, ensuring your motherboard is securely mounted and operational.
Preparation: Setting the stage
Before diving into the installation, it's important to prepare your workspace and gather the tools you'll need. Choose a clean, flat surface, free from dust and clutter. An anti-static wrist strap or mat is recommended to prevent static electricity from damaging sensitive components – especially if you live in a dry climate. Ensure you have the following items ready:
- Motherboard
- PC case
- A Phillips-head screwdriver
- Screws and standoffs (typically provided with the case)
- Motherboard manual
- Case manual
(Image credit: Tom's Hardware)
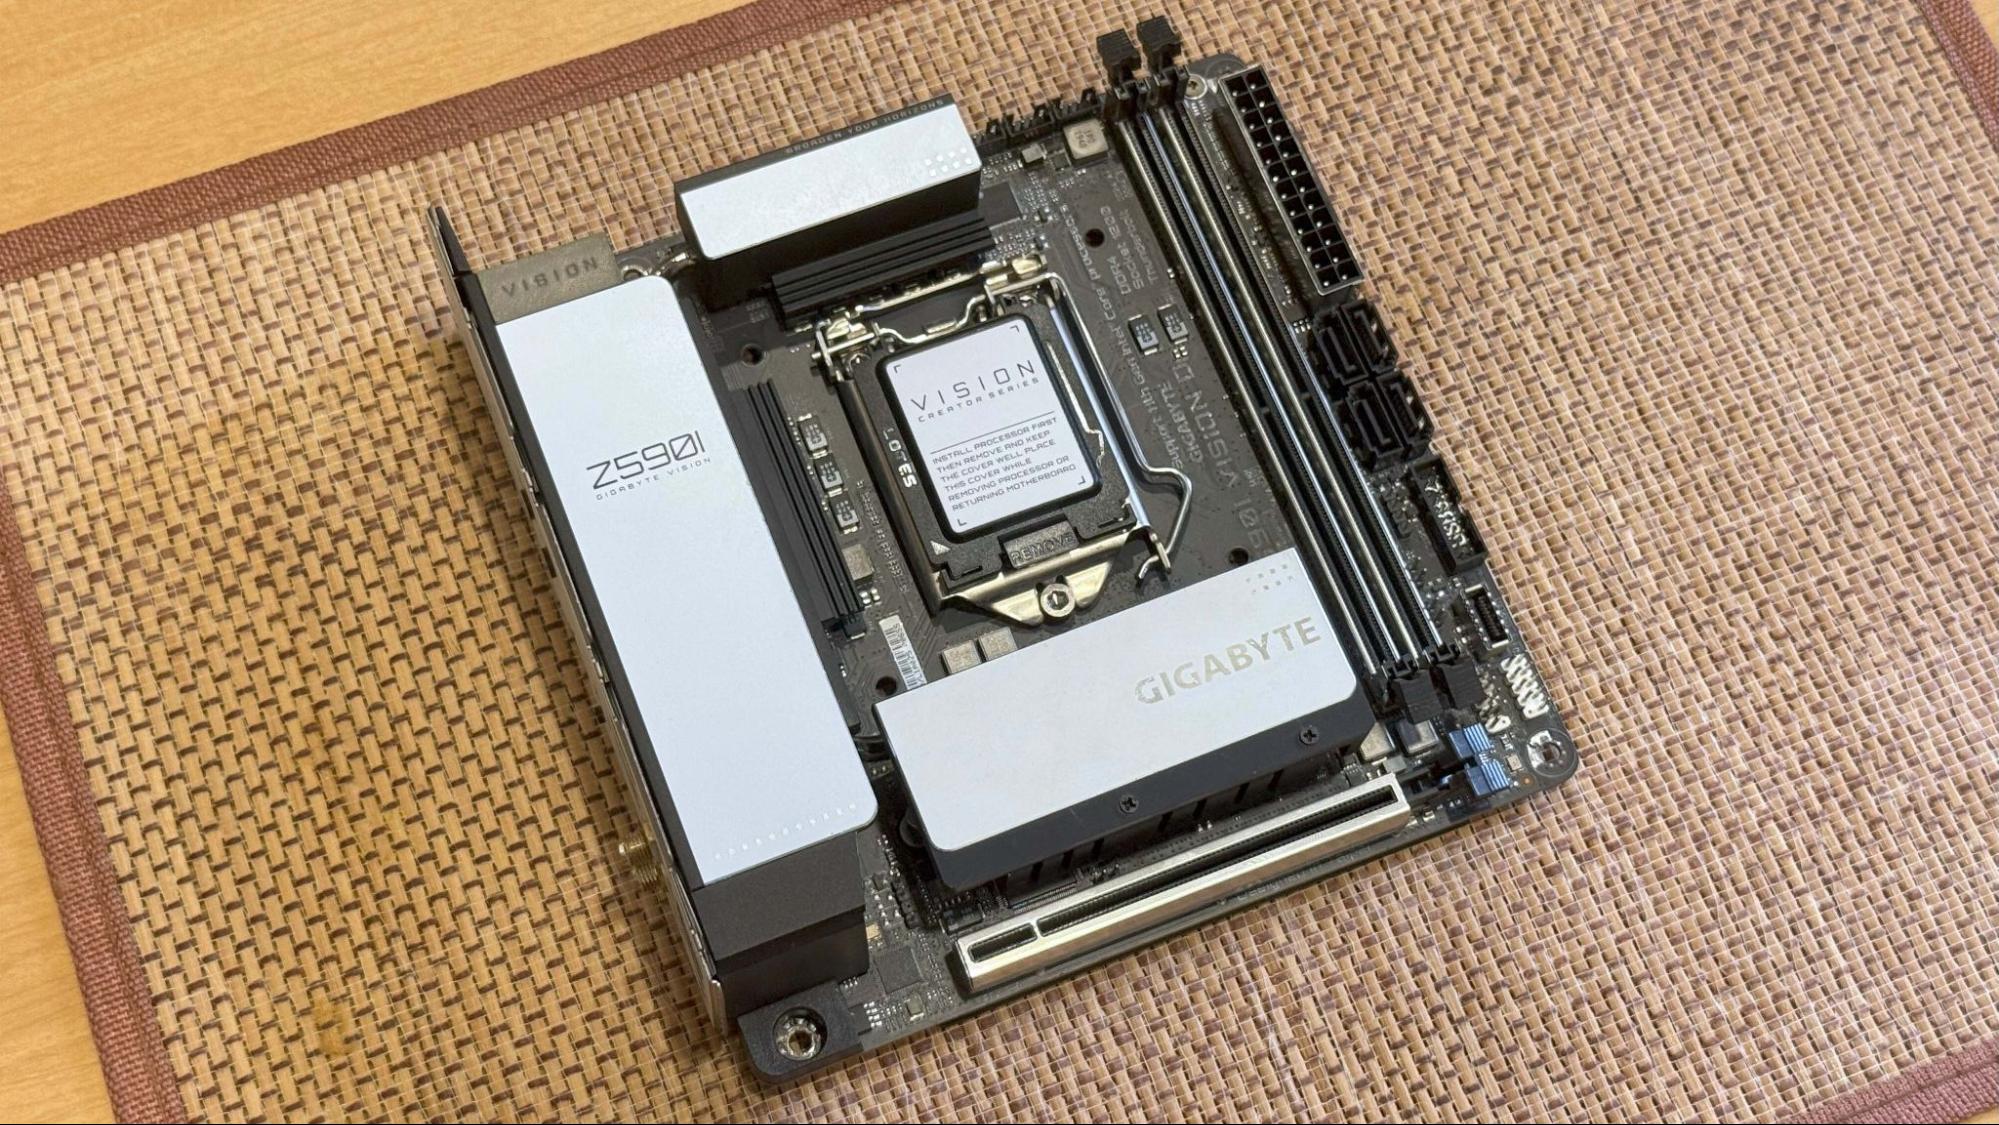
For most builds, it’s a good idea to prepare your motherboard by installing key components like the CPU, CPU cooler (if it’s an air cooler), RAM and M.2 storage (if applicable). Carefully take out the motherboard from the packaging and place it on a mat. You can use your desk or work bench too. Just make sure that you don’t damage any pins or solders at the bottom. You can also place the motherboard on top of the box it came in for this step, which will offer support with some give.
(Image credit: Tom's Hardware)
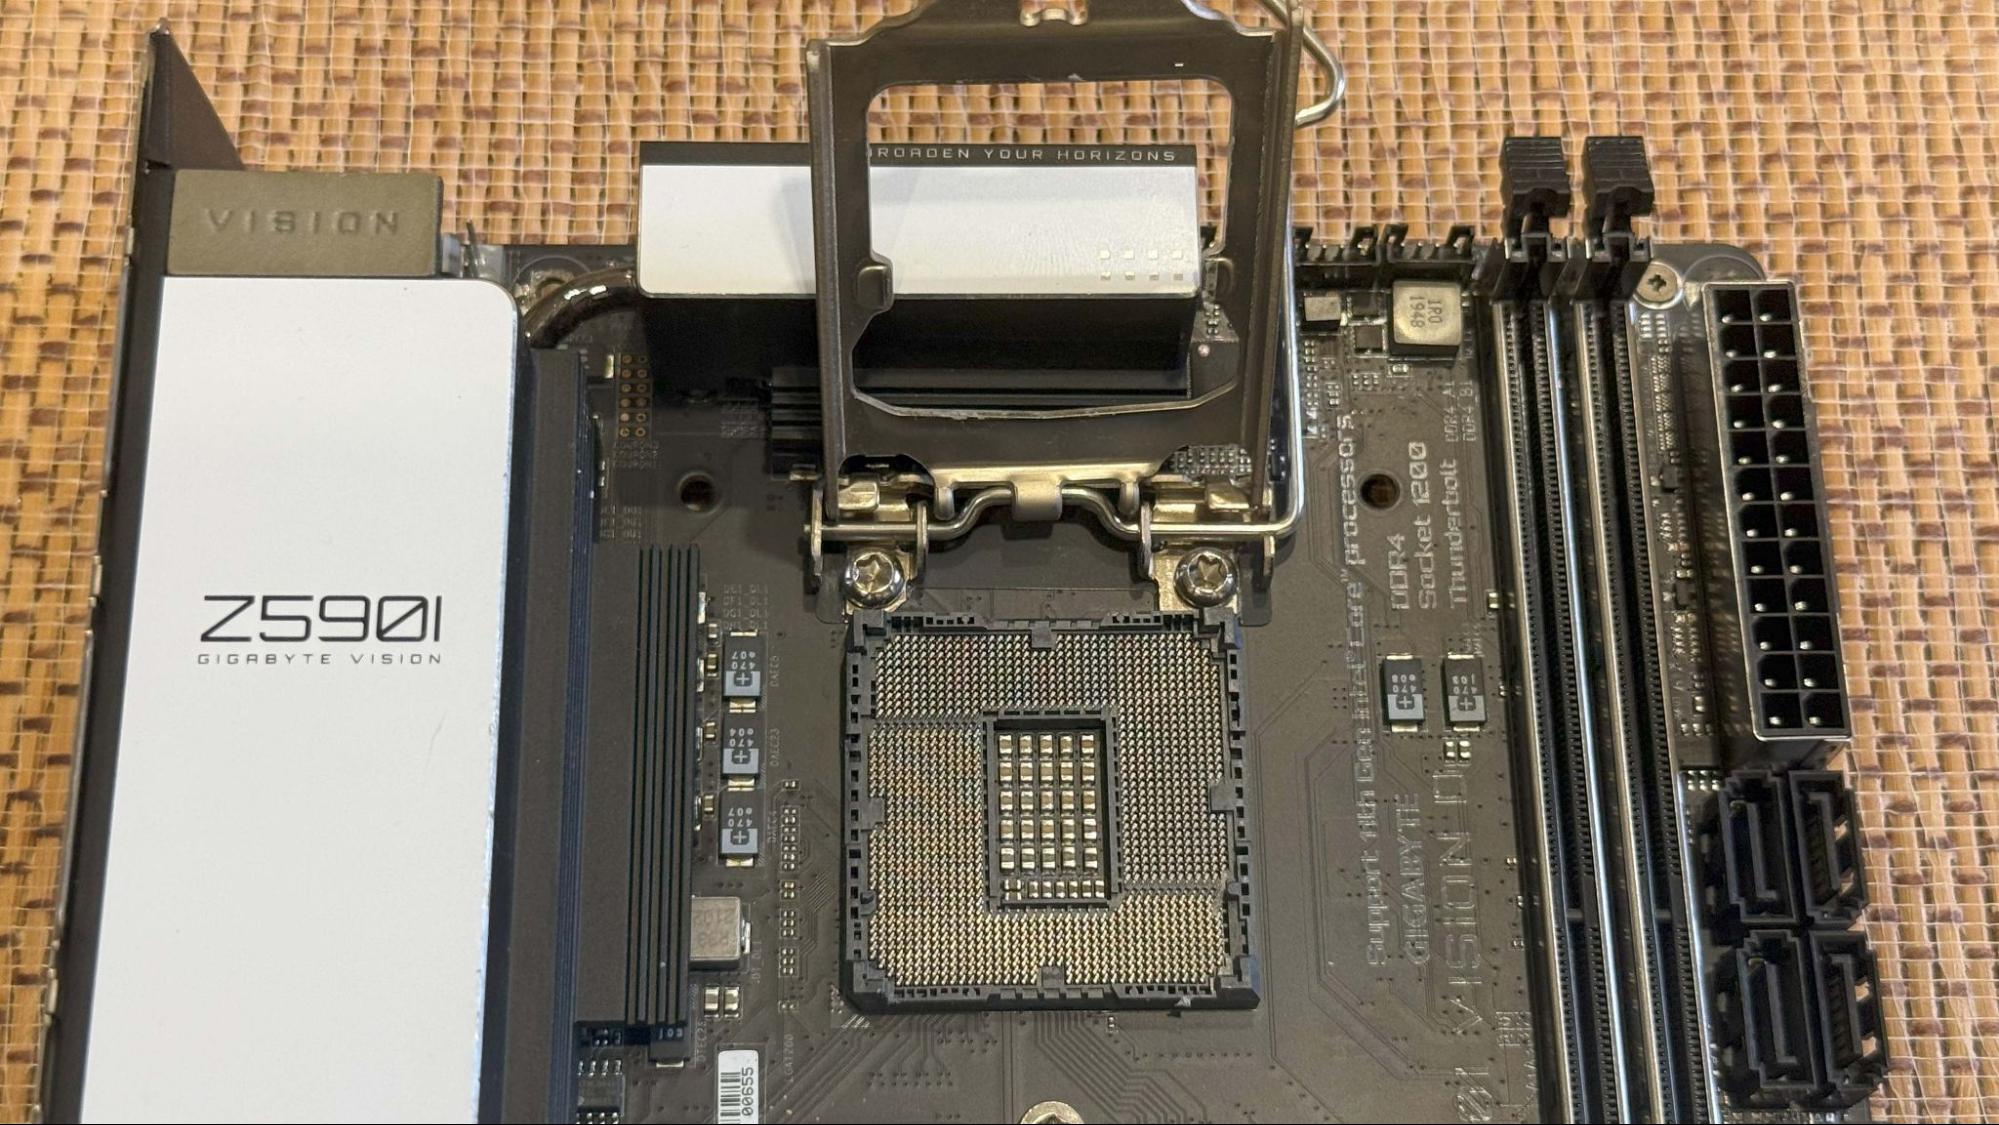
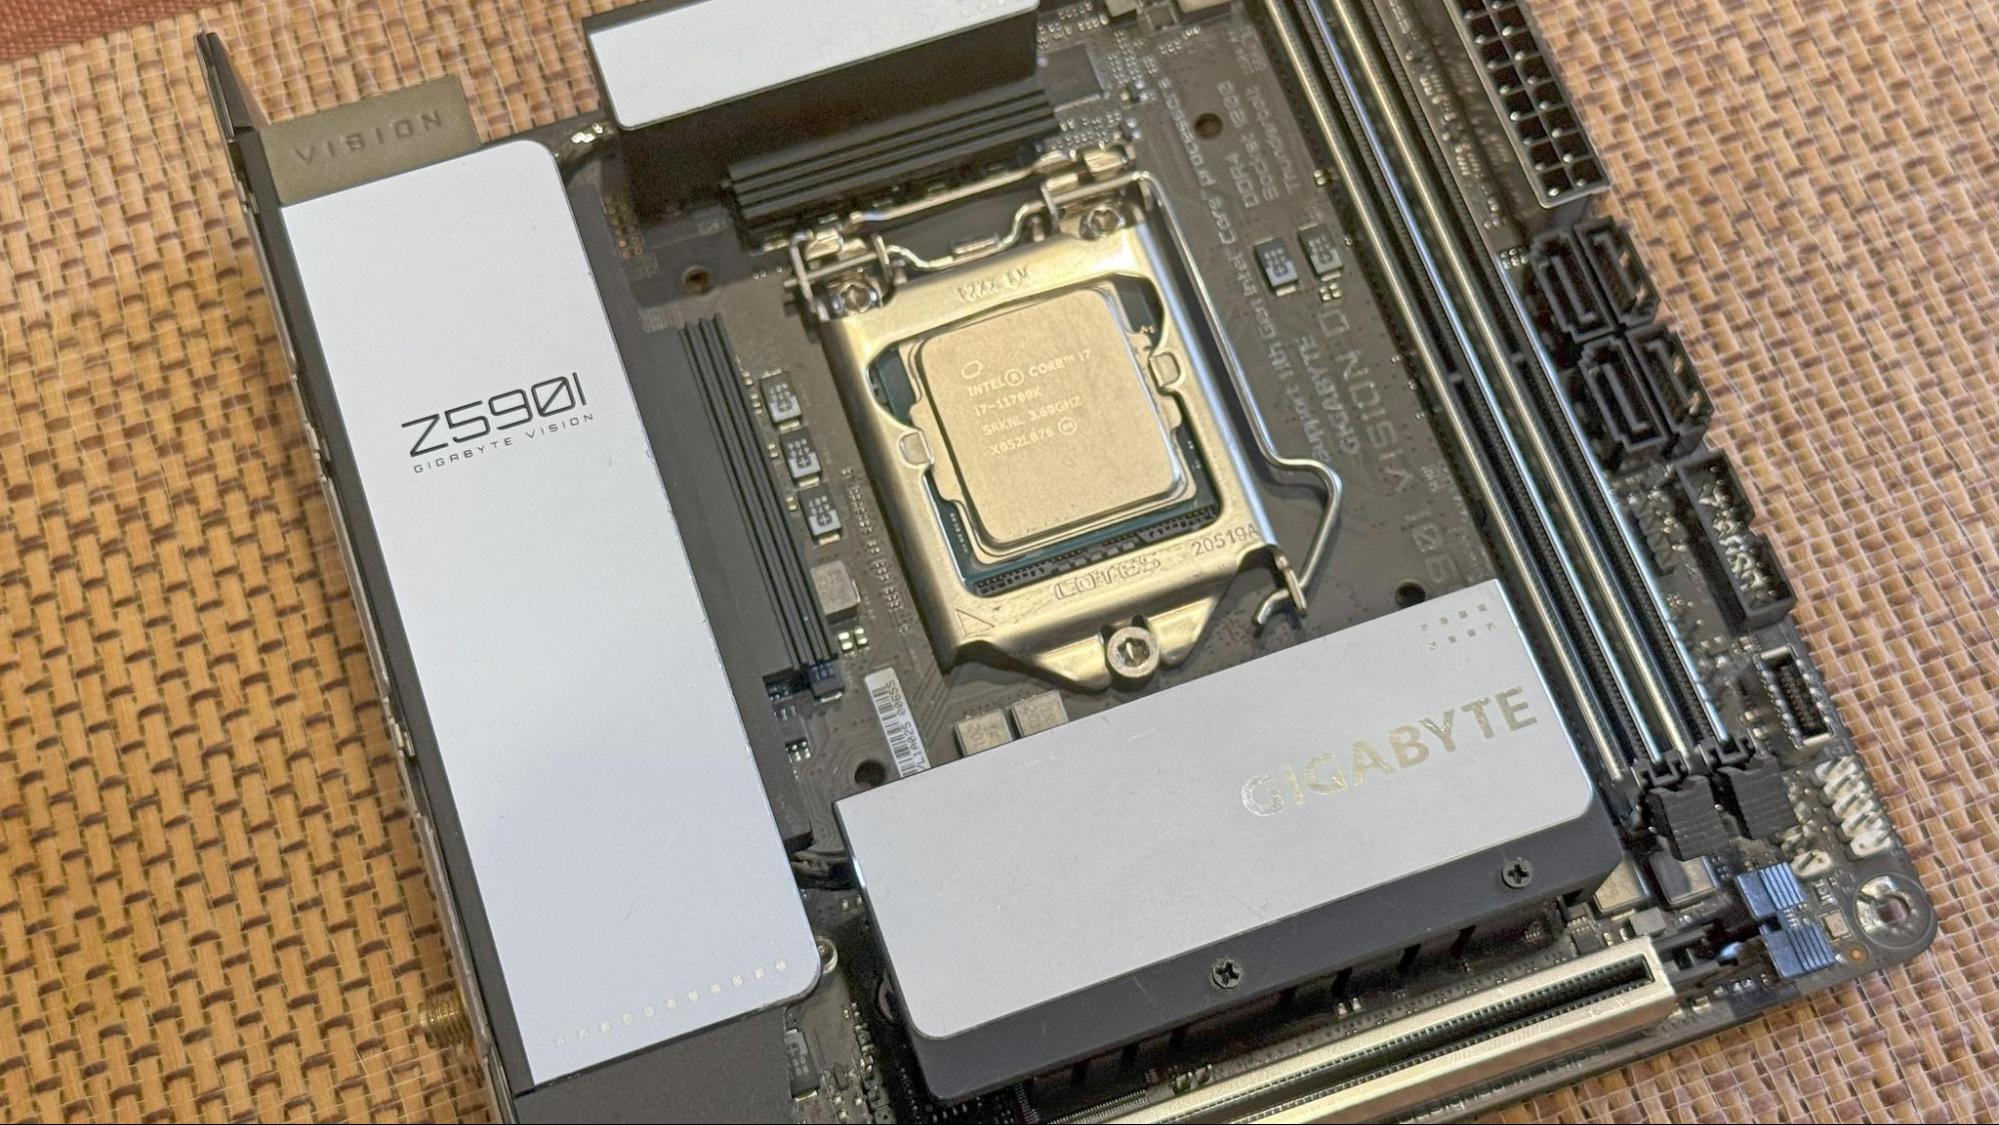
Start by locating the CPU socket on the motherboard and lifting the retention arm to open it. Carefully align the CPU with the socket, matching the triangle marker on the CPU corner with the one on the socket. Gently place the CPU into the socket without applying force, ensuring the pins or contact pads remain undamaged. Once in place, lower the retention arm to secure the CPU firmly. For more detail on this step, see our How to Install a CPU guide.
(Image credit: Tom's Hardware)
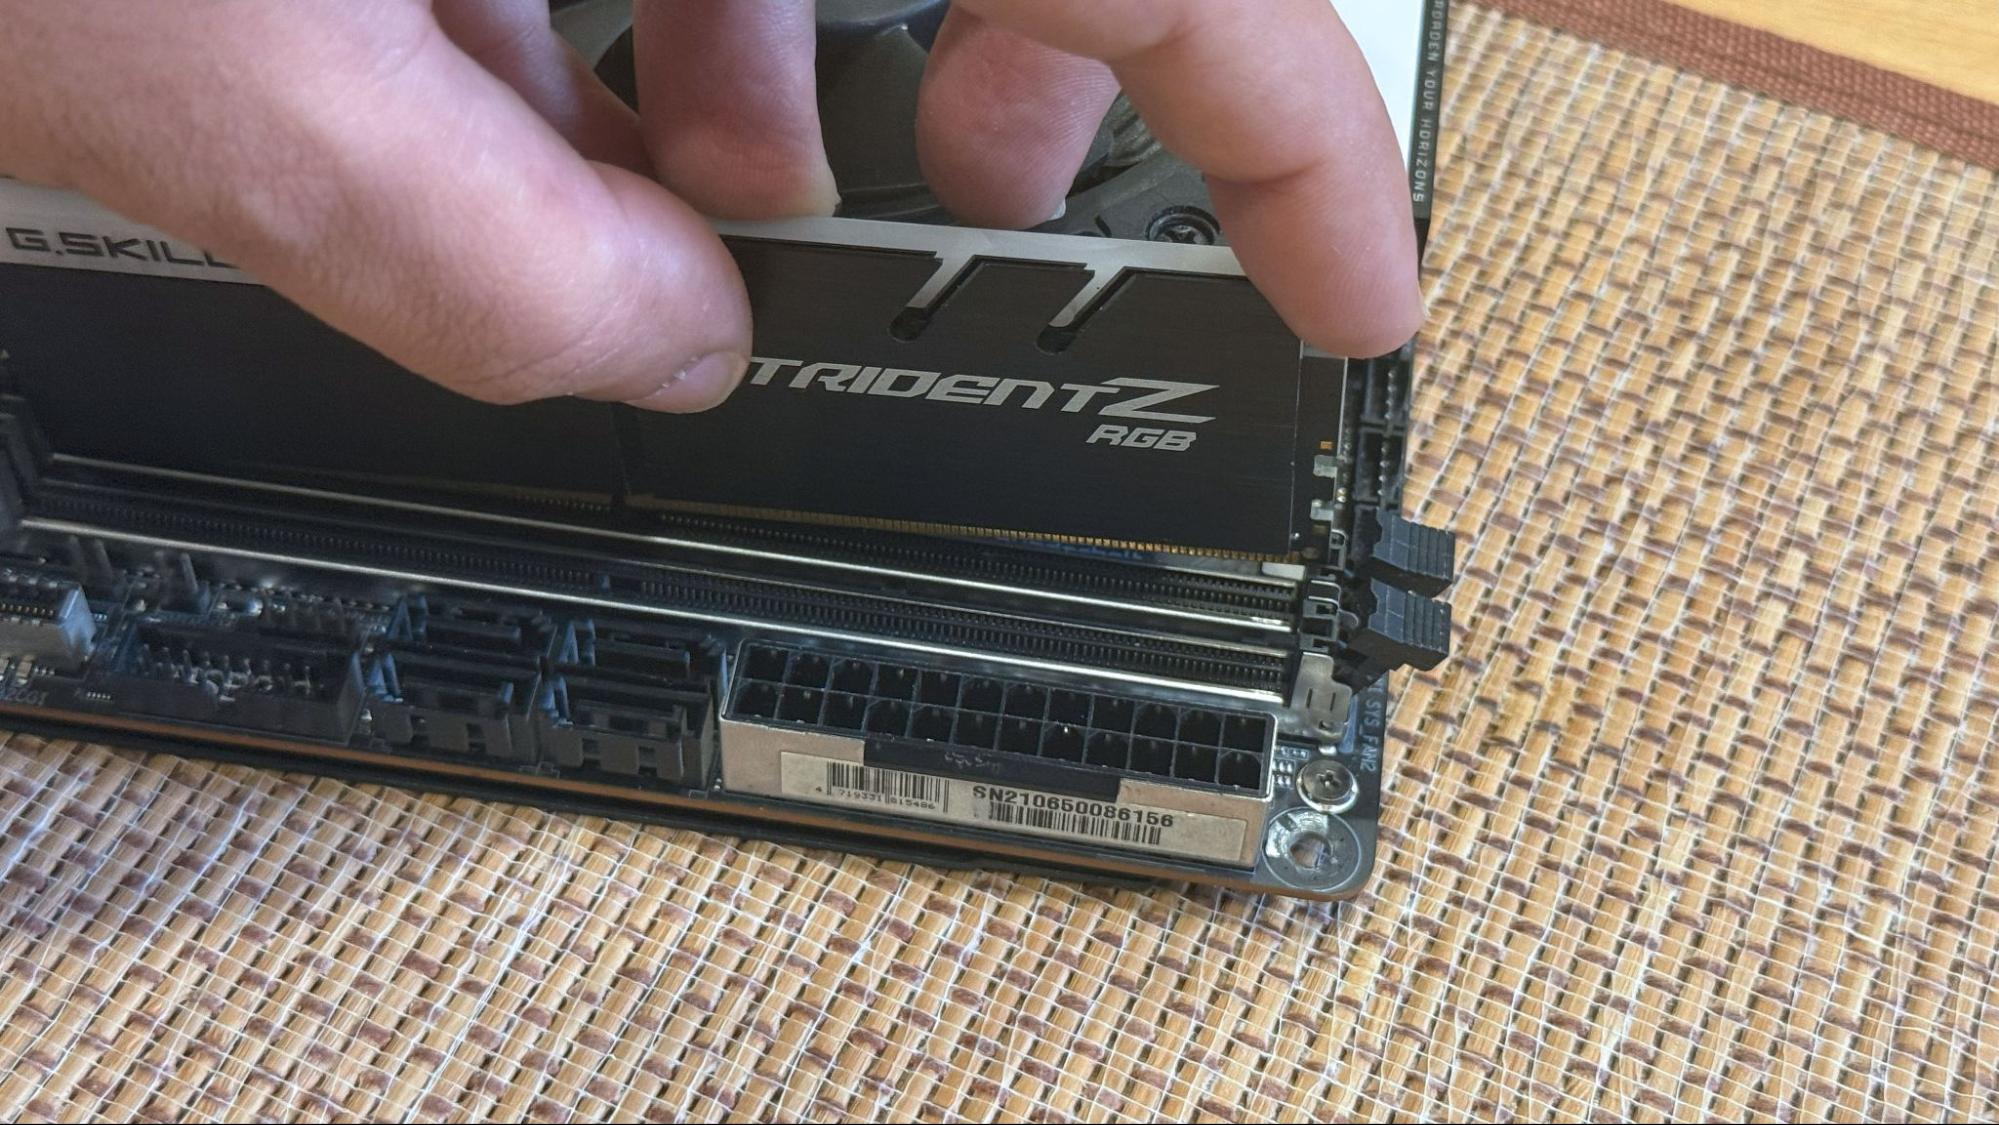
Next, install the RAM by identifying the appropriate DIMM slots for dual-channel configuration (refer to your motherboard manual). Open the retention clips on the slots, align the notch on the RAM module with the notch in the slot, and push the module firmly into place until the clips click back to secure it. Make sure you don’t apply too much pressure as it can crack the motherboard. You can read our RAM installation guide for more information on this step.
(Image credit: Tom's Hardware)
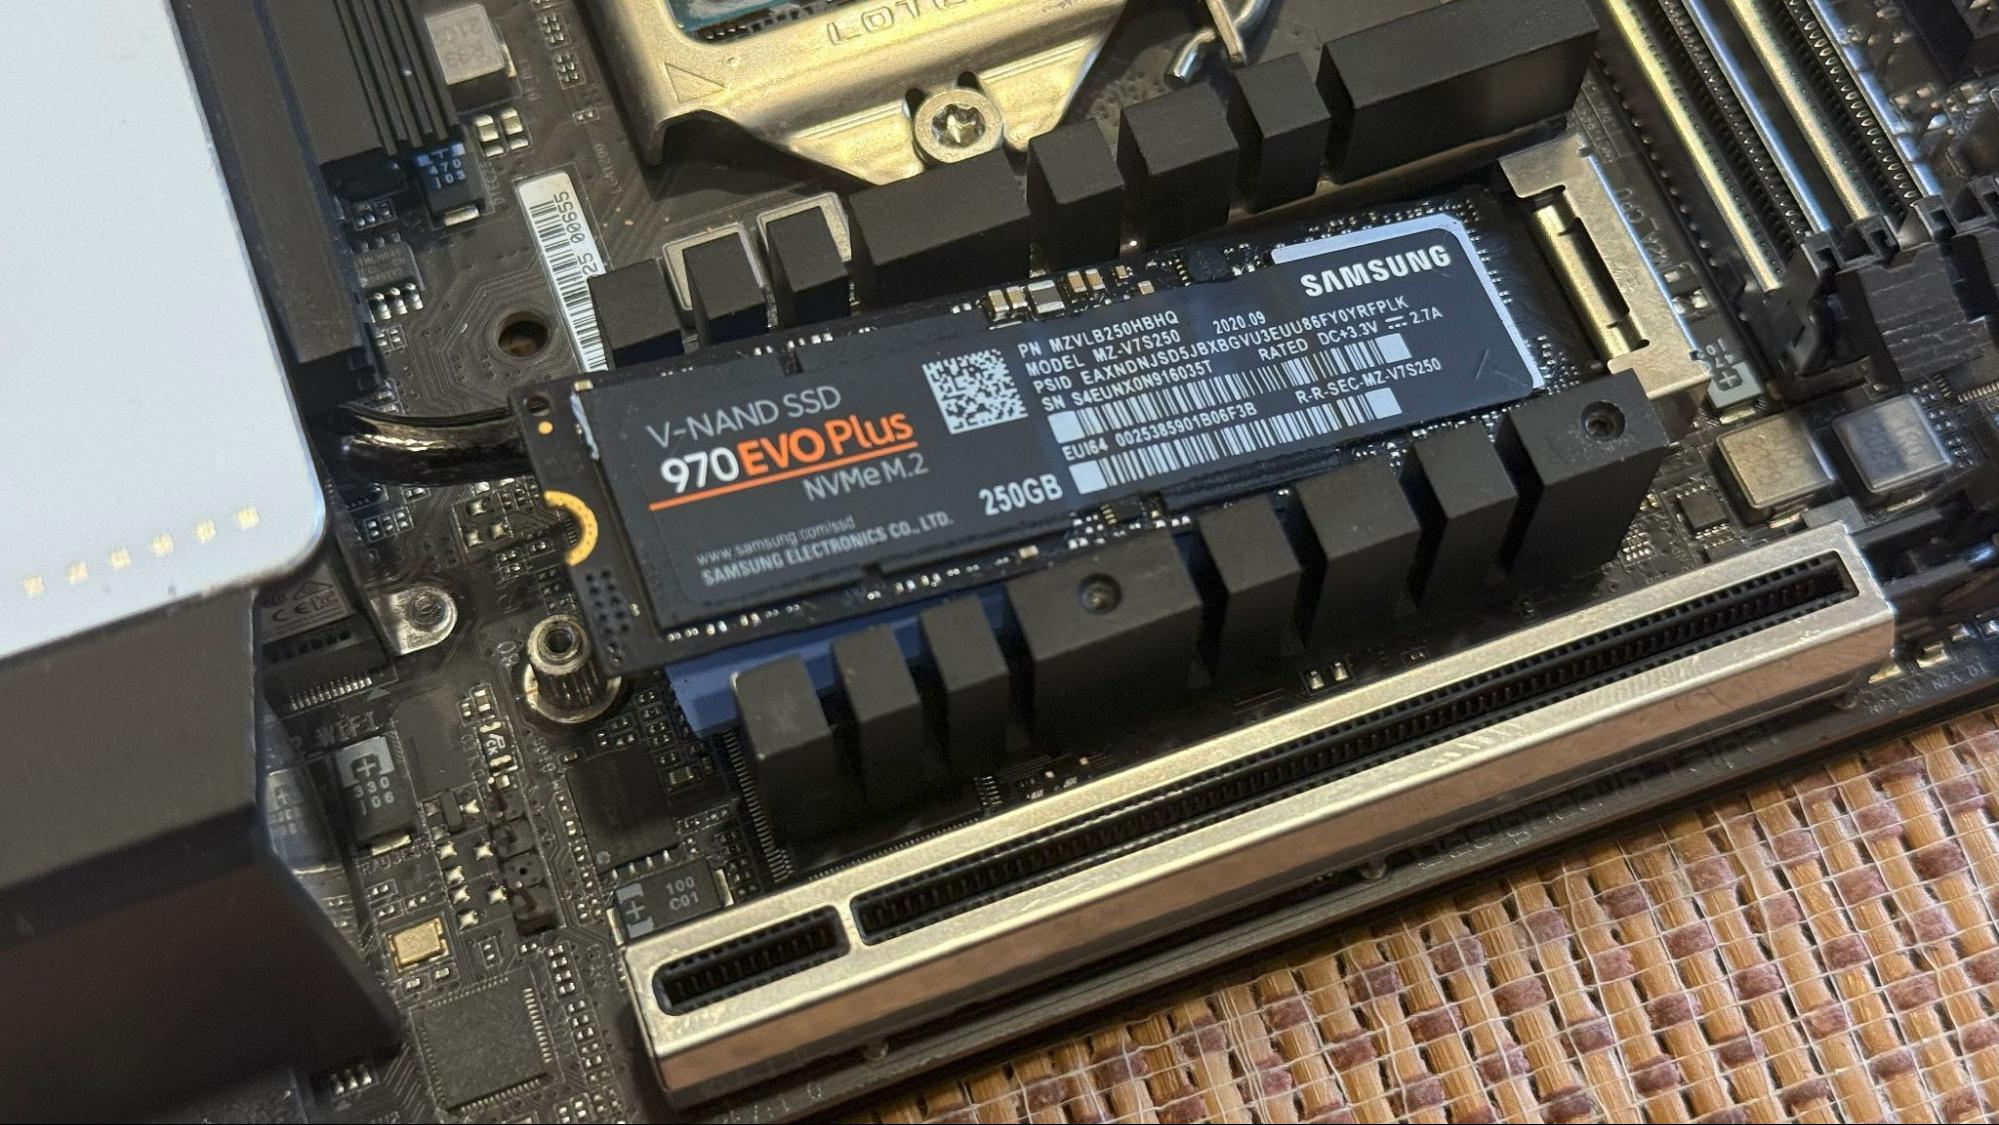
If you are using an M.2 SSD, locate the appropriate slot on the motherboard. The primary slot (with the most bandwidth) should be be above or below the PCIe x16 slot where you install the GPU. Remove the heatsink and screw for the slot (if both are present), and align the SSD connector with the slot, inserting it at a slight angle. Gently press the SSD down and secure it with the screw. Some motherboards may come with a heatsink cover installed for the M.2 slot, so make sure you remove that and take out any plastic film covering the thermal pads before installing back atop your SSD.
(Image credit: Tom's Hardware)
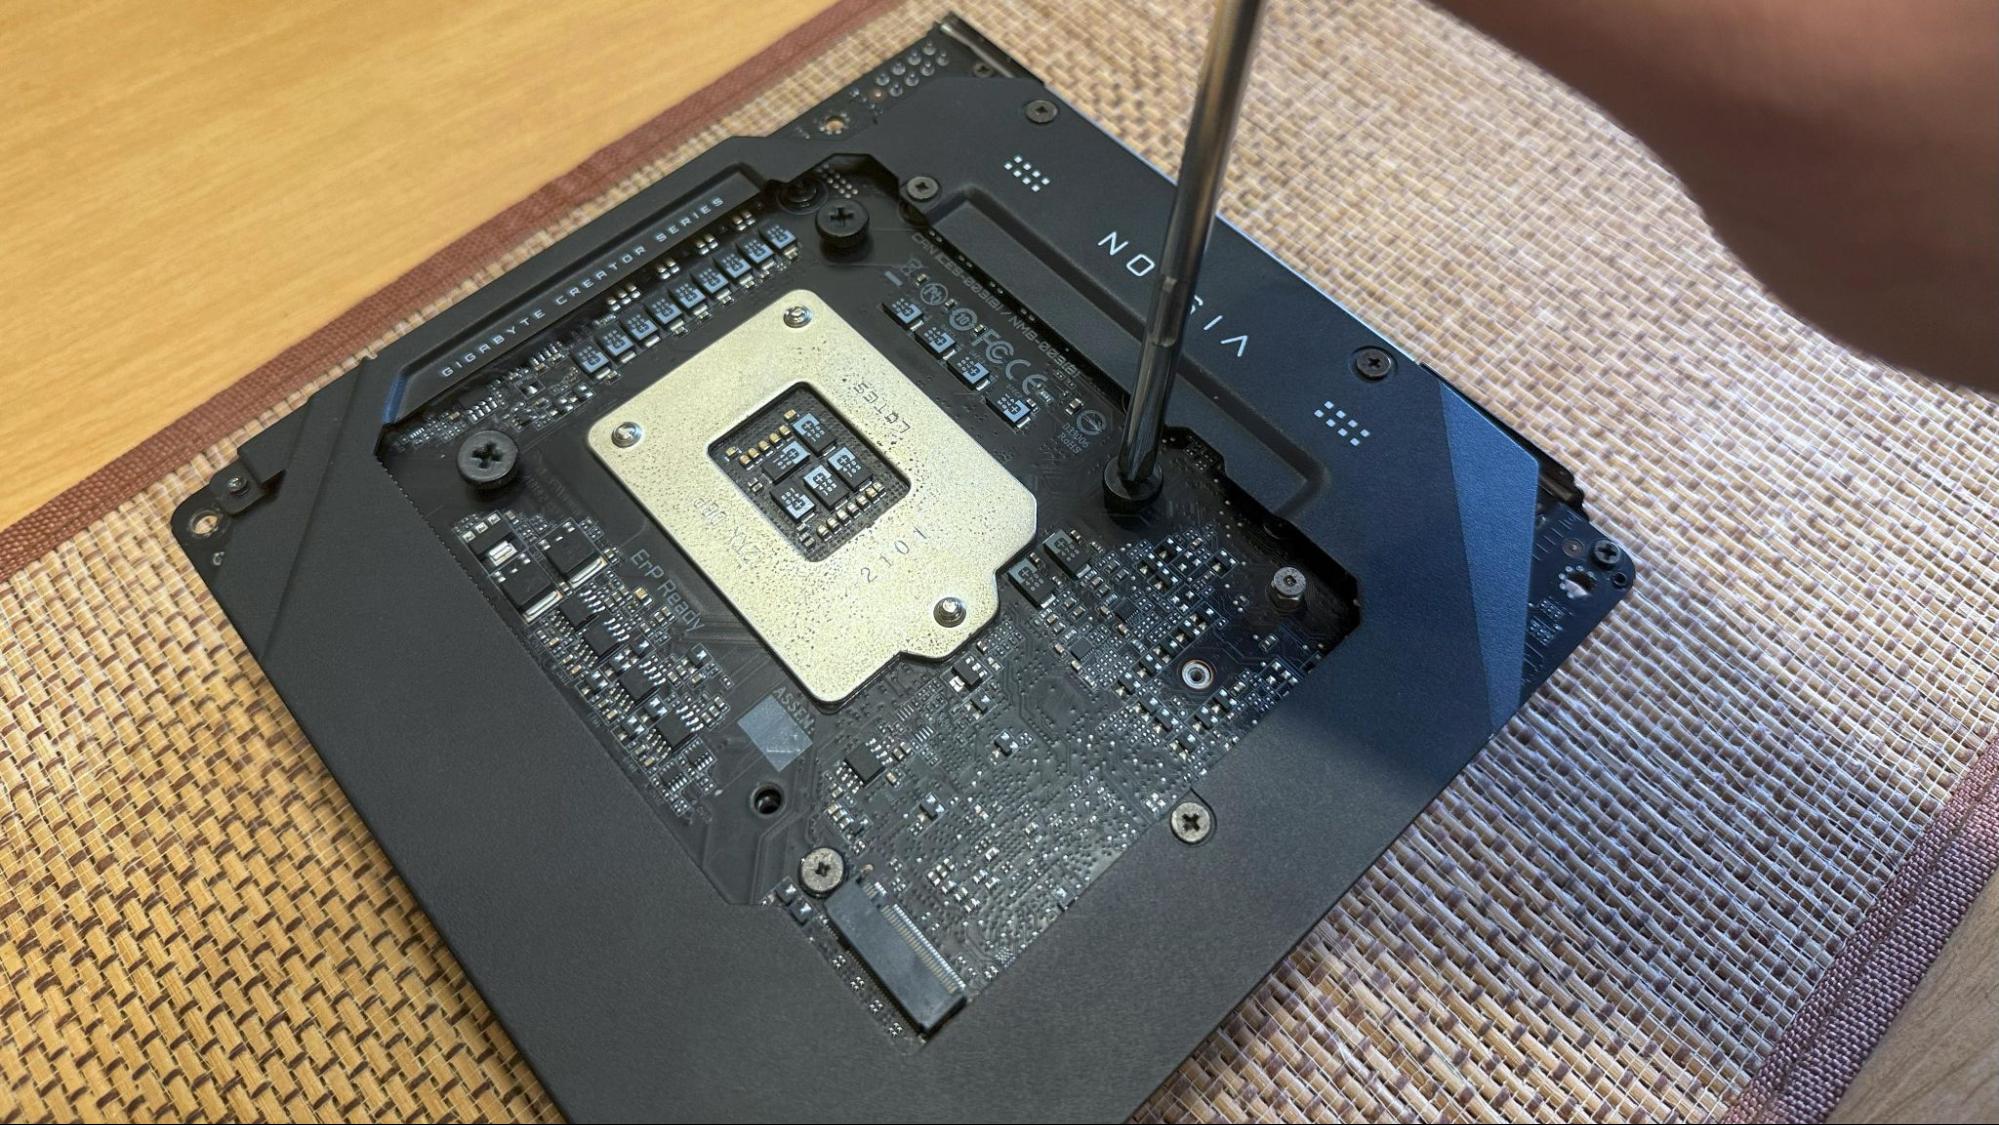
To attach the CPU cooler, apply a small amount of thermal paste to the top of the CPU unless the cooler comes with pre-applied paste. See our guide on how to apply thermal paste for more info. Position the cooler over the CPU socket, secure it using the mounting brackets or screws provided, and connect its fan cable to the CPU fan header on the motherboard. If you are planning to use a liquid cooling solution (hopefully one of the best AIO coolers), you can install the cold plate and mount the radiator and fans inside the case later in the build process.
Get Tom's Hardware's best news and in-depth reviews, straight to your inbox.
(Image credit: Tom's Hardware)
Next, unpack your case and remove the side panels. Your case may have screws at the back that hold the panels in place. Slide them off carefully and store them in a safe spot. Inside the case, you’ll find the designated area for the motherboard, typically a large, flat surface with pre-drilled holes and pre-installed standoffs. Examine the interior to familiarize yourself with the layout. Many cases will have guides stamped into the motherboard area for different motherboard form factors.
Install the IO shield
The IO shield is a small metal plate included with your motherboard. It fits into the rectangular cutout at the back of the PC case and provides access to the motherboard’s ports. Installing the IO shield is a simple but crucial step, as it protects the motherboard ports and ensures proper alignment. Note that if you’re installing a mid-range or higher modern motherboard, the IO shield may come pre-installed.
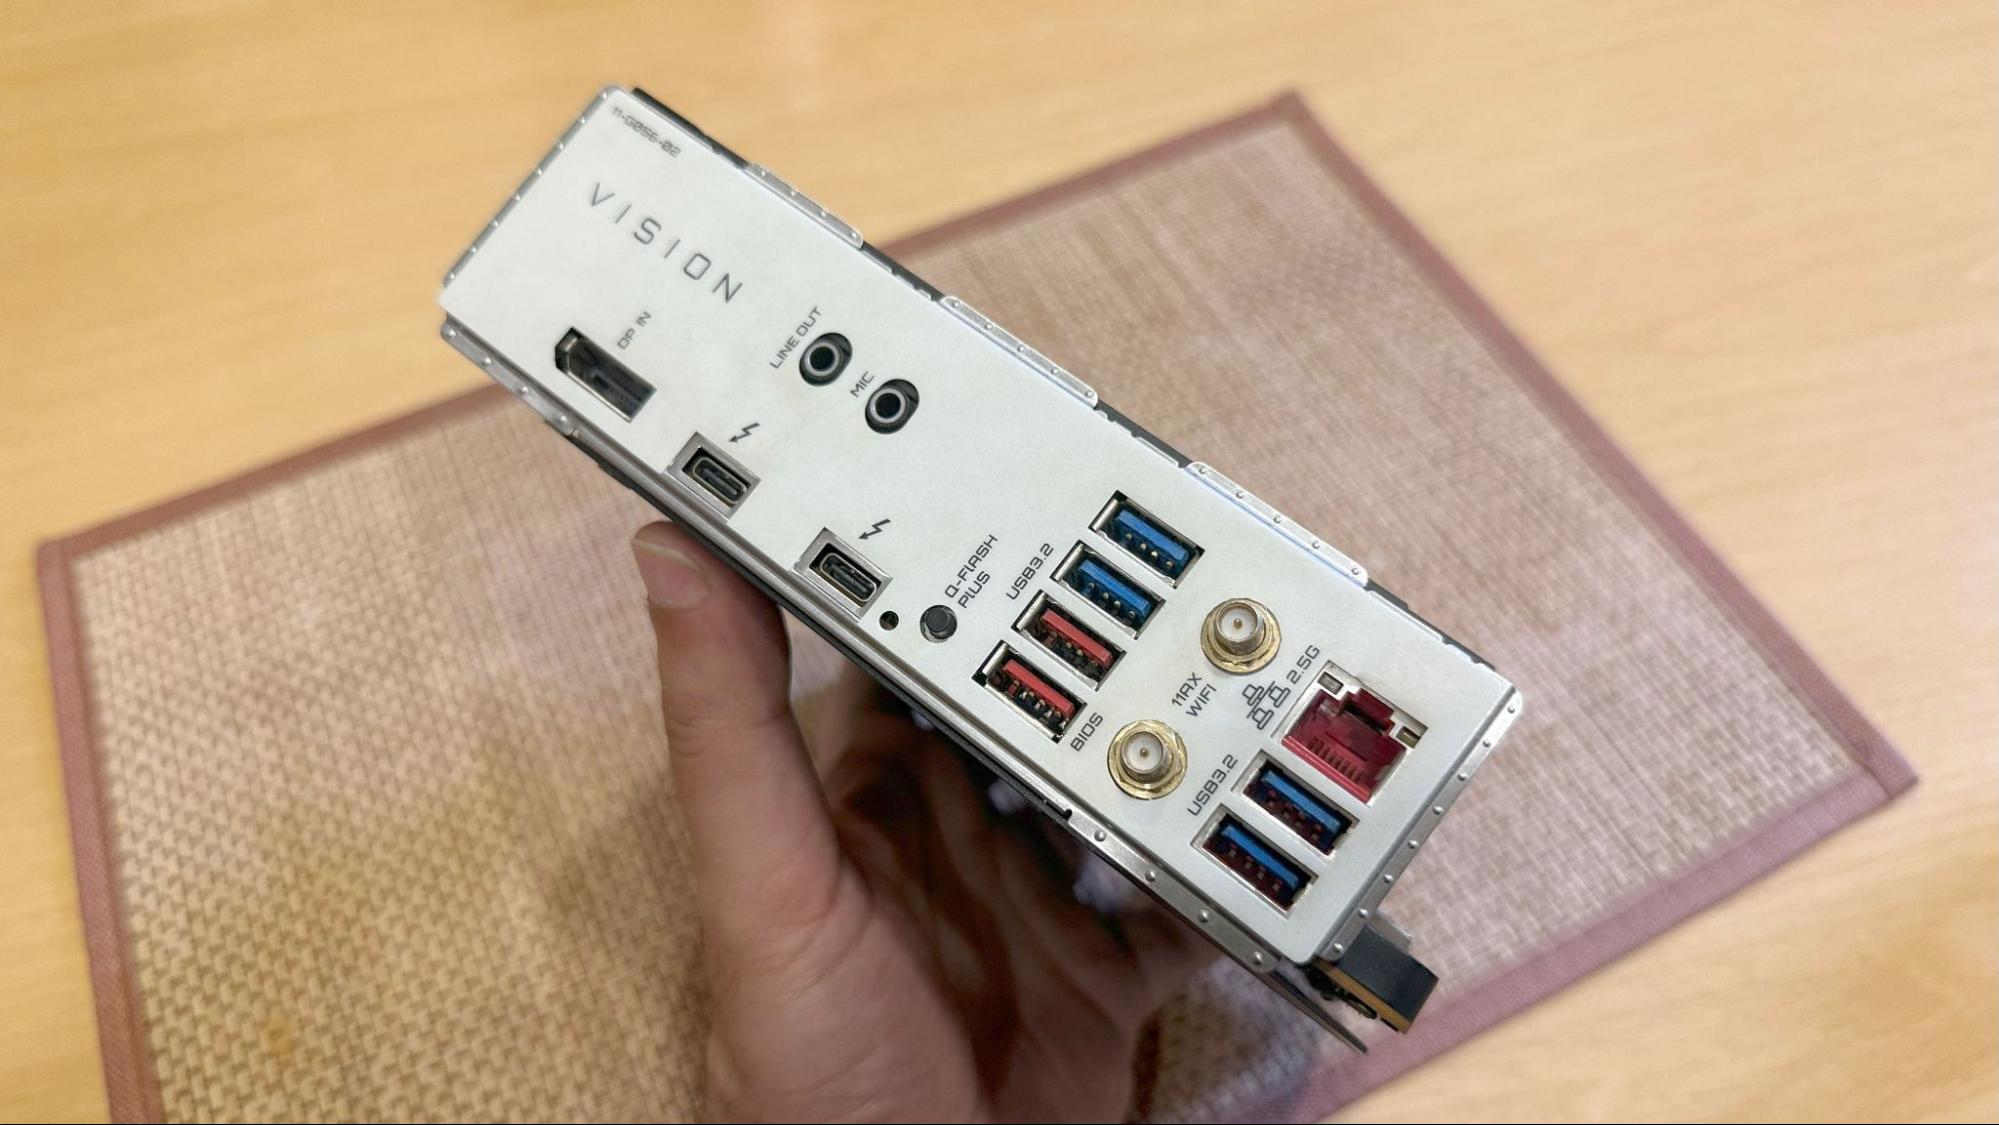
The motherboard used here comes with a built-in IO shield. (Image credit: Tom's Hardware)
To install the IO shield, hold it with the shiny or non-padded side facing outward. Align it in the case's rear rectangular cutout area, as well as with the ports on the motherboard, and press it into place until it clicks. Be gentle yet firm, as the shield can be sharp around the edges.
Double-check that all the port cutouts line up with the corresponding ports on the motherboard. If not, you’ll have to gently pop it out and rotate it 180 degrees.
Prepare the standoffs
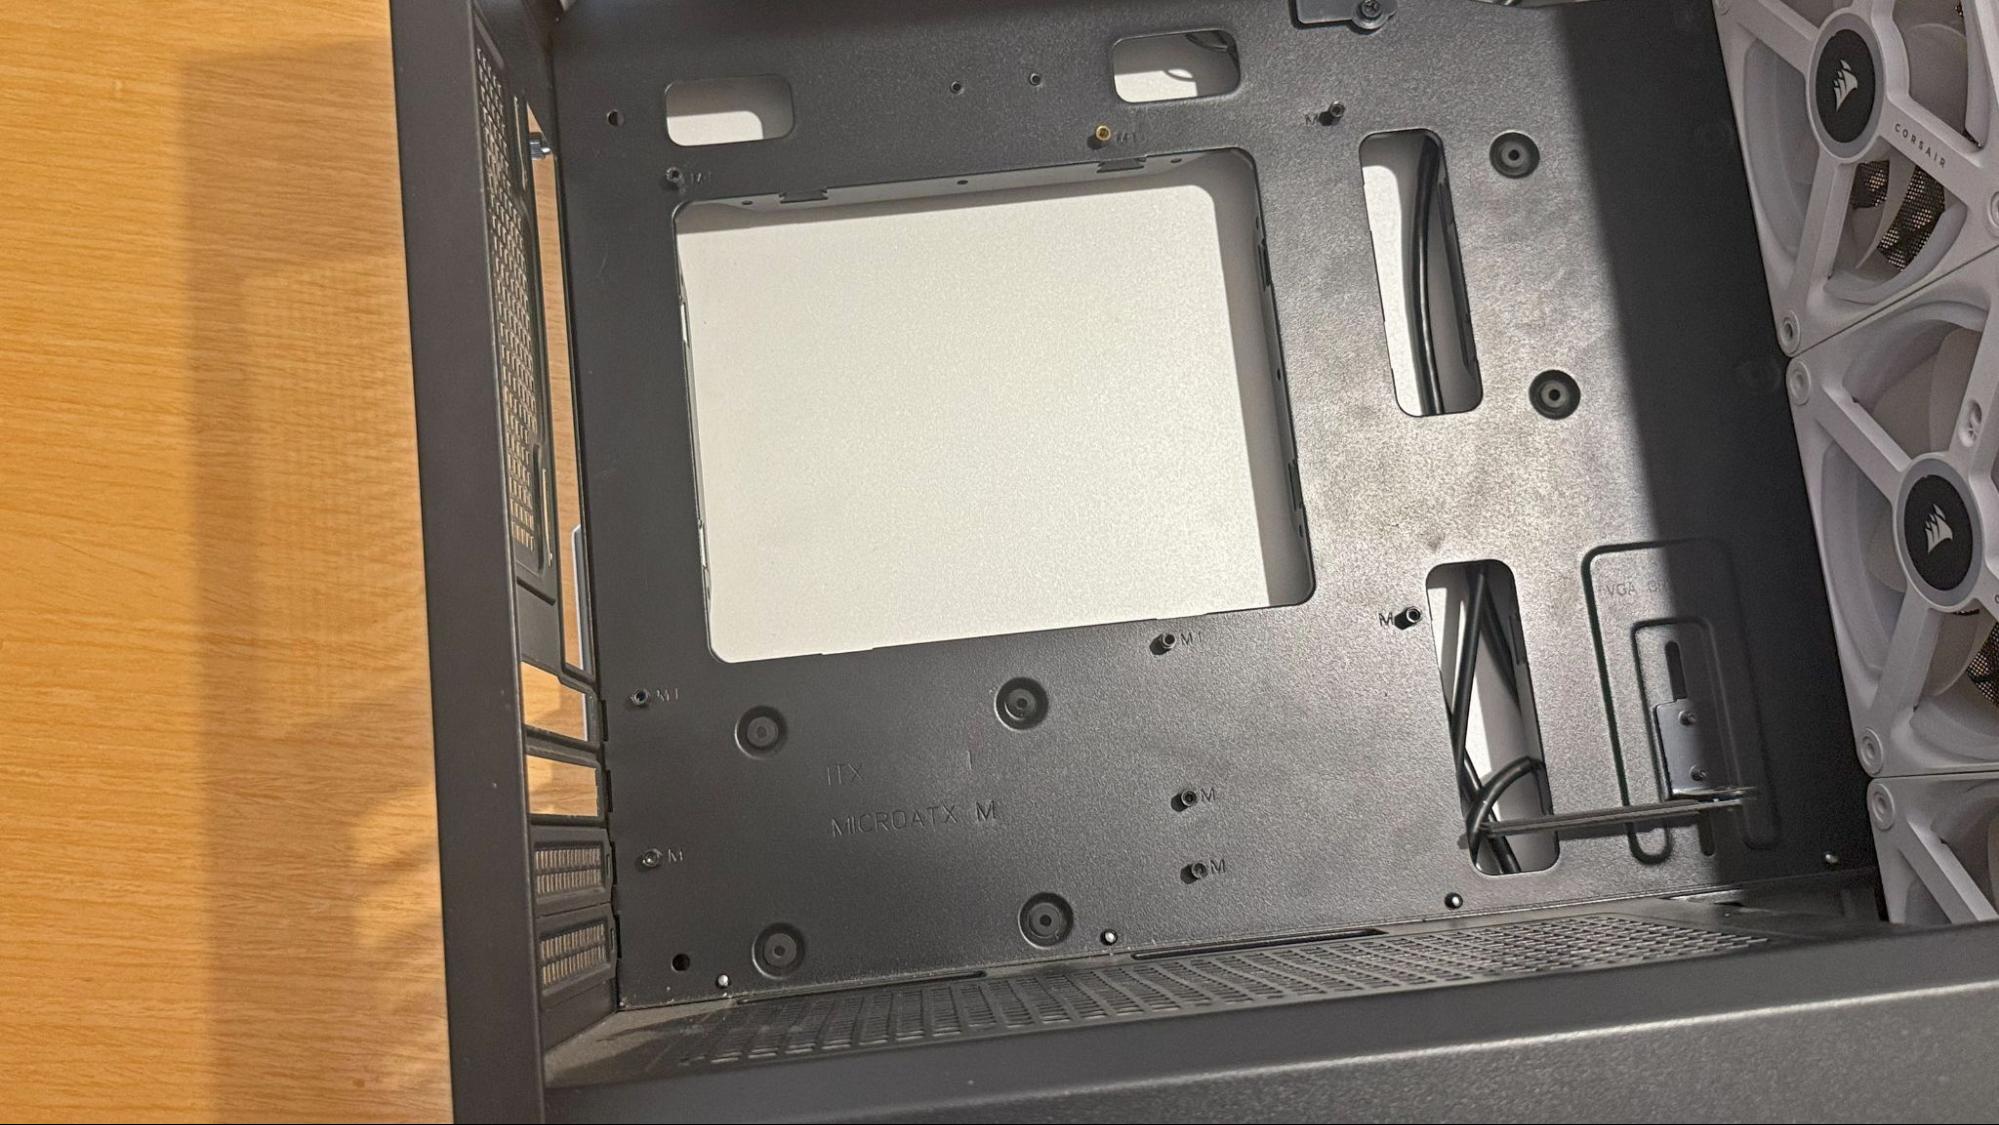
Standoffs are small, threaded spacers that elevate the motherboard off the case's metal surface, preventing short circuits. Most cases include standoffs pre-installed for standard motherboard sizes such as ATX, Micro-ATX, or Mini-ITX. Refer to your motherboard manual to locate the mounting holes and match them to the standoffs in the case.
(Image credit: Tom's Hardware)
If the standoffs are not pre-installed or if they don’t match the layout of your motherboard, you’ll need to install them yourself. Place a standoff in each hole corresponding to a screw hole on the motherboard. Use a standoff tool (often included with your case) or a nut driver to secure them. If you’re in a pinch, you can use pliers here, but be careful as it’s easy to mis-thread standoffs, which will cause installation problems and be a major pain to remove. Ensure there are no extra standoffs installed under the board area, as these can contact the bottom of the motherboard and cause short circuits.
Position the motherboard
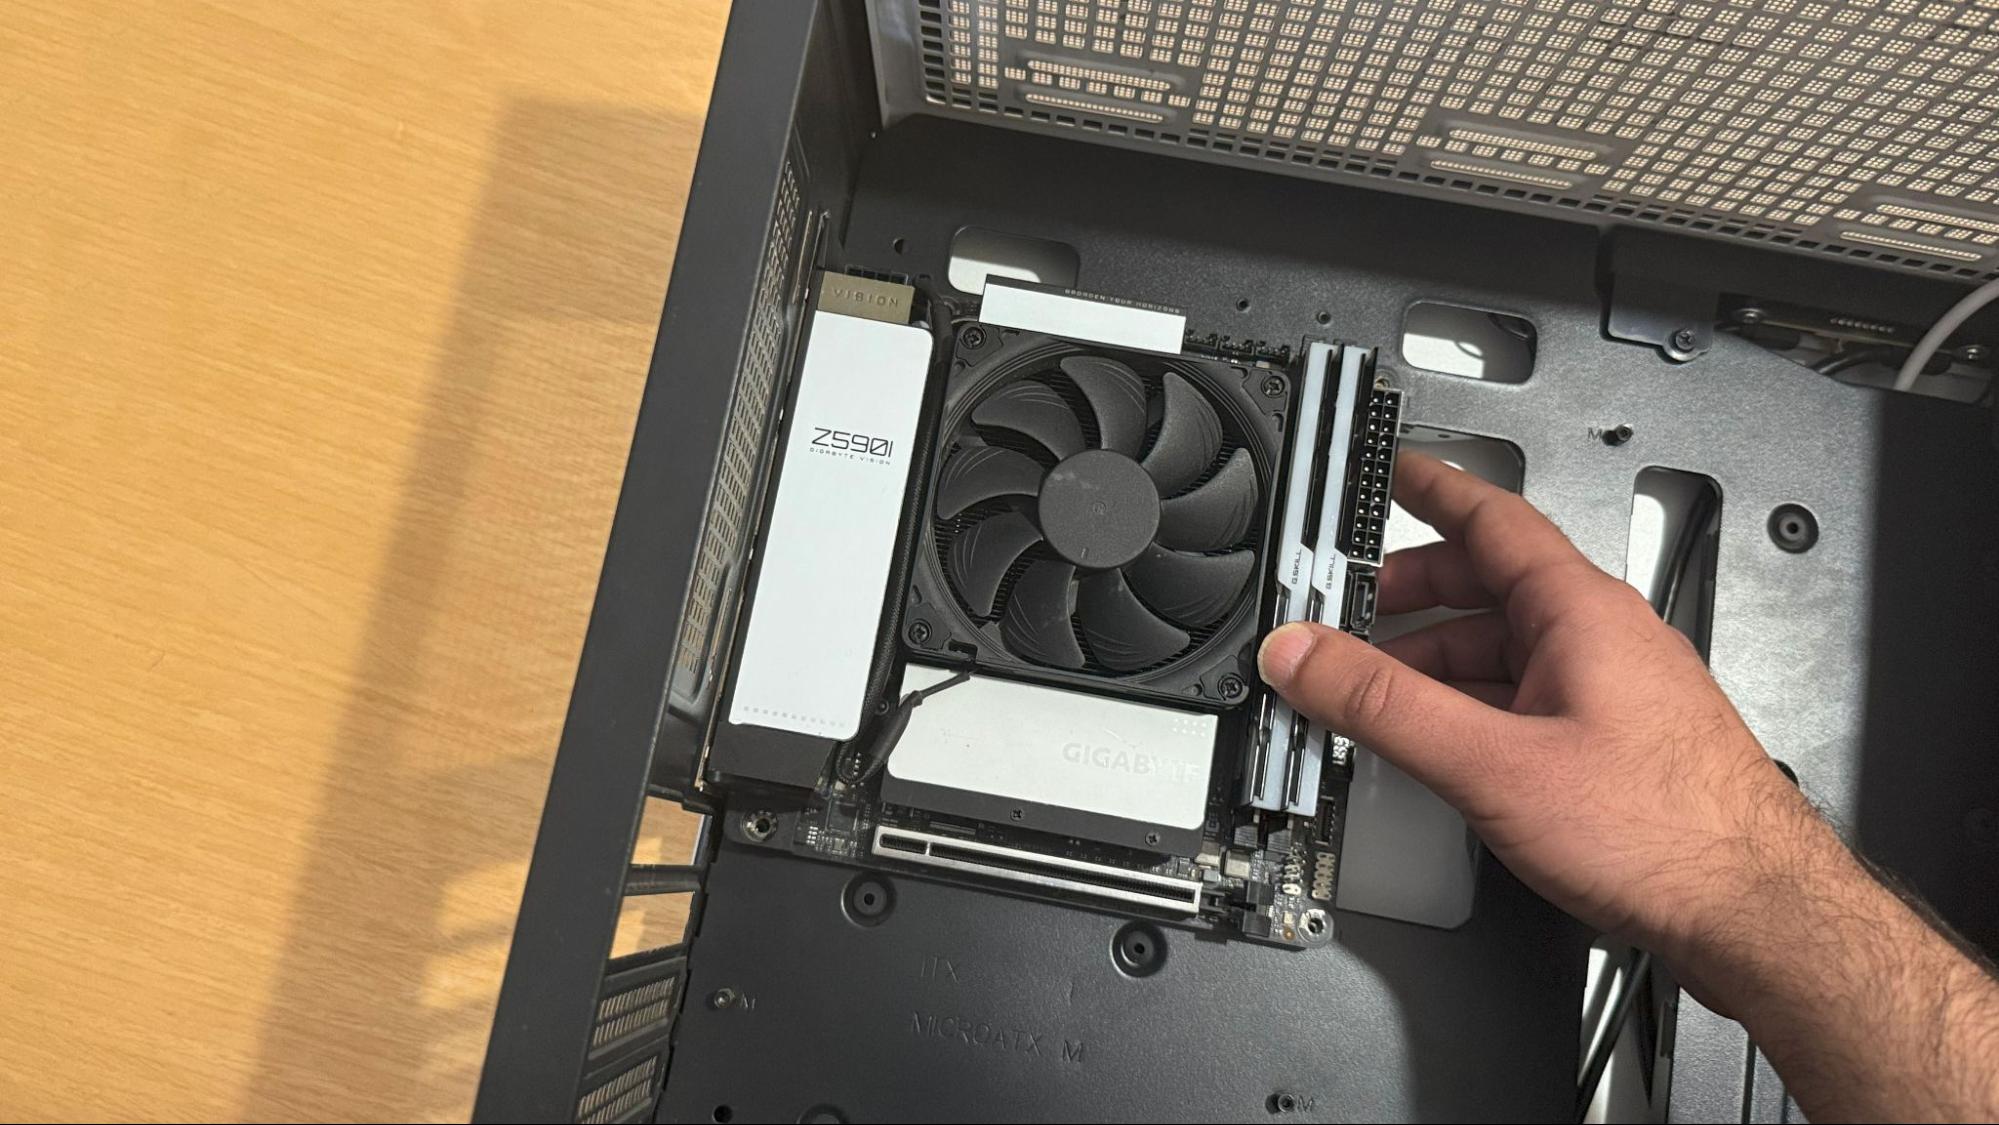
With the IO shield in place and the standoffs prepared, you can now position the motherboard in the case. Hold the motherboard by its edges, avoiding contact with sensitive components like the CPU socket or exposed pins. Carefully lower the motherboard into the case, aligning its ports with the IO shield and the screw holes with the standoffs.
(Image credit: Tom's Hardware)
Ensure the motherboard sits flat against the standoffs. Check that the ports fit snugly into the I/O shield without obstruction. It’s crucial to align everything properly at this stage to avoid stress on the board or misaligned screws.
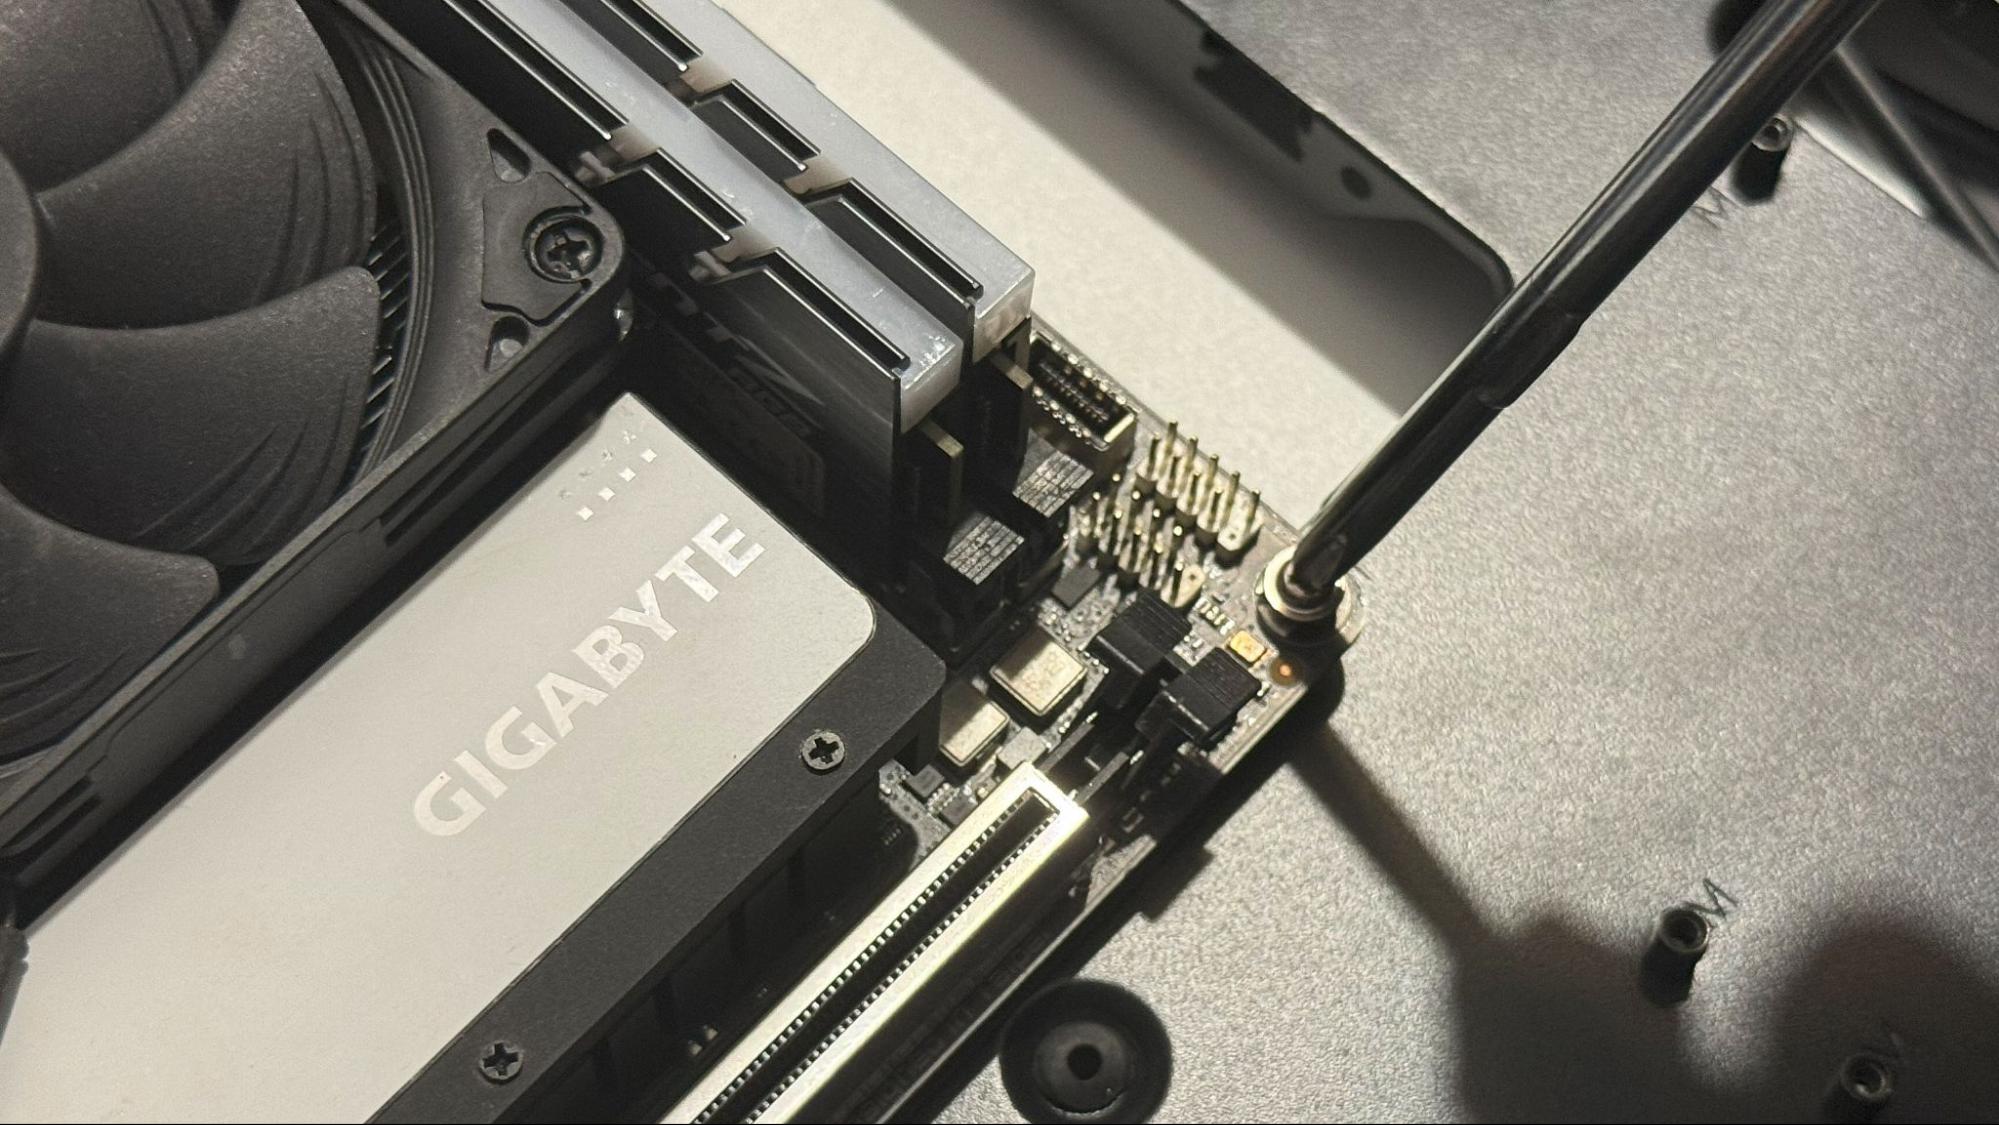
Once the motherboard is properly aligned, secure it to the standoffs using the screws provided with your case. Start by inserting a screw in the center hole (if there is one) to hold the board in place, then work your way outward. Tighten the screws evenly, but avoid over-tightening, as this could crack the motherboard or strip the threads in the standoffs. You only need to ensure that the board doesn’t move once the case is vertical, so you can stop when you feel the head of the screw touch the PCB around the screw hole.
(Image credit: Tom's Hardware)
Refer to your motherboard manual to ensure you’ve used all the appropriate mounting points. Missing screws can lead to instability, while excess screws can cause electrical shorts.
Connect power cables
With the motherboard secured, install the power supply and connect the cables. The two primary connections are:
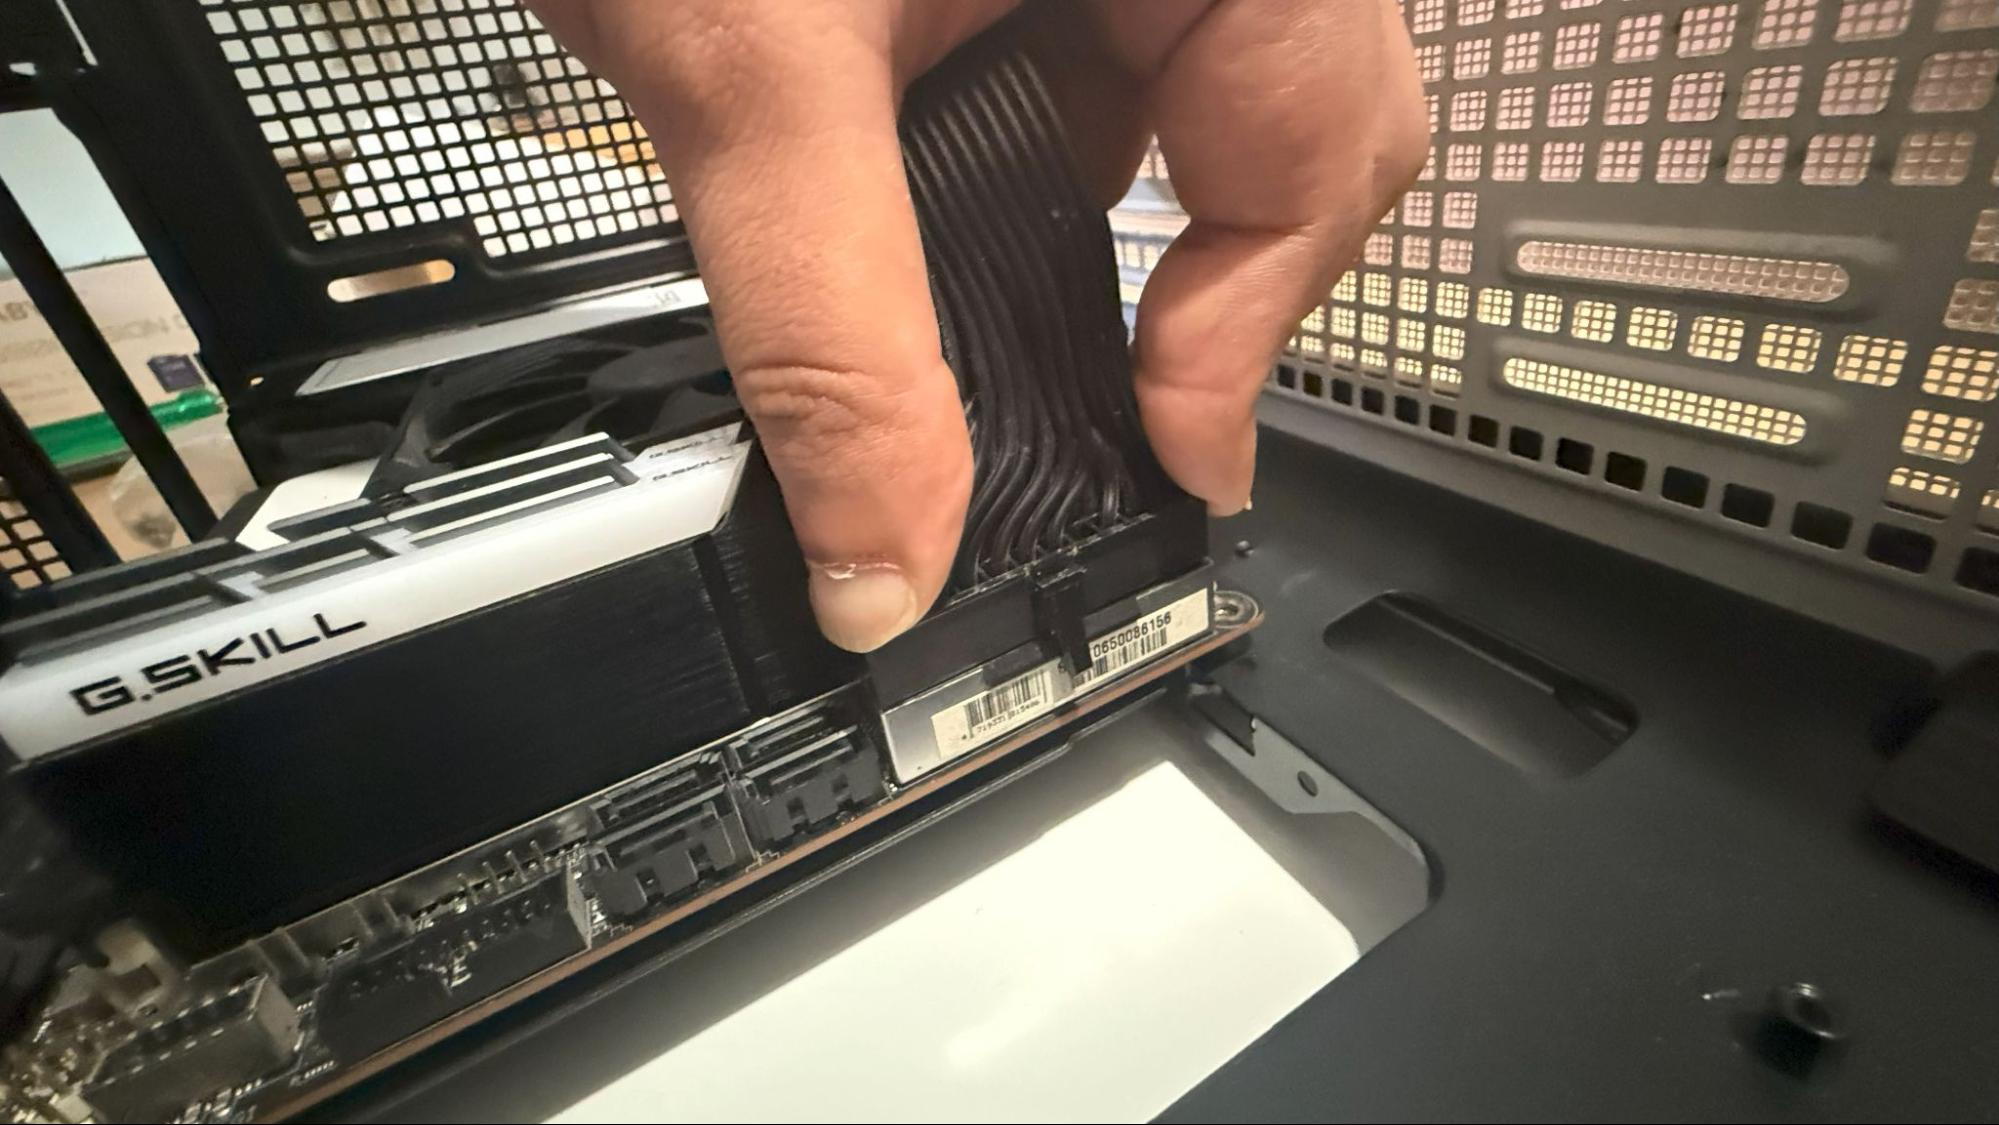
24-Pin ATX power: This large connector provides power to the motherboard. Locate the 24-pin port on the motherboard, typically on the right side, and connect the cable. It’s notched so that you can only install it one way. Push it firmly until it clicks into place.
(Image credit: Tom's Hardware)
8-Pin CPU power: This smaller connector powers the processor. It is usually located near the top-left corner of the motherboard. Connect the cable from the power supply, ensuring it clicks securely. If you have a higher-end board, there may be two 8-pin connectors here. Generally, if you aren’t doing serious overclocking, you only need to plug in one 8-Pin CPU cable, but check your motherboard manual to be sure.
These connections are essential for the motherboard and CPU to function. Double-check that they are firmly seated and correctly aligned.
Connect front panel cables
The front panel of your PC case has buttons, LEDs, and ports that need to be connected to the motherboard. These connections typically include:
Power Button and Reset Button: These control the system’s power and reset functions.
Power LED and HDD LED: These indicate system activity and hard drive usage.
USB Ports and Audio Jacks: These provide front-facing connectivity for peripherals.
Refer to your motherboard manual to locate the front panel header, typically found in the bottom-right corner. The header is a collection of small pins labeled with functions like “PWR,” “RST,” and “LED.” Connect the front panel cables to the corresponding pins, paying attention to the polarity (+/-). This step can be tedious due to the small size of the connectors, so use tweezers if necessary, refer closely to your manual, and don’t rush this step.
Connect additional components
If your build includes additional components, install and connect them at this stage. Common components include:
Graphics card (GPU): Install the GPU in the primary PCIe x16 slot. Secure it with screws and connect the requisite power cables from the PSU.
Additional storage: Mount SSDs or HDDs in the case’s drive bays or trays and connect them to the motherboard using the appropriate SATA cables.
Radiators and cooling fans: Install and connect any radiators for AIO liquid coolers and case fans to the motherboard’s fan headers or a separate fan hub. Ensure all cooling components are correctly installed and functional.
Test the installation
Before closing the case, test the system to ensure everything is functioning correctly. Connect the power supply to an outlet, be sure its switch is on, and turn on the PC. Check for signs of life, such as spinning fans, illuminated LEDs, and display output on the monitor.
to verify that the motherboard recognizes all installed components, including the CPU, RAM, and storage drives. If the system doesn’t power on or you encounter issues, recheck all connections and ensure the components are seated correctly.
If everything is working as planned, you should now be ready to install your operating system of choice. If you have related questions that weren’t answered here, see our larger
guide.
Additional tips and warnings
When handling components, exercise caution to avoid touching sensitive areas like the pins on the CPU socket, as they are easily damaged. Always refer to the manuals provided with your motherboard and case for specific instructions and diagrams, ensuring each step is performed correctly. Be mindful not to over-tighten screws, as excessive force can damage components or strip threads. Additionally, double-check the placement of standoffs to ensure they align properly with the motherboard; misaligned standoffs can cause short circuits.
By carefully following these guidelines, you can successfully install a motherboard into your PC case, laying a solid foundation for a reliable and efficient system. Taking the time to verify each step ensures all components are securely mounted and connected, allowing you to enjoy the rewarding experience of building your own computer.
Kunal Khullar is a contributing writer at Tom’s Hardware. He is a long time technology journalist and reviewer specializing in PC components and peripherals, and welcomes any and every question around building a PC.