Create Shortcuts to Frequent Tasks - MATLAB & Simulink (original) (raw)
Main Content
You can create shortcuts in projects to perform common project tasks, such as opening important files and loading data.
Create Shortcuts
To create a shortcut from an existing project file, follow these steps:
- In the Project panel, right-click the file and select . Alternatively, in the Project toolstrip, expand the Shortcuts gallery. Then, click New Shortcut and browse to select a file.
The Create New Shortcut dialog box opens. - Select an icon and enter the shortcut name. If you are using the shortcuts to define steps in a workflow, consider add a numbered prefix to the shortcuts filename.
- To add the shortcut to an existing group, in theGroup field, select a group from the list. For more information about shortcut groups, see Organize Shortcuts.
- Click OK.
The shortcut appears with the selected name and icon in theShortcuts gallery. In the Project panel, theStatus column displays an icon  indicating that the file is a shortcut.
Note
Shortcuts are included when you commit your modified files to source control, so you can share shortcuts with other project users.
Run Shortcuts
To run a shortcut, in the Project toolstrip, in the Shortcuts gallery, click the shortcut. Clicking a shortcut in theShortcuts gallery performs the default action for the file type. For example, MATLAB® runs .m shortcut files and loads.mat shortcut files. If the shortcut file is not on the path, MATLAB changes the current folder to the parent folder of the shortcut file, runs the shortcut, and then changes the current folder back to the original folder.
Alternatively, in the Project panel, right-click the shortcut file and select . If the script is not on the path, then MATLAB asks if you want to change the folder or add the folder to the path.
Organize Shortcuts
You can organize shortcuts by categorizing them into groups. For example, you might create separate groups of shortcuts for loading data, opening files, generating code, and running tests.
To create a shortcut group, follow these steps:
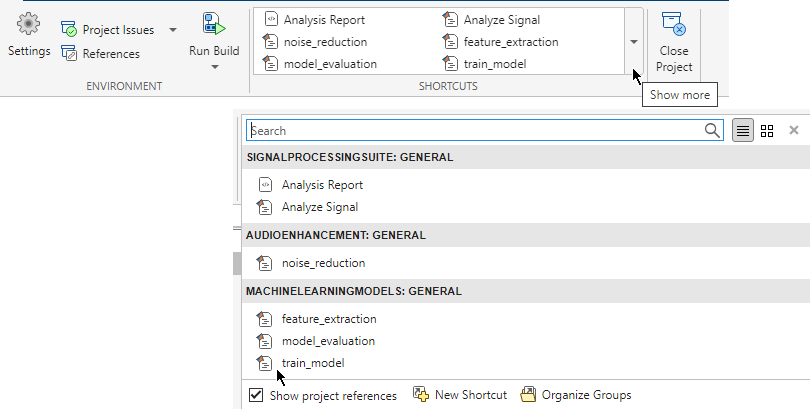
- Expand the Shortcuts gallery in the Project toolstrip. Then, click Organize Groups.
- Click the Create button.
- Enter a name for the group and click OK.
The new shortcut group appears in the Shortcuts gallery.
To move a shortcut into a group, follow these steps:
- In the Shortcuts gallery, right-click a shortcut and select . Alternatively, in the Project panel, right-click a file and select .
The Create New Shortcut dialog box opens. - In the Group field, select a group from the list and click OK.
You can access shortcuts for every project in the project hierarchy from the Shortcuts gallery of the top-level project. By default, the Shortcuts gallery shows all shortcuts in the project hierarchy and groups them by the name of the project they belong to. To show only the shortcuts that belongs to the open project, clear the Show project references check box.