How to Write a Job-Winning Résumé (Steps and Example) (original) (raw)
Your résumé has the power to open doors for you.
But here’s the thing: you only have 7.4 seconds to make an impression on potential employers, according to a 2018 eye-tracking study by Ladders. In that short timeframe, recruiters will make up their mind on whether you’re application and résumé is worthy of an interview, or if they should keep the doors firmly shut.
It’s a tricky situation to navigate, but we’ve got you covered. Whether you’re just entering the world of work, looking for a new job, or changing careers, this step-by-step guide will help you write a résumé that gets you noticed and, most importantly, hired.
1. Do some prep work
Before you start writing your résumé, it’s a good idea to:
- review the job description (take note of specific requirements, and highlight important keywords and phrases)
- write a list of important duties and responsibilities you performed in your previous positions, especially those that pertain to the job you’re applying for now
- write down all your achievements from previous positions, along with figures and data that quantify those achievements
- create a master list of your soft skills and hard skills.
Why do this? By gathering all this information, you’ll be better equipped to craft a tailored résumé, which in itself shows employers your genuine interest in the role and that you understand their needs — and, in effect, gives yourself an advantage over the other candidates.
2. Choose the right format
Now that you’ve completed the prep work, it’s time to start writing your résumé. This begins by determining and choosing the résumé format that best matches your specific career situation.
There are three main formats: chronological, functional/skills-based, and combination/hybrid.
Here’s a quick rundown of each one:
| | Chronological format | Functional format | Combination format | | | ---------------------------- | --------------------------------------------------------------- | ------------------------------------------------------------------------------------------------------------ | ------------------------------------------------------------------------------------- | | Résumé Purpose | Highlights work experience and expertise | Highlights skills | Gives equal weight to both skills and experience | | Level of work experience | Key section placed at the top of the page | Secondary section placed at the bottom of the page | One of two key sections, typically placed in the middle of the page | | Skills section | Secondary section placed in the middle of the page | Key section placed at the top of the page | One of two key sections, typically placed at the top of the page | | Pros | Preferred by most recruiters and easy to read | Emphasizes marketable skills, and bridges employment gaps | Emphasizes most relevant skills and accomplishments | | Cons | Very common, and calls attention to irregular employment record | Suggests you’re hiding something, and difficult to read | Work history may be pushed down to second page and recruiters might not read that far | | Good for | Virtually everyone | Creative professionals, overqualified candidates, employment gappers, and military-to-civilian transitioners | Experienced professionals and career changers | | Bad for | Career changers and employment gappers | Students, entry-level candidates, experienced professionals, and career changers | Students and entry-level candidates |
3. Add a header
At the top of your résumé, always add a header that includes your name (typically in a larger font size), phone number, email address, LinkedIn profile and location.
You can also optionally add the following, if applicable:
- a link to your personal website or online portfolio
- links to your professional social media pages
- your personal details (like marital status and date of birth)if you’re applying for jobs in countries where it’s customary to include this information
- a professional photo of yourself, particularly if you’re a creative professional or applying for a customer-facing job.
Make sure you use the exact same header of your résumé in all supporting documents, including your cover letter and list of references. This ensures consistency in terms of personal branding.
4. Write a standout headline
The résumé headline (or résumé title) is one of the most underutilized elements of a great résumé.
It’s essentially a short sentence that summarizes your key skills and industry experience, typically placed right after your résumé’s header and before your summary section (but it can be placed immediately after your name). When done right, a headline can help you make a great first impression, catch the hiring manager’s attention, and convince them you’re the perfect candidate.
Headlines are ideal for candidates with a lot of experience, as it’s a great way to condense your value to potential employers into a snappy one-liner, but everyone can (and should) consider adding one to their résumé.
Make sure your headline:
- includes keywords from the job ad
- incorporates achievements (like years of experience, number of awards won or dollar amount of sales)
- includes certifications and licenses
- is limited to a maximum of two lines
- uses title case
- is free of clichés and buzzwords like “motivated”, “go-getter” and “synergy”.
5. Craft a strong career summary or career objective
Every great résumé begins with a strong career summary or career objective.
Though they both are placed at the beginning of a résumé and intended as an introduction, they do have some key differences. Here’s a quick comparison between the two:
| | Career summary | Career objective | | | --------------------- | --------------------------------------------------------------------------------------------- | ------------------------------------------ | | Résumé Purpose | Highlights your qualifications | Focuses on your goals | | Voice | Written in the active voice | Written in the passive voice | | Metrics | Incorporates metrics to prove your achievements using percentages, years, dollar amounts, etc | Does not typically incorporate metrics | | Ideal for | Virtually everyone | Entry-level candidates and career changers |
Whichever you choose to use (you can even combine the two by including a one-sentence objective at the end of a summary), make sure it:
- is tailored to the job you’re applying for
- demonstrates your value
- is concise (typically 3–5 lines long).
Here’s a useful tip: write this section last. Why? Because once you have the rest of your résumé planned out, it will be easier to pick out the things you want to show off here.
6. Detail your work experience
The work experience section is perhaps the most important element of your résumé — and the one that recruiters care most about. It gives potential employers an idea of your employment history and whether you have the skills and knowledge to succeed in the role.
You should only list the positions that are relevant to the job you’re currently applying for in this section, which should be formatted as individual entries in reverse-chronological order (i.e. starting from your most recent position first and then working backwards through time).
Each entry should include:
- your position/job title
- the name of your employer
- the location of where you are working/have worked
- dates of employment
- a short optional description of the company if it’s not a household name
- a bulleted list of 4–6 of your most notable achievements (make sure to start each list item with an action word).
If you want to showcase experience from a previous career or that is otherwise unrelated to the job you’re applying for, you can do this by creating another section titled “Additional Experience”. In this case, you should replace the company description and list of achievements with an optional job summary, limited to two lines at most.
7. List your education
Up next is the education section, where you should list your academic experiences as separate entries.
Each entry should include:
- the type of qualification you earned or are working towards
- the name of your school
- the school’s location
- years attended.
You can also optionally add the following, particularly if you’re an entry-level jobseeker:
- your GPA
- relevant coursework
- any awards and honors you received
- your academic achievements
- relevant extracurricular activities.
Always begin this section with your highest education first, and then list everything else in reverse-chronological order. That said, don’t include your high school experience if you’ve completed a university degree.
8. Showcase your skills
The skills section of your résumé is intended to give employers an at-a-glance view of all your know-how that makes you the perfect candidate for the job. It should comprise a mix-and-match of your most relevant soft and hard skills.
There are many different ways you can list your skills in your résumé, including:
- as a bulleted list (with an optional short description for each skill)
- by category (such as “Technical Skills”, “Soft Skills” and “Languages”)
- by rating each skill with a consistent metric to show your proficiency
As a general rule of thumb, you should list between five and 10 skills here. Depending on your background and the required experience for the position, you can list more, but limit the number to 20. Ultimately, the skills you include in your résumé should be directly relevant to the job.
9. Add other optional sections
If you have other key accomplishments and qualifications you weren’t able to mention elsewhere on your résumé, and which will help you further demonstrate your suitability for the position, consider including additional sections, such as:
- Achievements
- Awards and honors
- Certifications and licenses
- Hobbies and interests
- Languages
- Memberships and affiliations
- Military experience
- Patents
- Projects
- Publications
- Testimonials
- Volunteer work
Again, make sure that the content of any additional sections is tailored to the job you’re applying for.
10. Proofread your résumé
Before you submit your résumé to potential employers for consideration, make sure you thoroughly proofread it — and then proofread it again. This is essential as it can save you from a potentially embarrassing — and job-costing — typo like “attention to derail” or “ruining the company’s global operations”.
Beyond proofreading your résumé for grammar and spelling errors, you should also:
- confirm that your contact details are up to date and correct
- ensure that dates, names (including those of employers and schools), and figures and percentages are correct
- check that links work and point to the correct addresses
- make sure that dates, numbers, bulleted lists, and fonts are formatted consistently.
It’s a good idea to ask a trusted friend or relative to look over your résumé after you’ve proofread it yourself. After all, they might find typos you missed, and can even offer you valuable feedback on content and layout.
11. Use an example for inspiration
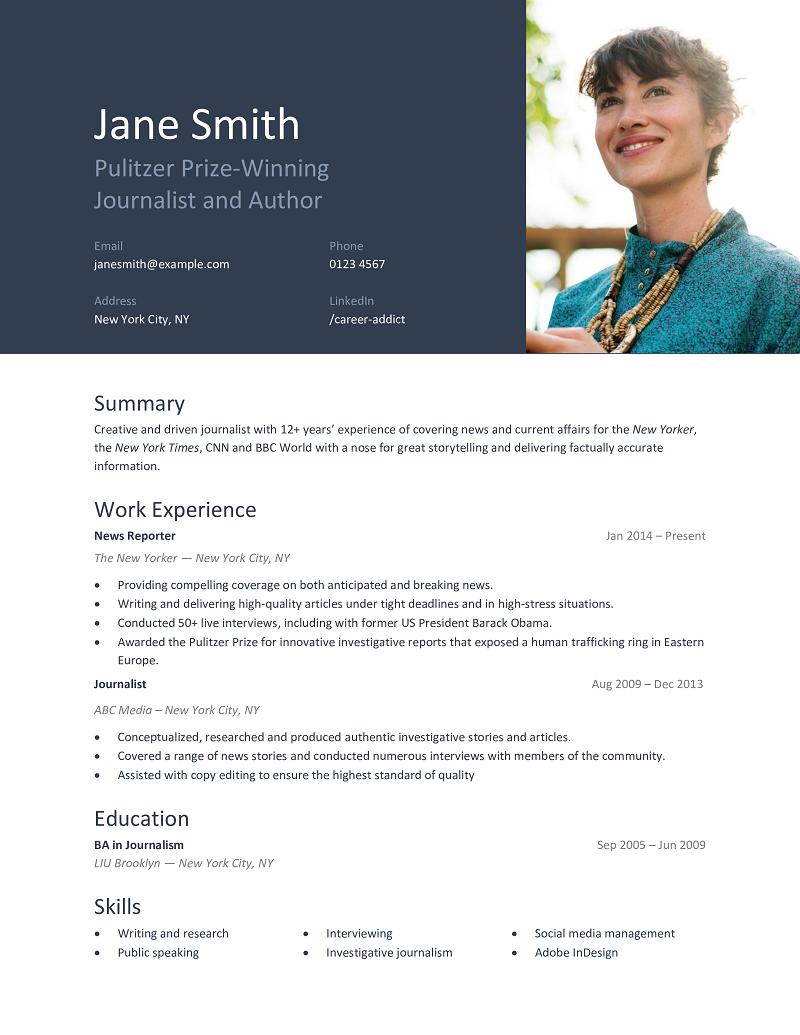
Want to see a well-written résumé in action? With a custom example we created with our professionally designed and ATS-optimized Smooth résumé template for inspiration!
Get the Smooth template Explore all templates
We compiled these essential résumé writing steps into a video too:
Final thoughts
Résumé writing, whether it’s to apply for your first job or a more senior position, can be an overwhelming and time-consuming process, one that is hopefully simplified by this guide.
Before we go, here’s some parting advice:
- Limit your résumé to two pages.
- Optimize it for application tracking systems.
- Save it as a PDF with a descriptive file name, e.g.: “Jane Smith — Journalist Résumé.pdf”.
- Always supplement your application with a targeted cover letter.
Got a question about writing your résumé? Just drop us a line in the comments section below — we’re more than happy to help!