How to Install and Run a Kubernetes Cluster on Ubuntu 22.04 (StepbyStep) (original) (raw)
Last Updated : 27 Sep, 2025
You can install and configure Kubernetes in different ways on your personal laptops, physical servers, Virtual machines, and as a cloud service. Before moving ahead with this article, we need to have a basic understanding of Kubernetes and its architecture and containers. In this article, we will get a high-level overview of ways you can install Kubernetes.
What is Kubernetes?
Kubernetes is an open-source platform designed to automate deploying, scaling, and managing containerized applications. It groups containers that make up an application into logical units for easy management and discovery. Originating from Google, Kubernetes provides robust tools for orchestration, scaling, and maintenance of application clusters. Its core features include automatic bin packing, self-healing, and horizontal scaling.
Installation Methods of Kubernetes
There are several methods to install Kubernetes based on your needs and resources. **Play-with-K8s offers a ready-made online Kubernetes cluster for quick learning or testing without any installation.**Minikube is ideal for limited system resources, packaging all Kubernetes components into a single setup that acts as both master and worker nodes. Kubeadm is perfect for real-time setups, enabling the creation of multi-node Kubernetes clusters. It is a popular choice for configuring master and node components, with cloud-based VMs recommended for systems with limited resources.
1. Play-with-K8s
This method is ideal for someone who does not want to install anything on their system. This is a ready-made Kubernetes cluster available online for people who want to learn or test Kubernetes.
2. Minikube
It is ideal for someone who wants to install Kubernetes on their system but has a limited system resource. So the key takeaway point with minikube is that it doesn't have a separate Kubernetes master and Kubernetes worker node architecture. Here we get all Kubernetes components packaged together as an all-in-one setup. The single system acts as both master and worker nodes.
3. Kubeadm
It is a way to go if you need an actual real-time setup. It can be done using the Kubeadm tool. It can be used to set up multi-node Kubernetes clusters. It is one of the most popular installation methods for Kubernetes. Depending upon the system resource you have you can create multiple VMs. Then you can configure Kubernetes master and node components. In case your system resources are limited, it is recommended to use cloud-based VMs.
Once your Kubernetes cluster is up and running, you'll have a robust environment for orchestrating containers at scale.
How to Installation of Kubernetes Cluster with Kubeadm ? A Step-By-Step Guide
The following are the steps that guide you in installation of kubernetes cluster, In this Article, we will show the kubernetes setup on AWS Cloud using Docker. Here, we taking 3 ubuntu instances, 1 Master Node and 2 Worker Nodes.
**Step 1: Launch EC2 Instances
- Login into AWS Console with your AWS credentials
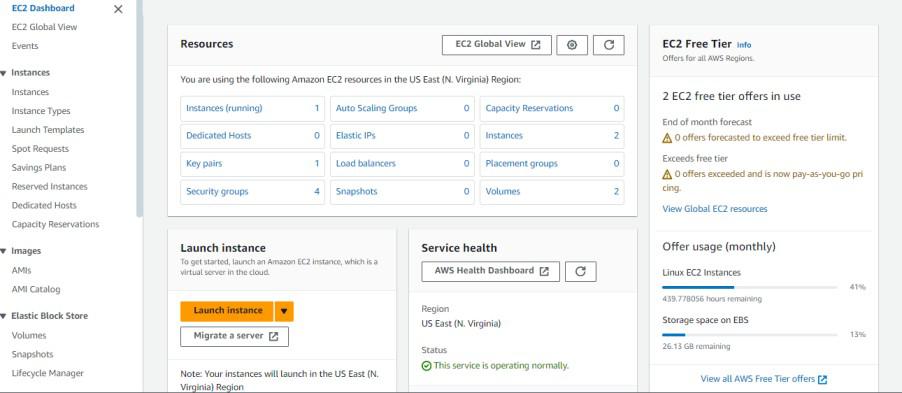
- After login navigate to EC2 Dashboard, click on Instances and Launch Instance. The interface looks as follows:
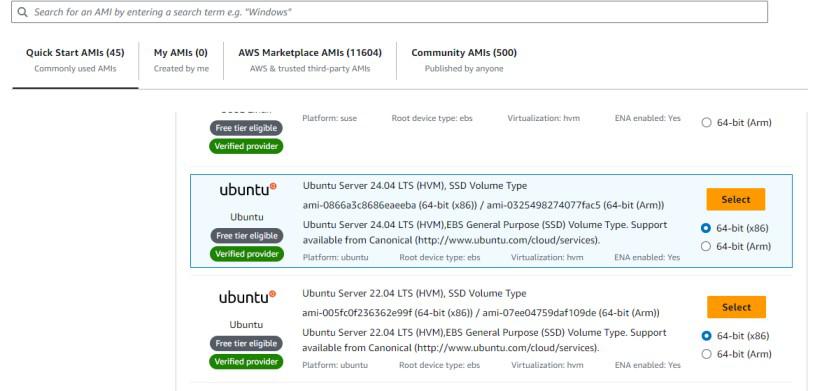
- Define the details and choose AMI as Ubuntu of the version above 22.04.
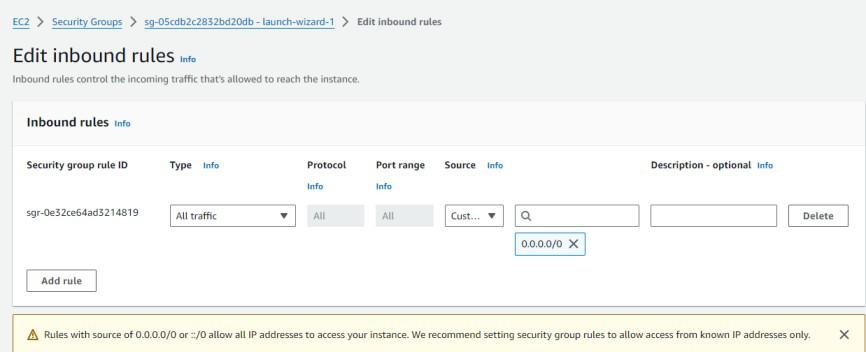
- Configure Security Groups as allowing all traffic from all ports:
- Like this Launch 3 Instances, 1 instance Kubernetes Master Node as name with instance type t2.medium and other 2 instances as naming K8s Worker Node1 , K8s Worker Node2 with instance type as t2.micro.
- After success launching the instances looks as follows:

- Connect to kubernetes master node with EC2 Console.
**Step 2: Set Hostname for Node
- Set the hostname of the node with the following command as **master-node, while doing on worker nodes as **worker-node1 , worker-node2

You can follow the same command and assign name to **worker-node1 and **worker-node2.
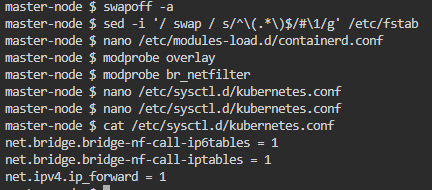
**Step 3: Disable swap
- Disable the swap settings with the following commands:
swapoff -a
sed -i '/ swap / s/^(.*)$/#\1/g' /etc/fstab
**Step 4: Install Containerd
- Installing the containerd and configure it as a default container runtime with the following commands:
nano /etc/modules-load.d/containerd.conf
- In this enter the content of this below:
overlay
br_netfilter
- Execute the following commands to add the modules:
modprobe overlay
modprobe br_netfilter
- Enable the IPv6 settings with following commands:
nano /etc/sysctl.d/kubernetes.conf
- Enter the following content in this:
net.bridge.bridge-nf-call-ip6tables = 1
net.bridge.bridge-nf-call-iptables = 1
net.ipv4.ip_forward = 1
**Step 5: Install Kubernetes Components
- Add Kubernetes Repositories to the Instance
apt-get update
curl -fsSL https://prod-cdn.packages.k8s.io/repositories/isv:/kubernetes:/core:/stable:/v1.30/deb/Release.key | gpg --dearmor -o /etc/apt/keyrings/kubernetes-apt-keyring.gpg
echo 'deb [signed-by=/etc/apt/keyrings/kubernetes-apt-keyring.gpg] https://prod-cdn.packages.k8s.io/repositories/isv:/kubernetes:/core:/stable:/v1.30/deb/ /' | tee /etc/apt/sources.list.d/kubernetes.list
apt update
- Install kubeadm, kubelet, and kubectl with the following commands:
apt-get update
apt-get install -y kubelet kubeadm kubectl
apt-mark hold kubelet kubeadm kubectl

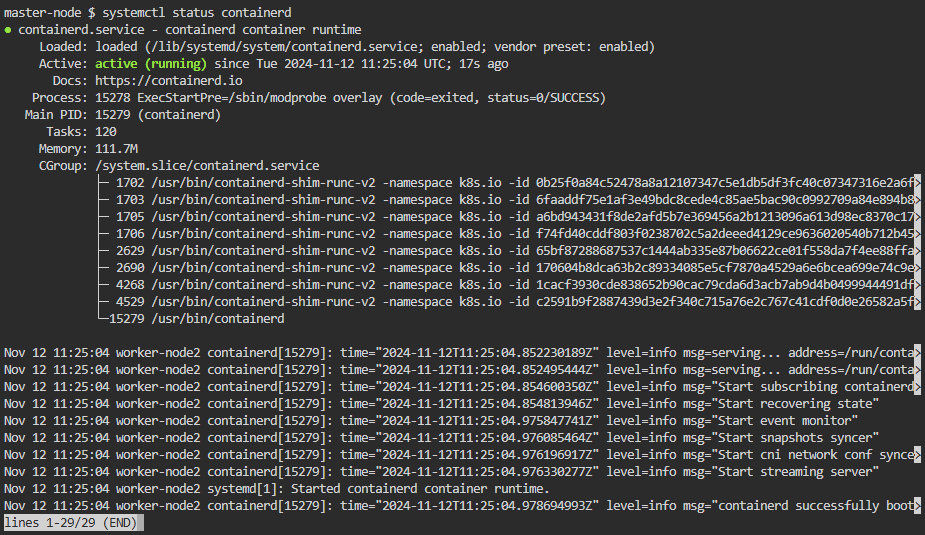
**Step 6: Set Containerd as Default
- Execute the following commands to set containerd as default:
mkdir -p /etc/containerd
containerd config default | tee /etc/containerd/config.toml > /dev/null
systemctl restart containerd
**Step 7: Configure Worker Nodes
- Repeat all the steps from step2 in adding worker nodes, these steps are necessary for the worker nodes in kubernetes cluster before joining
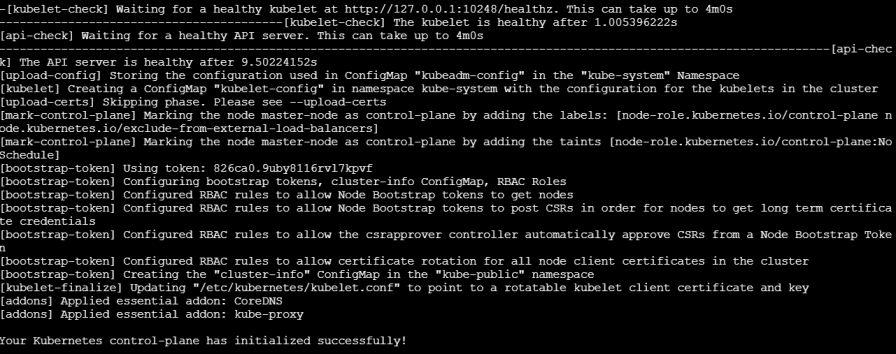
**Step 8: Intializing kubernetes Master Node
kubeadm init --pod-network-cidr=10.244.0.0/16
**Step 9: Setuping kubeconfig for the master node
- Execute the following commands for setuping the kubeconfig in the master node:
mkdir -p $HOME/.kube
cp -i /etc/kubernetes/admin.conf $HOME/.kube/config
chown (id−u):(id -u):(id−u):(id -g) $HOME/.kube/config
- Use the following command to setup the CNI as flannel for the kubernetes cluster.

**Step 10: Join Worker Nodes
- Run the following command on the Master Node and run the providing the token on the worker nodes.
kubeadm join :6443 --token --discovery-token-ca-cert-hash sha256:
**Step 11: Verify the Kubernetes Cluster
kubectl get nodes

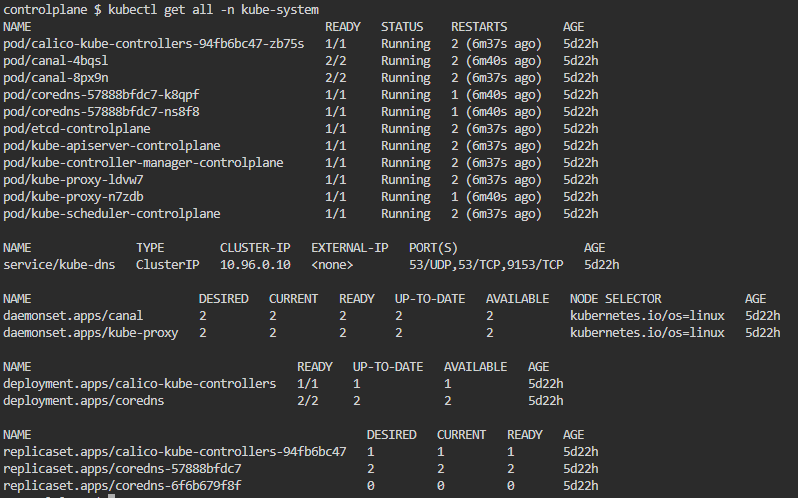
**Step 12: Check the K8s Resources
- The following command is used for checking the resources whether they are creating or not.
kubectl get all -n kube-system
**Step 13: Create Pod Application
- Run the following command to create pod and a service to the application.
kubectl run mypod1 --image=bnvschaitanya/maven-web-application --port=80
- Create a service for this pod:
kubectl expose pod mypod1 --type=NodePort --port=80 --target-port=8080
**Step 14: Access Application
- Access the web application through the browser