Git Bash (original) (raw)
Last Updated : 11 May, 2026
Git Bash is a Unix-like command-line interface for Microsoft Windows that lets developers run Git commands and manage repositories from a terminal, bringing Linux-style workflows to Windows.
- Provides a terminal environment to interact with Git repositories.
- Supports core Git actions like cloning, committing, pushing, and pulling.
- Includes basic Unix command-line tools on Windows.
- Enables task automation using user-written scripts.
- Helps users understand and practice workflows in a version control system.
Usage of Git Bash
Git Bash is used to run Git commands and Unix-style CLI tools on Windows to manage repositories and automate development tasks.
- **Compatibility: Git Bash is designed to be fully compatible with Git, making it a crucial tool for developers who use Git for version control.
- **Powerful CLI Tools: Provides flexible Unix command-line tools on Windows.
- **Ease of Use: Offers a familiar Bash experience for Unix/Linux users.
Git GUI
Git GUI tools provide a visual interface to perform common version control tasks, making Git easier to use than the command line for many users.
- Git is available through both GUI and CLI.
- GUI simplifies tasks like commit, branch, and merge.
- Popular tools include Sourcetree, GitHub Desktop, TortoiseGit, and GitKraken.
- Beginners can start with simple GUIs.
- Advanced users can choose customizable GUIs based on their needs.
Steps to Install Git Bash
Step 1: Download and Run The installer
The .exe file installer for Git Bash can be downloaded from "https://gitforwindows.org/" Once downloaded execute that installer, following window will occur.

Git Bash Installation
Step 2: Select required options
Select the components that you need to install and click on the Next button.
.webp)
Install Git Bash
Step 3: Select Installation Directory
Select the path where you want to install git as shown in the image below.
.webp)
Install Git Bash
Step 4: Wait for Completion
Let the installation process finish to begin using Git Bash. To open Git Bash navigate to the folder where you have installed the git otherwise just simply search in your OS for git bash.
.webp)
Install Git Bash
.webp)
Install Git Bash
Basic Git Bash Commands
Here are some fundamental Git Bash commands to get you started:
**Navigating Directories:
- **ls: Lists files and directories in the current directory.
- **cd : Changes the current directory to the specified directory.
- **pwd: Prints the current working directory.
**Managing Files and Directories:
- **touch : Creates a new file.
- **mkdir : Creates a new directory.
- **rm : Removes a file.
- **rmdir : Removes an empty directory.
**Using Git Commands:
- **git init: Initializes a new Git repository.
- **git clone : Clones an existing repository.
- **git status: Displays the status of your working directory and staging area.
- **git add : Adds a file to the staging area.
- **git commit -m "message": Commits the changes in the staging area with a message.
- **git push: Pushes changes to a remote repository.
- **git pull: Pulls changes from a remote repository.
- **git log: "git log" command will help you to see the logs of all the commits made.
- **git branch: Creates a new branch.
- **git merge: For merging the changes from one branch to another branch.
- **git config: "git config" will help you to configure the username and email id.
- **git tag: It will display the all tags.
**Working with Git Bash on Windows
Git Bash allows you to interact with the Git version control system in a command-line environment on Windows.
Step 1: Configuring Git
**Set your global username/email configuration:
Open Git Bash and begin creating a username and email for working on Git Bash.
**Set your username:
git config --global user.name "FIRST_NAME LAST_NAME"
**Set your email address:
git config --global user.email "MY_NAME@example.com"
cd command refers to the command line change directory and is used to get into the desired directory. To navigate between the folders the cd command is used
cd folder_name
ls command is used to list all the files and folders in the current directory.
ls
Open Git Bash and change the current working directory to your local project by use of the cd command.

Change Working Directory
Step 2: Commit Repository in Git Bash
Initialize the local directory as a Git repository.
git init
Stage the files for the first commit by adding them to the local repository
git add .
By "git status" you can see the staged files after that Commit the files that you've staged in your local repository.
git commit -m "First commit"
Now After the "git status" command, it can be seen that nothing to commit is left, Hence all files have been committed.
Step 3: Initializing a Local Git Repository
Follow the steps given below to initialize your Local Repository with Git. Open GitHub through the internet and click on create new repository Give a suitable name for your repository and create the repository.
.webp)
Initiailzed Git Repo
**Note: Initializing your GitHub repo with a README is optional, but if you do, the README won’t exist in your local repo unless you pull it first.
The following will appear after creating the repository
-(1).webp)
Step 4: Connect the local Repository to GitHub
Go to the GitHub repository and in the code, section copy the URL and In the Command prompt, add the URL for your repository where your local repository will be pushed.
git remote add origin repository_URL
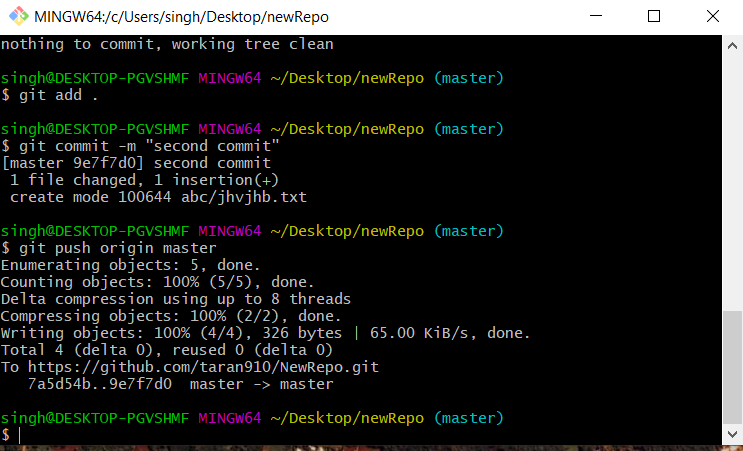
Push the changes in your local repository to GitHub.
git push origin master
Here the files have been pushed to the master branch of your repository. Now in the GitHub repository, the pushed files can be seen.
Step 5: Pulling and Pushing Changes to GitBash
Suppose the files are being changed and new files are added to the local repository. To save the changes in the git repository:
Download all the other changes from the remote repository to the local repository.
git pull
Changes have to be staged for the commit.
git add .
or
git add file_name
Now commit the staged files.
git commit -m "commit_name"
Push the changes.
git push origin master
Pushing Changes to GitBash
New changes can be seen:
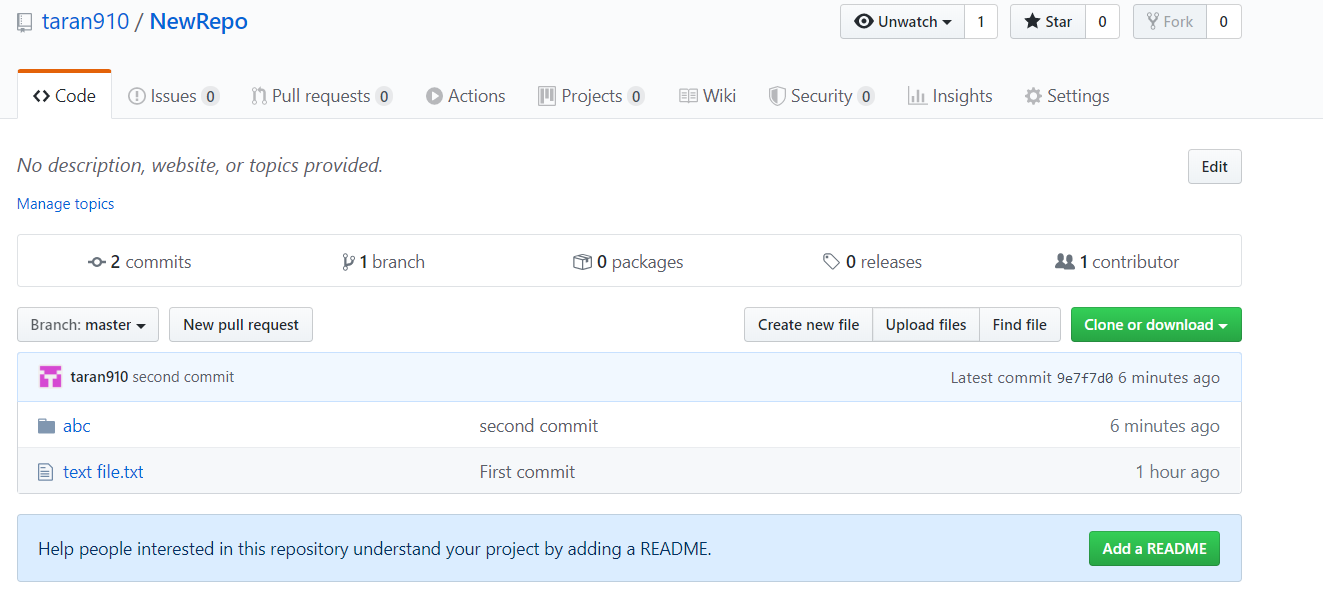
Updated Directory
Create and Manage Branches in GitBash
In a team workflow, each member works on a separate branch, and validated changes are merged into the main (master) branch. This branch-based workflow enables version control, parallel development, and easier source code maintenance.
**Syntax
- List all of the branches in your repository.
git branch
- Create a new branch
git branch branch_name
- Safe Delete the specified branch
git branch -d branch_name
- Force delete the specified branch
git branch -D branch_name
- To navigate between the branches git checkout is used. To create a new branch and switch on it.
git checkout -b new_branch_name
- To simply switch to a branch
git checkout branch_name
After checkout to the branch, you can see a * on the current branch Now the same commit add and commit actions can be performed on this branch also.
.webp)
Git Bash
Merging Branches in GitBash
First, reach the target branch
git checkout branch_name
Merge the branch to target branch
git merge new_branch
Cloning Repositories in GitBash
Cloning is used to get a copy of the existing git repository. When you run the git clone command it makes the zip folder saved in your default location
git clone url
This command saves the directory as the default directory name of the git repository To save the directory name as your custom name an additional argument is to be passed for your custom name of the directory
git clone url custom_name
Undoing Commits in GitBash
When there is a situation when you forget to add some files to commit and want to undo any commit, it can be committed again using --amend
**Syntax:
git commit --amend