Resolve Git Conflicts - MATLAB & Simulink (original) (raw)
This example shows how to resolve a conflict when you collaborate on files that are under Git™ source control. You create a new branch, make changes, then merge the changes into the main branch. The branch merge causes a conflict.
Open an example repository under Git source control using the Copy Command button. The example repository has a branch merge that caused a conflict. If your merge does not have conflicts, you can share your local changes by pushing to the remote repository as described in Push to Git Remote.
If you have not yet created a branch, see Create, Manage, and Merge Git Branches.
Identify Conflicted Files
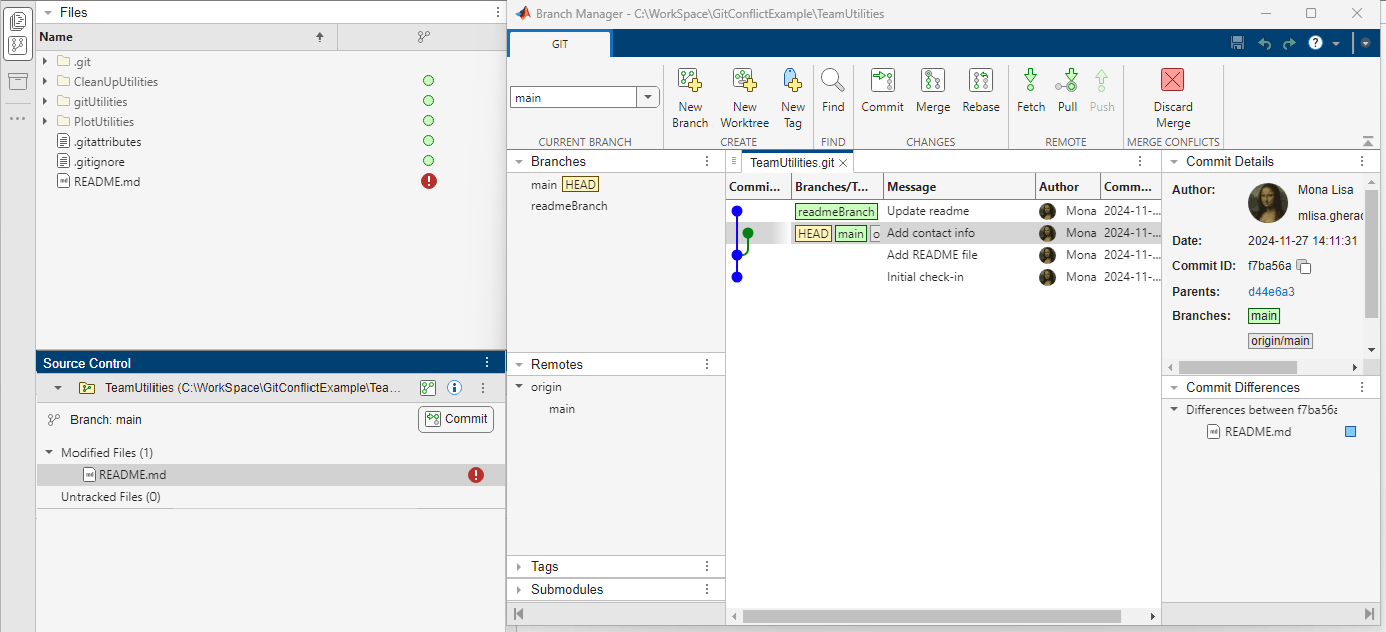
Identify conflicted files by looking for a red warning symbol  in the list of modified files in the Source Control
  panel. If the Source Control icon is not in a sidebar, click the Open more panels button
  and select the Source Control panel. The conflict warning symbol also appears in the source control column in the Files and the Project panels.
Tip: At anytime during a merge operation, you can discard the merge and restore to the state of your repository before the merge. In the Branch Manager toolstrip, click Discard Merge.
Examine and Fix Conflict
To examine the details of a conflict, right-click the conflicted file and select View Conflicts.
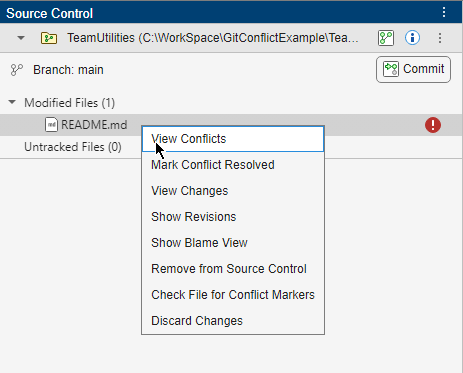
For text-based files, the Two-Way Merge Tool opens. For model files, the Three-Way Merge Tool opens. If you are resolving conflicts in models, see Resolve Conflicts in Models Using Three-Way Merge (Simulink) instead.
Merge Text Files
To fix a conflict, you can keep one of the changes or combine both before you save the merged file.
If you see conflict markers <<<<<<< .mine in a text file that is already committed, extract the conflict markers before you merge the file. For more information, see Extract Conflict Markers.
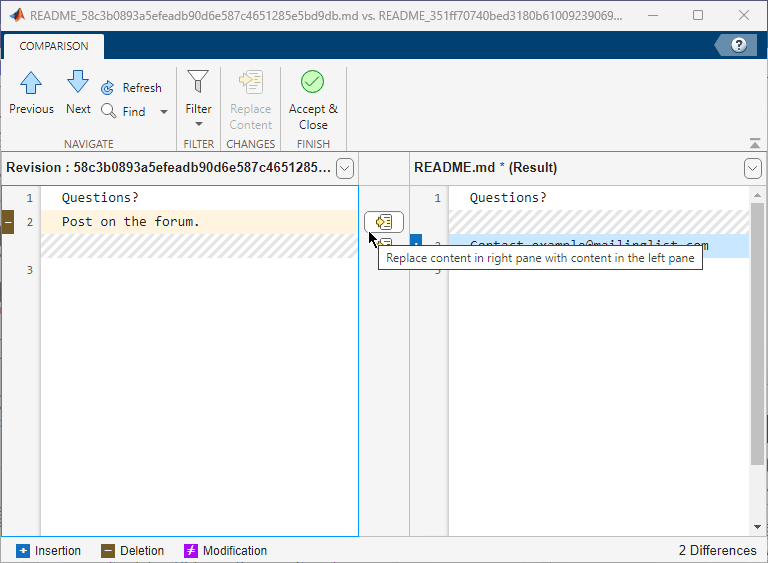
You can merge files only from left to right. When comparing to another revision in source control, the file on the right is the version in your local branch. The file on the left is either a temporary copy of the previous version or another version causing a conflict (for example, filename_theirs). Observe the file paths for both files at the top of the comparison report. Follow these steps to merge differences from the file on the left (temporary copy) into the file on the right to resolve conflicts.
1. In the Comparison report, select a difference in the report and click Replace Content. The selected difference is copied from the file on the left to the file on the right. To undo the content replacement, click Undo. Alternatively, use the inline Replace Content and Undo icons. The merged file name at the top of the report displays the dirty flag (filename.m*) to show that the file contains unsaved changes.
In this example, you decide to combine your change in the file on the right with another user changes in the file on the left using the Replace Content button.
2. Click Accept & Close to save the merged changes and mark the conflict resolved.
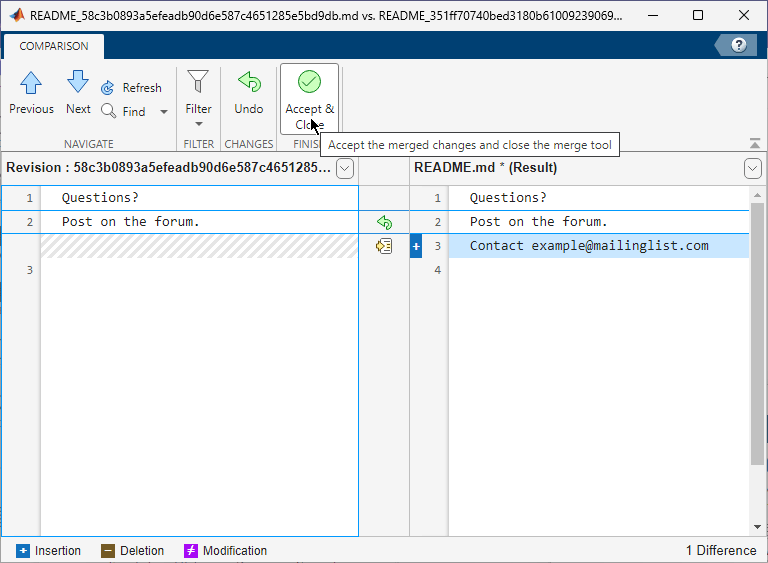
Tip: To keep your version of the file instead, do not make changes to the (Result) file before you click Accept & Close.
Extract Conflict Markers
Source control tools can insert conflict markers in files that you have not registered as binary, such as SLX and MLX files. You can use MATLAB® to extract the conflict markers and compare the files causing a conflict. This process helps you to decide how to resolve a conflict.
Conflict markers have this form:
<<<<<<<["mine" file descriptor] ["mine" file content]
["theirs" file content] <<<<<<<["theirs" file descriptor]
Tip: Register files with source control tools to prevent them from inserting conflict markers and corrupting files. For more information, see Register Binary Files with Git. If your file already contains conflict markers, the MATLAB tools can help you resolve the conflict.
Files not marked as conflicted might contain conflict markers. If you or another user marked a conflict resolved without removing the conflict markers before committing the file. If you see conflict markers in a file that is not marked conflicted, you can extract the conflict markers by following these steps.
1. In the Files or Project panel, right-click a file and select Source Control > Check File for Conflict Markers.
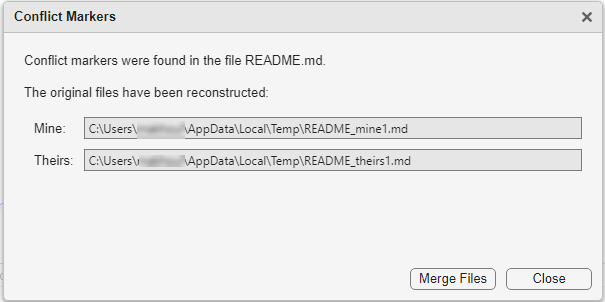
2. MATLAB reconstructs the original files content before the merge and displays the paths in the Mine and Theirs fields.
3. Click Merge Files to open the Merge Tool and resolve conflicts. See Merge Text Files.
Commit Merge Result
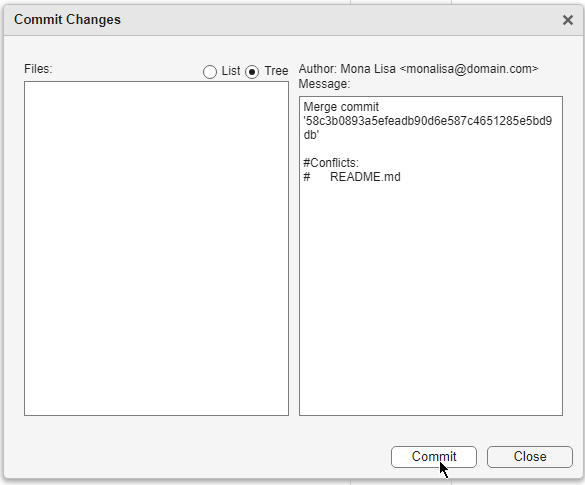
After you resolve conflicts in your files, commit the result merged file. In the Source Control panel, click Commit.
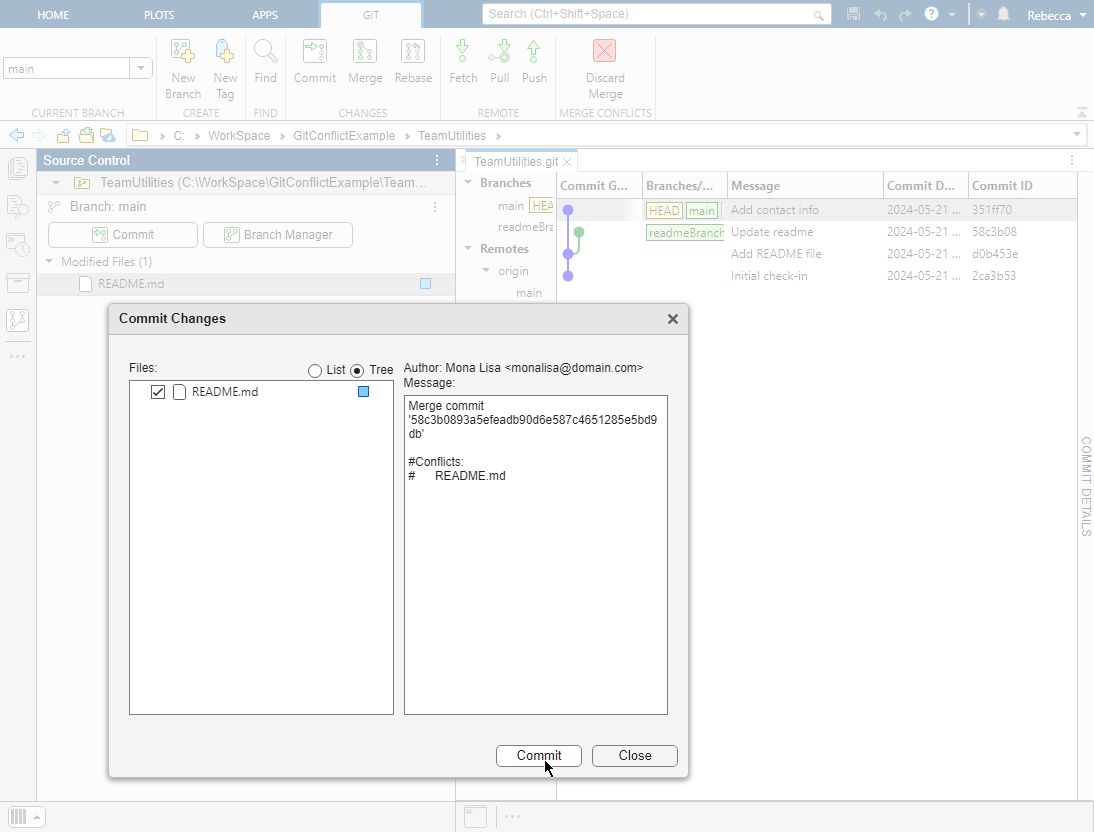
An autogenerated merge commit message shows in the Commit dialog box. To finalize the merge, click Commit.
Note: If you kept only your changes and did not keep any of the other user changes, the list of modified files does not include any files because MATLAB does not detect local changes. You must commit to finalize the merge.
After you resolve merge conflicts, push local changes to share your changes with other users. For more information, see Push to Git Remote.
See Also
Tools
Functions
- gitrepo | gitclone | createBranch | switchBranch | fetch | merge | push