How to Use AWS CodePipeline For Continuous Integration and Deployment? (original) (raw)
Last Updated : 23 Jul, 2025
**AWS CodePipeline automates the continuous integration (CI) and continuous deployment (CD) process by streamlining the build, test, and deployment phases. By integrating AWS CodeCommit, CodeBuild, and CodeDeploy, CodePipeline automates code commits, builds, and deployments. CI ensures that code is automatically built and stored with every commit, while CD automates swift and consistent deployments. This reduces manual errors and enhances deployment efficiency and reliability

Using AWS CodePipeline For Continuous Integration and Deployment
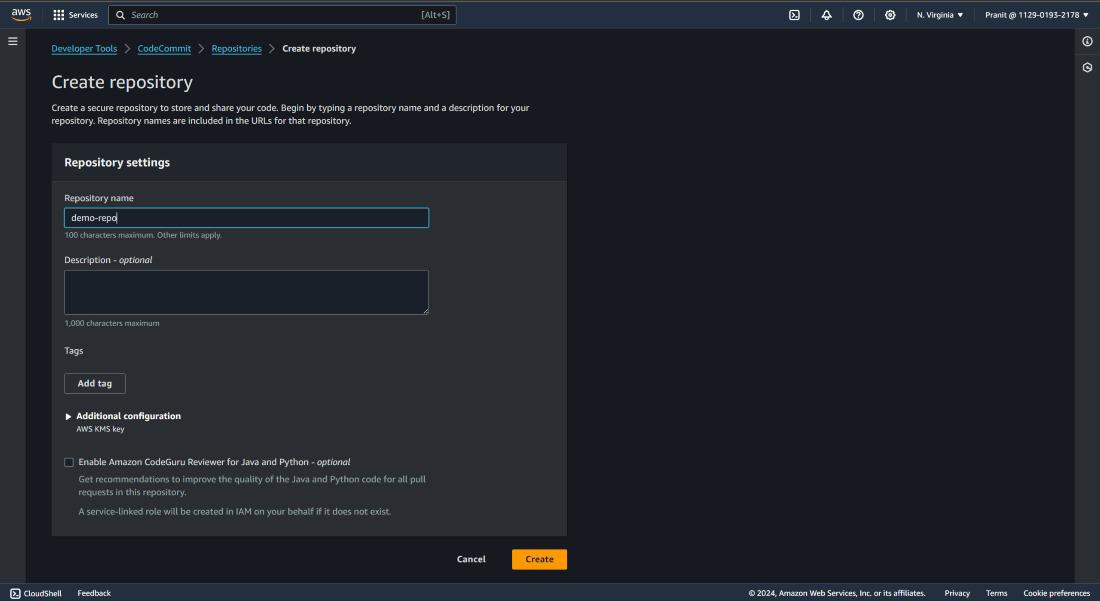
**Step 1: First create a CodeCommit repository.
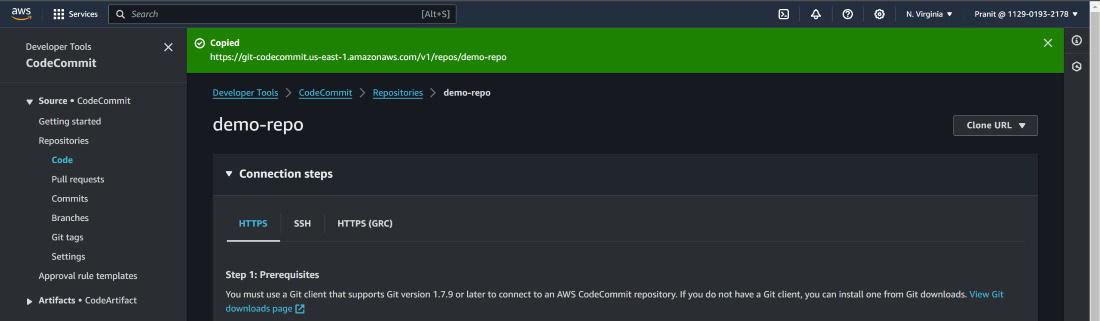
**Step 2: On the top right corner of page, click Clone URL to copy the **HTTPS URL .
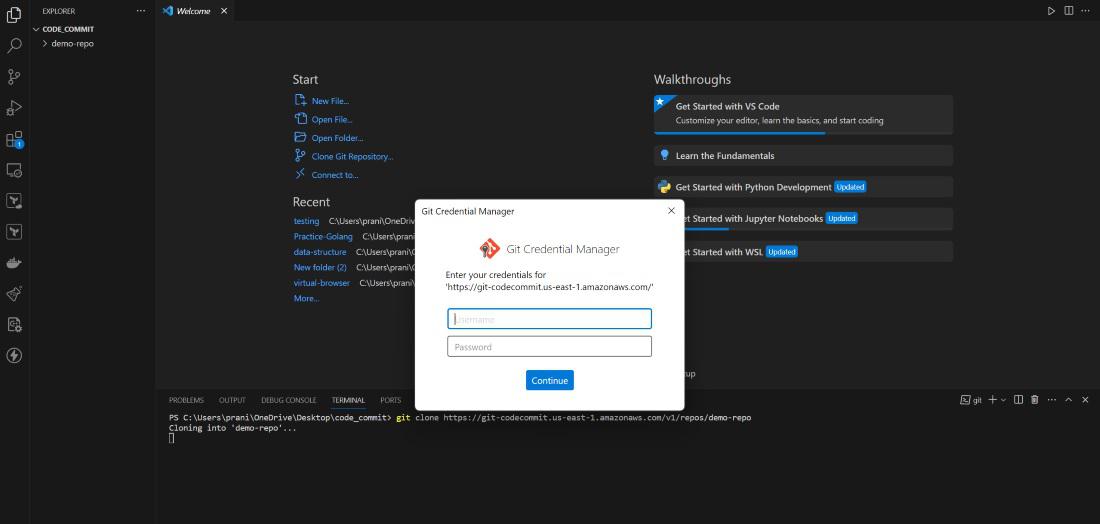
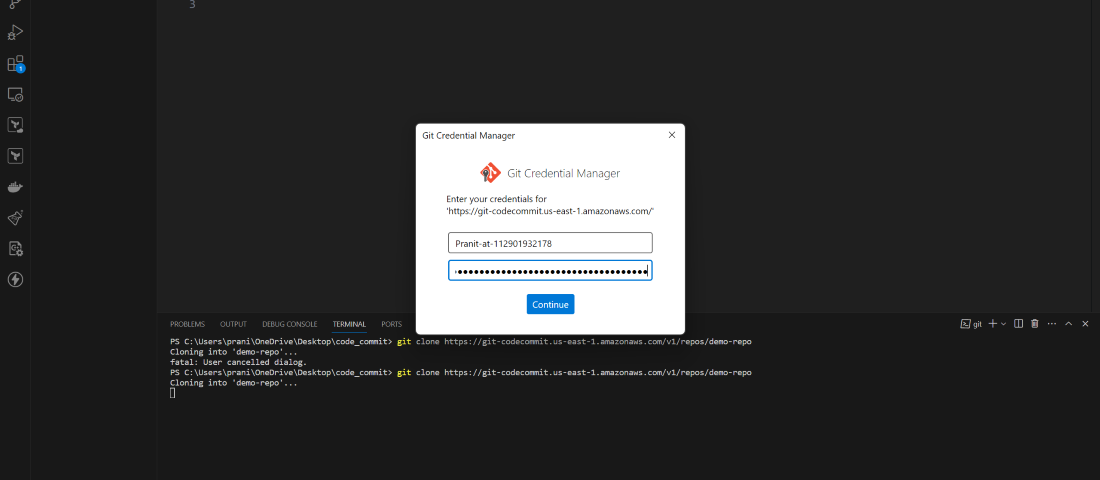
**Step 3: Now go to a local editor terminal (for e.g. visual studio) and write the git clone using the copied URL . But here you will see a new screen will pop out and it will be asking GIT credential.
git clone <__copied URL_>
**Step 4: Now to generate GIT credential, go to the IAM service. Here go to the IAM user account that you are using using now. There you will find Security Credential, select that and scroll down to **HTTPS GIT credentials for AWS CodeCommit. Here click **Generate credentials.
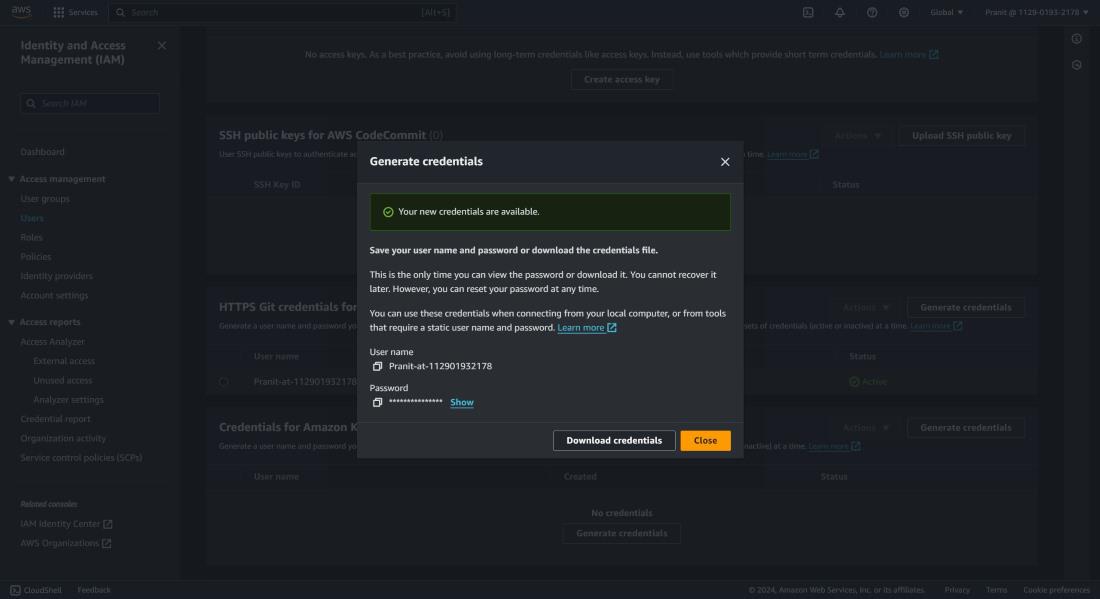
**Step 5: Now we have the GIT credentials. So we can now git clone using the HTTPS URL of CodeCommit repository (_the same command used in step 3). You can now successfully clone the repository after entering the GIT credentials.
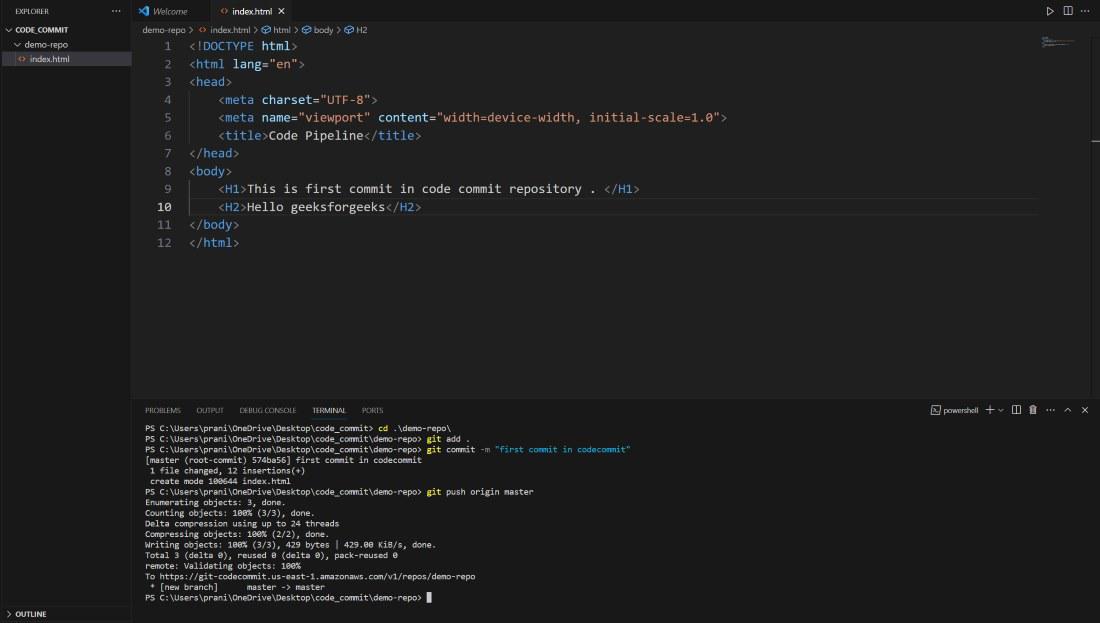
**Step 6: Now go inside the repository and create a index.html. Basically here all the changes are in local environment, so to make sync the changes with the CodeCommit repository you need to **push all the changes to the master branch of CodeCommit repository.
git add . git commit -m "first commit in codecommit" (you can give any message inside the inverted commas) git push origin master
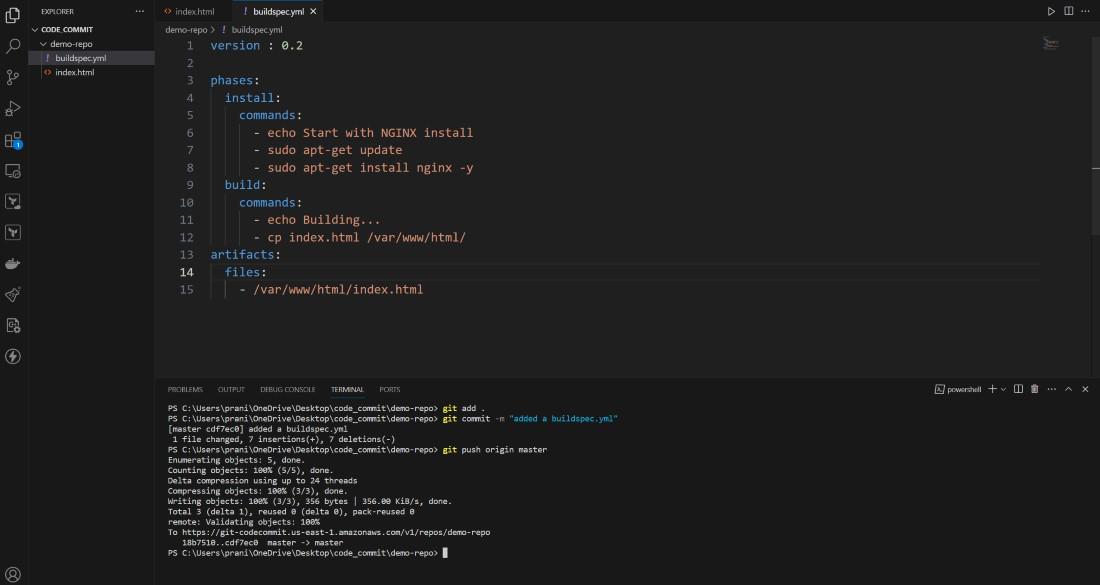
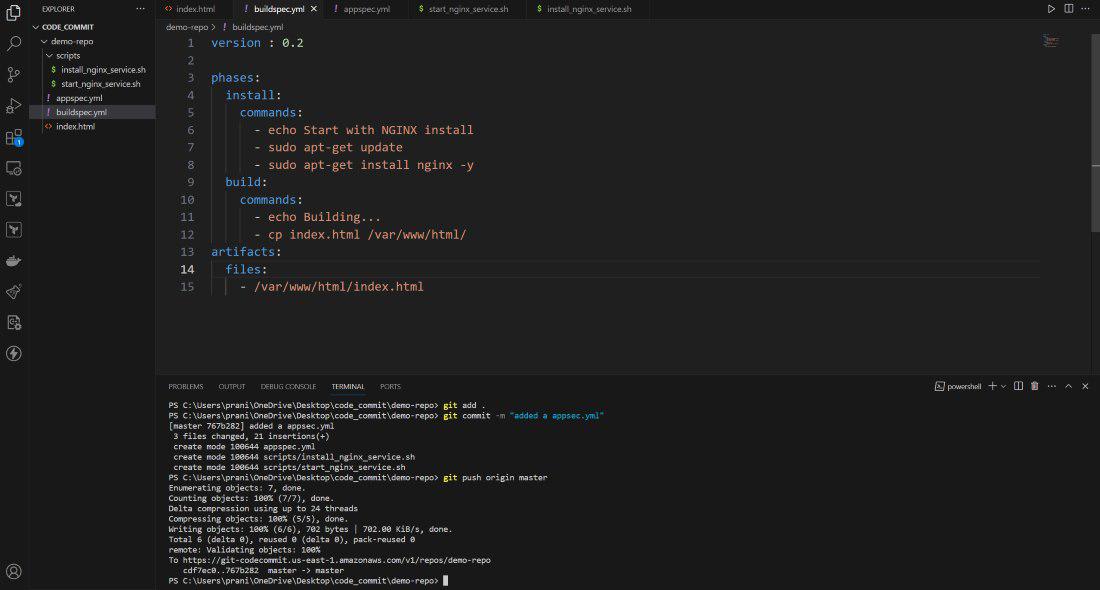
**Step 7: Now we have all these code present inside the CodeCommit repository. We need to build these code now. Before using AWS CodeBuild, we need a **buildspec.yml file inside the repository. This buildspec.yml defines the set of build commands and settings which is necessary for providing a structured way to specify how CodeBuild should build and package your application. Create a buildspec.yml file and push it CodeCommit repository.
version : 0.2
phases: install: commands: - echo Start with NGINX install - sudo apt-get update - sudo apt-get install nginx -y build: commands: - echo Building... - cp index.html /var/www/html/ artifacts: files: - /var/www/html/index.html
**Step 8: Now go to AWS CodeBuild and create a build. Here provide the project name. Add **CodeCommit as code source and here also mention the branch you are using. Select **Ubuntu as operating system, **standard runtime and use the latest image. Here automatically a new service role will be created and attached to the build. Mention the build file, but if you have already selected buildspec.yml then then there is no need for mentioning in the Buildspec name. Select no artifacts. Here you can untick the Cludwatch logs and create the build.
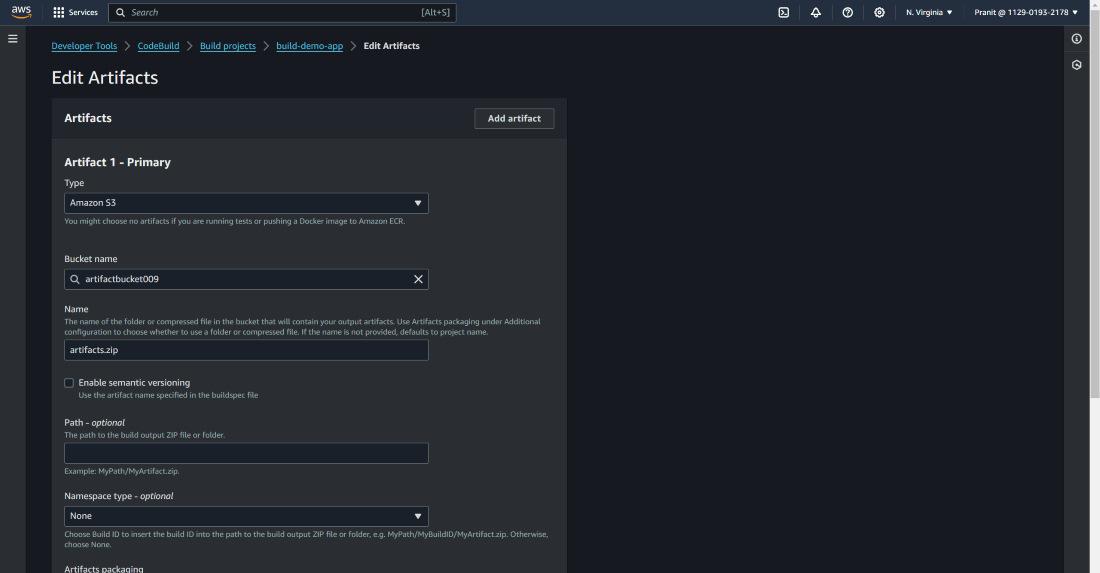
**Step 9: After creating code build you can start the build to see whether your build is successful or not. This build is creating some artifacts which needs to be stored. So select edit and then select artifacts.
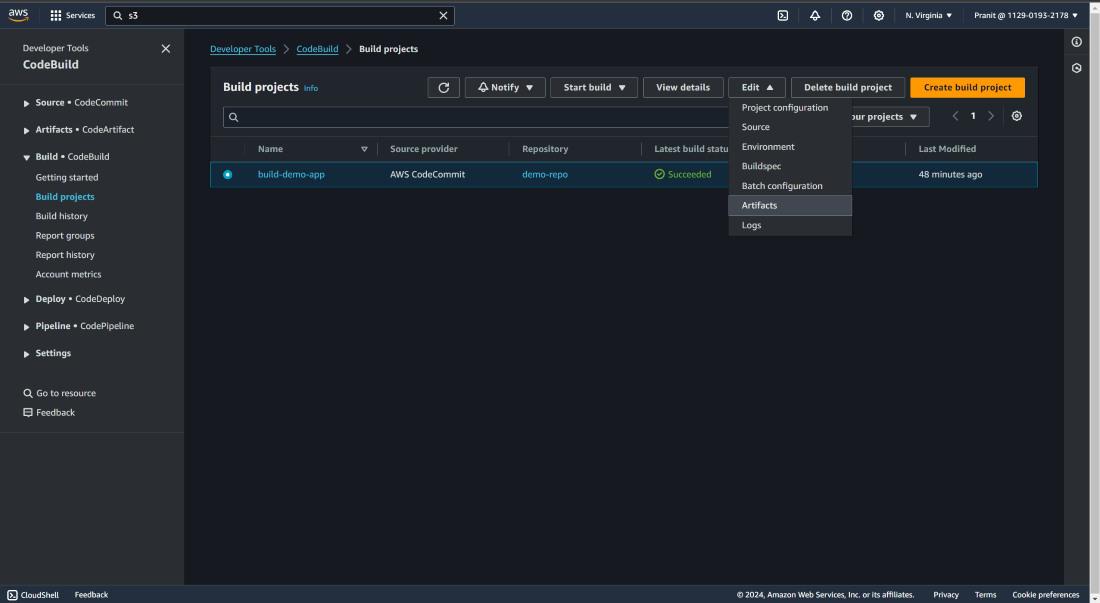
**Step 10: Here we have used Amazon S3 bucket to store the artifacts. Mention the s3 bucket previously created here and in names write **artifacts.zip (.zip).
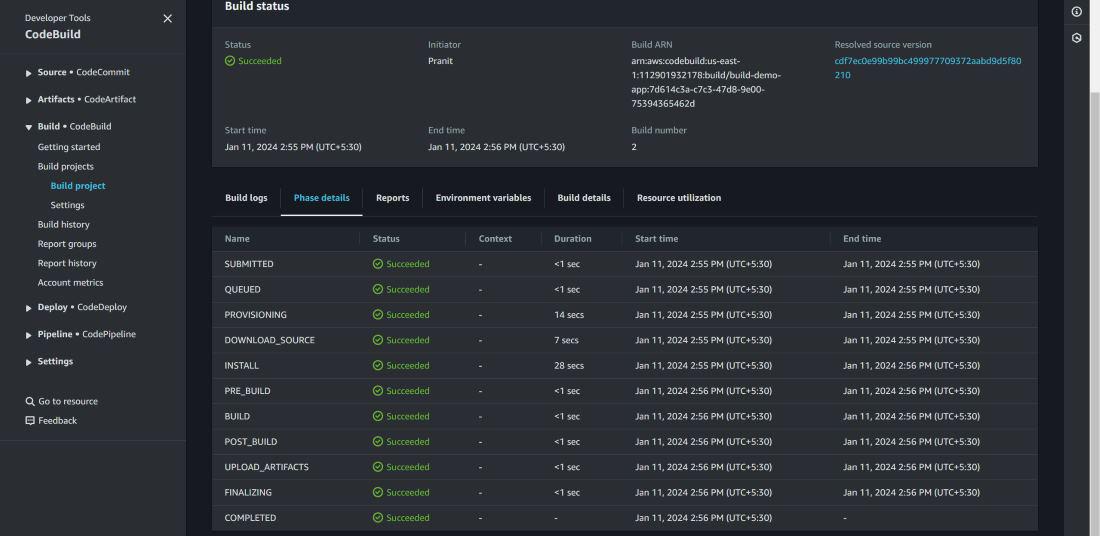
**Step 11: Then start the build. You can check the phase details status.
**Step 12: After build status is successful, now we have to deploy our website. Create an **application on AWS CodeDeploy. Here mention the application name and select EC2/On-premises as compute platform.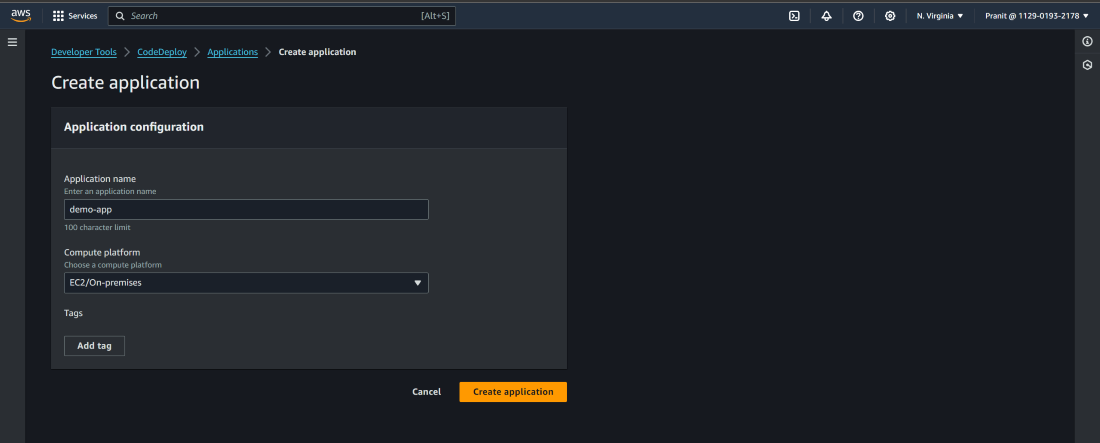
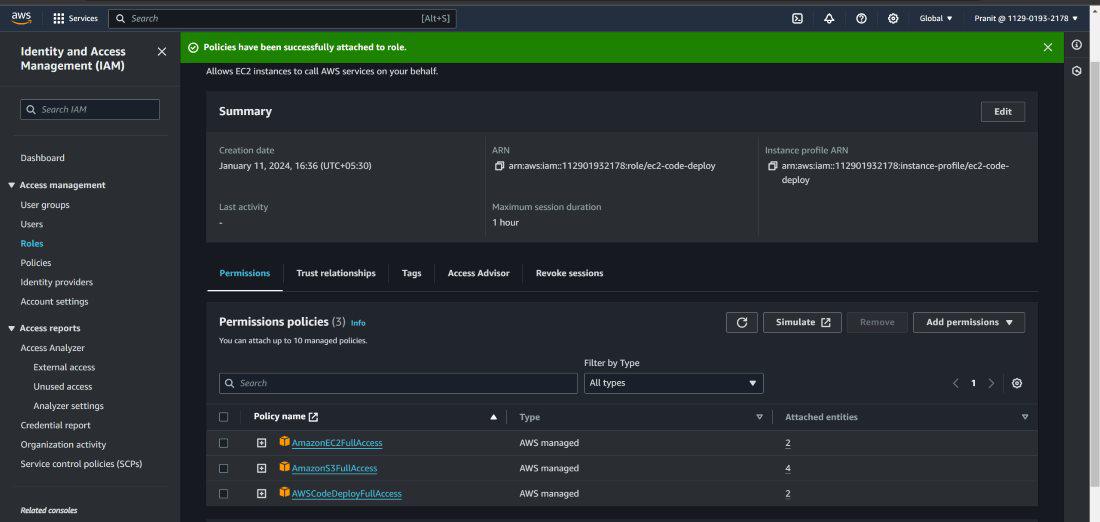
**Step 13: In the previous step we have taken EC2 as compute platform. So now we have to create an EC2 instance(select base image ubuntu22). This EC2 instance needs is used as deployment platform which is interacting with AWS S3 bucket, AWS CodeDeploy service. So after creating EC2 instance you have to **create a IAM role and attach the role to the EC2 instance with some policies **AmazonEC2FullAccess, **AmazonS3FullAccess and **AWSCodeDeployFullAccess.
**Step 14: Create another IAM role for deployment group with the policies **AmazonEC2FullAccess, **AmazonS3FullAccess, AWSCodeDeployFullAccess, **AmazonEC2RoleforAWSCodeDeploy, **AWSCodeDeployRole and **AmazonEC2RoleforAWSCodeDeployLimited. This role will attach to the deployment group that we will create in the next step..jpg)
**Step 15: Now go to AWS CodeDeploy and create a deployment group. Here mention deployment group name, attach the IAM role you have created in the previous step, select EC2 for environment configuration and attach the **EC2 instance created in step 13. And here we will install codedeploy agent manually and so select **never in install codedeploy agent.
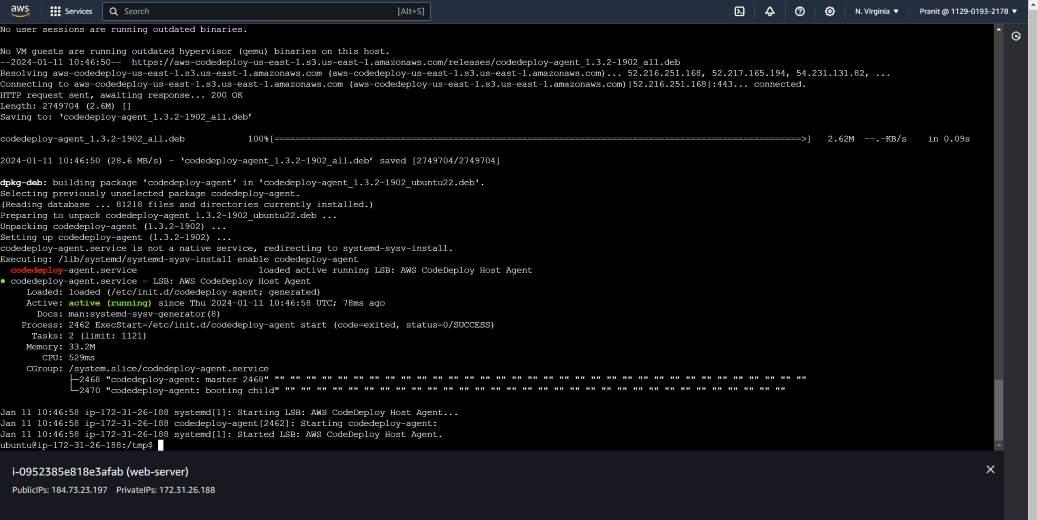
**Step 16: Now we have to install the codedeploy agent on EC2 instance. You can install the codedeploy by following the official documentation of AWS or you can directly install codedeploy agent using the following script (_make sure that you are using us-east-1 or else you have change the region name in the script):
sudo apt-get update sudo apt-get install ruby-full ruby-webrick wget -y cd /tmp wget https://aws-codedeploy-us-east-1.s3.us-east-1.amazonaws.com/releases/codedeploy-agent_1.3.2-1902_all.deb mkdir codedeploy-agent_1.3.2-1902_ubuntu22 dpkg-deb -R codedeploy-agent_1.3.2-1902_all.deb codedeploy-agent_1.3.2-1902_ubuntu22 sed 's/Depends:.*/Depends:ruby3.0/' -i ./codedeploy-agent_1.3.2-1902_ubuntu22/DEBIAN/control dpkg-deb -b codedeploy-agent_1.3.2-1902_ubuntu22/ sudo dpkg -i codedeploy-agent_1.3.2-1902_ubuntu22.deb systemctl list-units --type=service | grep codedeploy sudo service codedeploy-agent status
**Step 17: Like CodeBuild stage, CodeDeploy stage also needs a configuration file called **appspec.yml which provides instructions to CodeDeploy on how to deploy your application. Create appspec.yml in the local environment.
version: 0.0 os: linux files:
- source: /
destination: /var/www/html
hooks:
AfterInstall:
- location: scripts/install_nginx_service.sh timeout: 300 runas: root ApplicationStart:
- location: scripts/start_nginx_service.sh timeout: 300 runas: root
Here there are two scripts used, one script install the nginx service and another script to start the nginx service.
#!/bin/bash
sudo apt-get update sudo apt-get install -y nginx
**start_nginx_service.sh
#!/bin/bash
sudo service nginx start
After creating all these files you have to push all the changes to AWS CodeCommit repository.
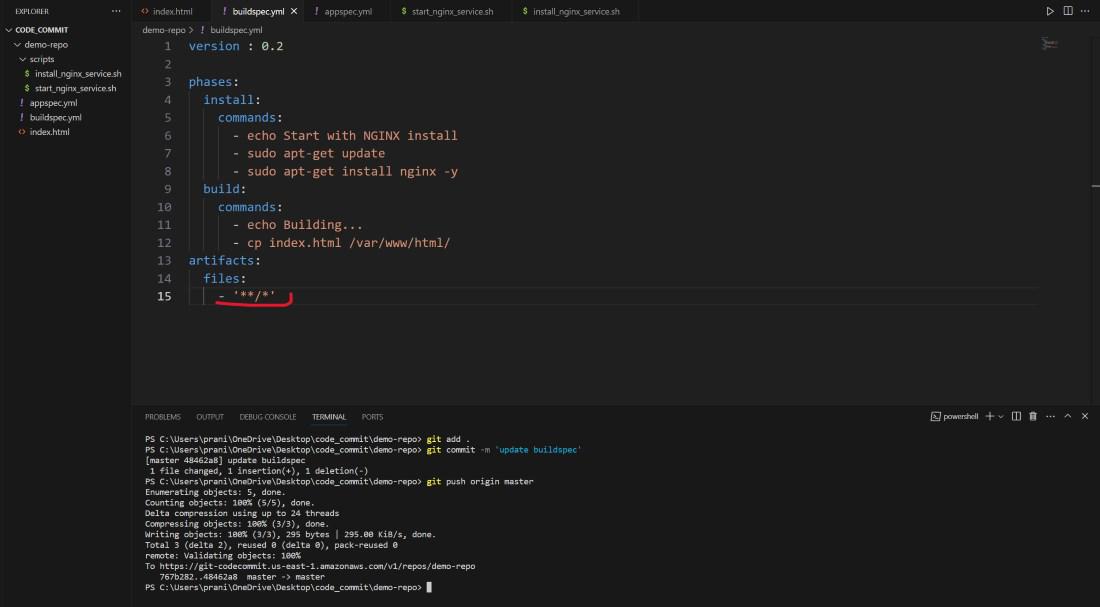
**Step 18: Now you need to update the artifacts files in the **buildspec.yml and then push the changes to AWS CodeCommit repository.
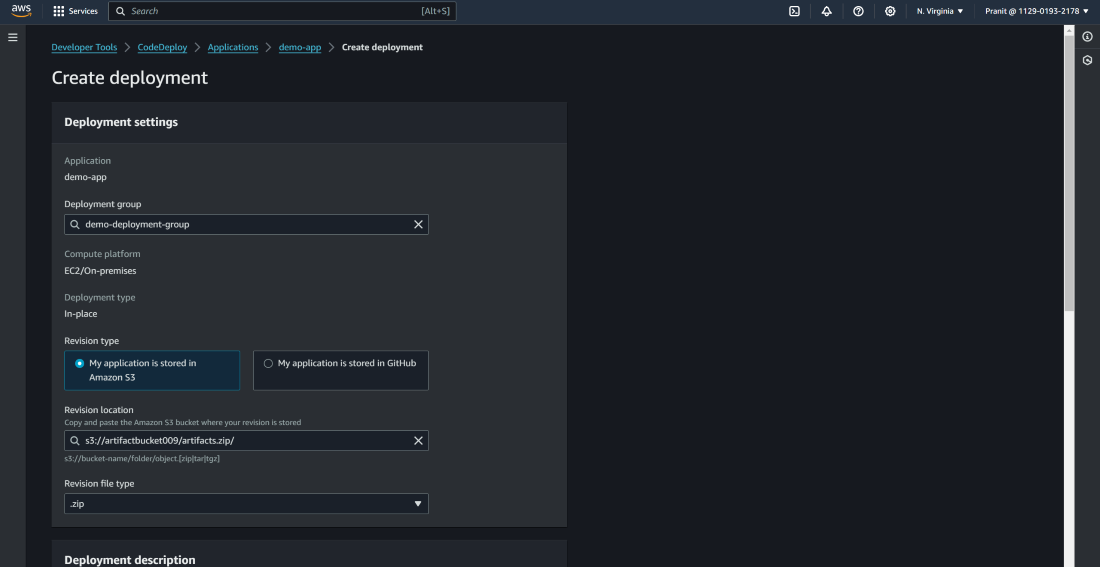
**Step 19: Now here we have to create a deployment using revise location as S3 bucket's URL . Previously we have used artifacts.zip to store the artifacts in S3 bucket, so mention the revision file type as ****.zip**.
**Step 20: After this check the CodeCommit repository if all the files are present or not. Now again start the codebuild and then create the deployment.
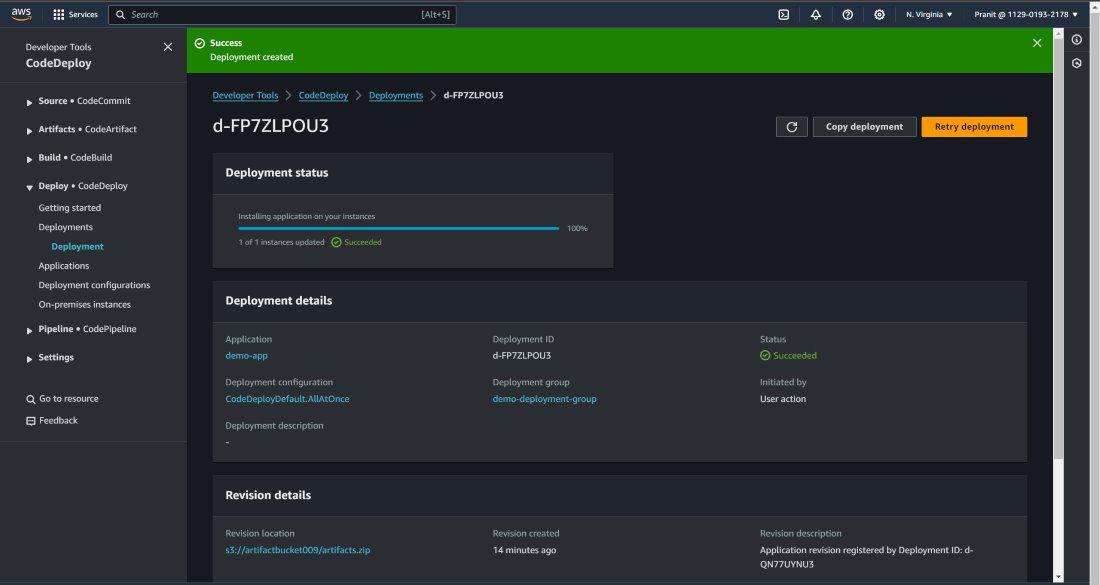
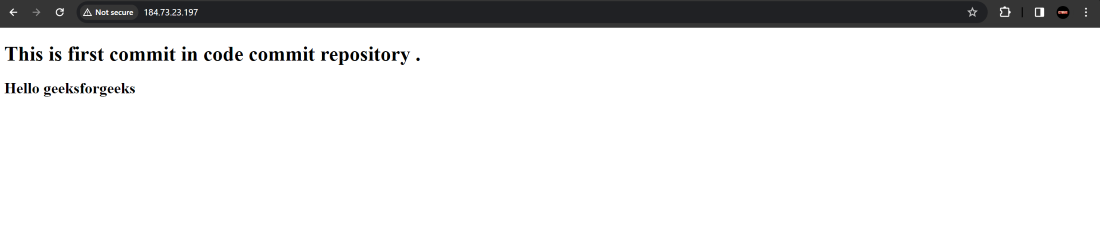
**Step 21: After the successful deployment then access the Public IP of EC2 instance to access the webpage.
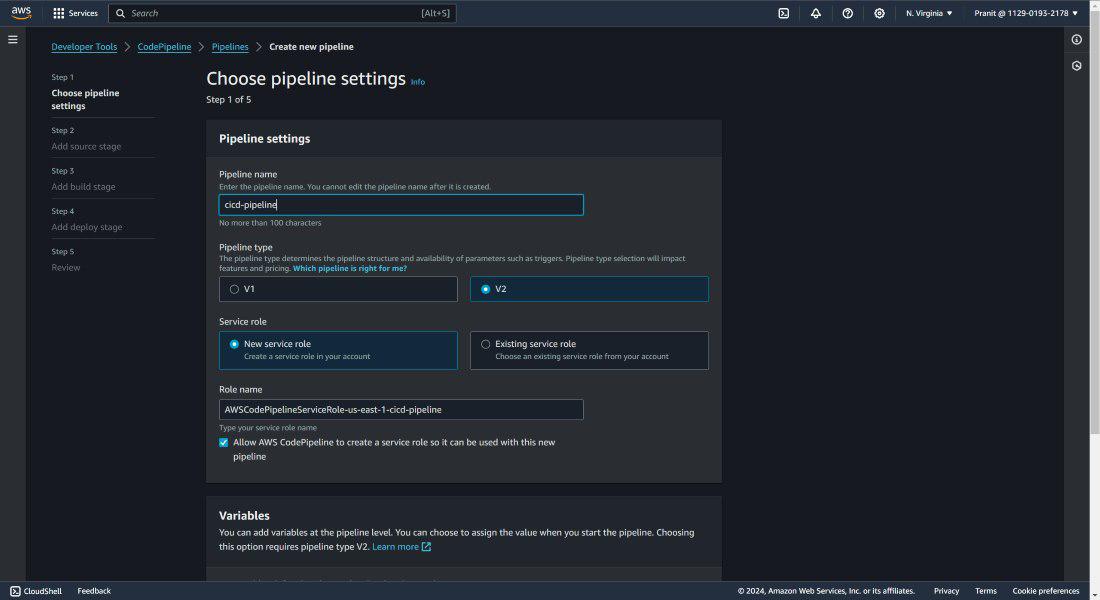
**Step 22: Till now all the above steps are done manually. To automate the CodeCommit, CodeBuild and CodeDeploy stage we need to use AWS CodePipeline. So create an AWS CodePipeline.
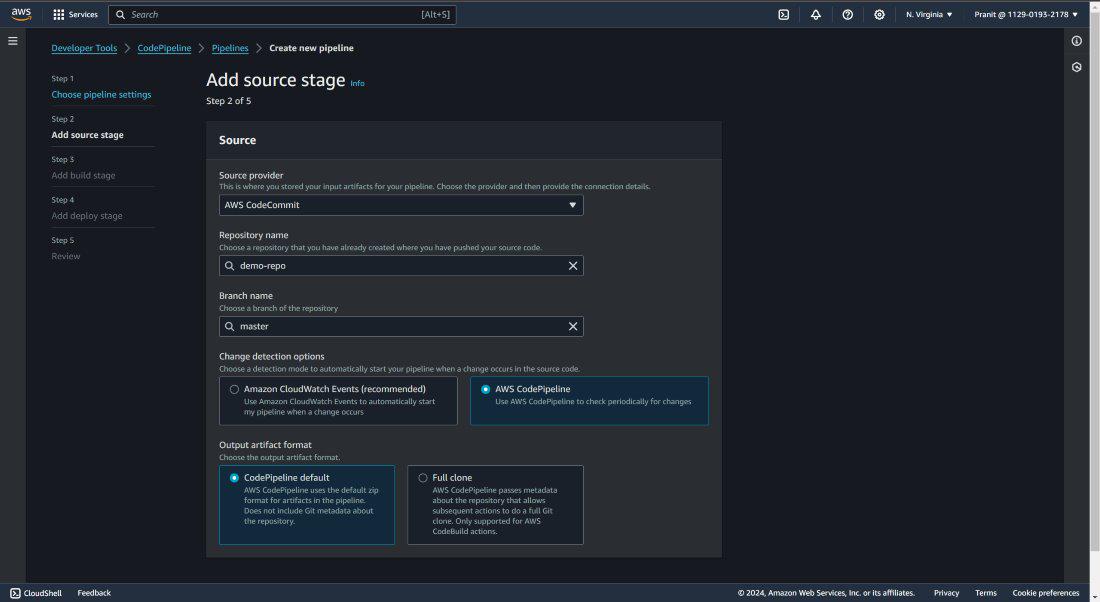
**Step 23: Select code source as AWS CodeCommit and mention the repository name and branch also. Here choose **AWS **CodePipeline in Change detection options (_After selecting this it will automatically detect changes in the repository and start the code build, code deploy stage).
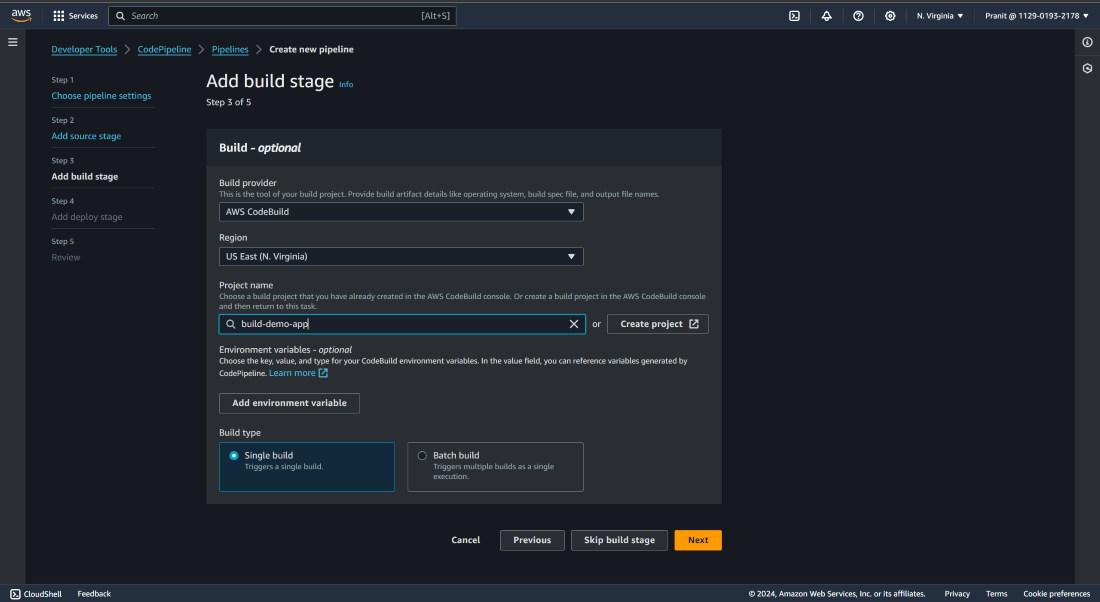
**Step 24: Select AWS CodeBuild as build provider and enter the project name.
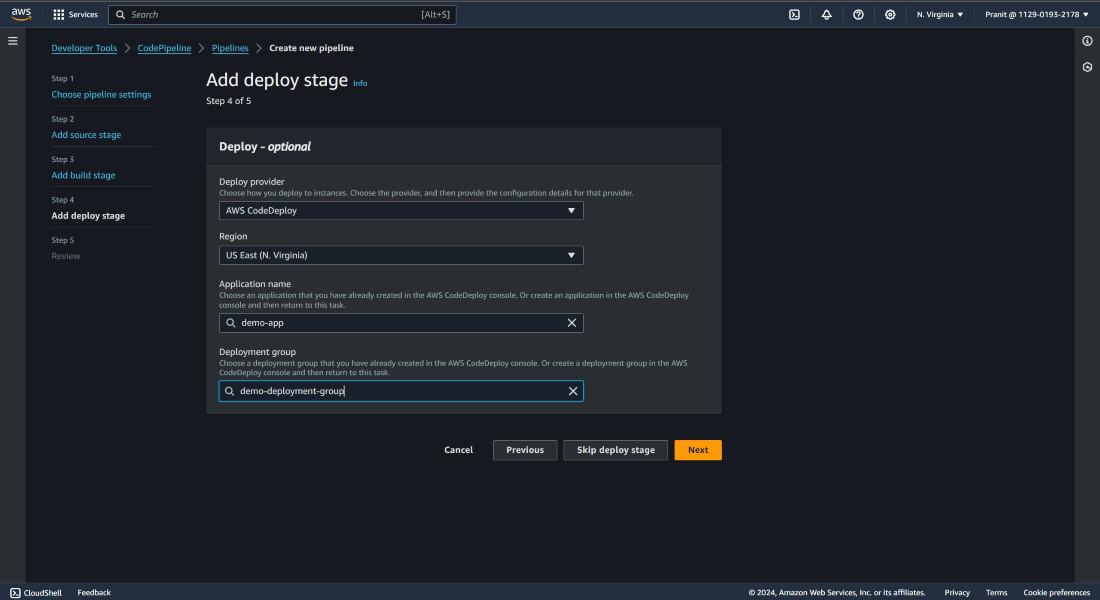
**Step 25: Here also mention the AWS CodeDeploy as deploy provider and mention the application name and deployment group name.
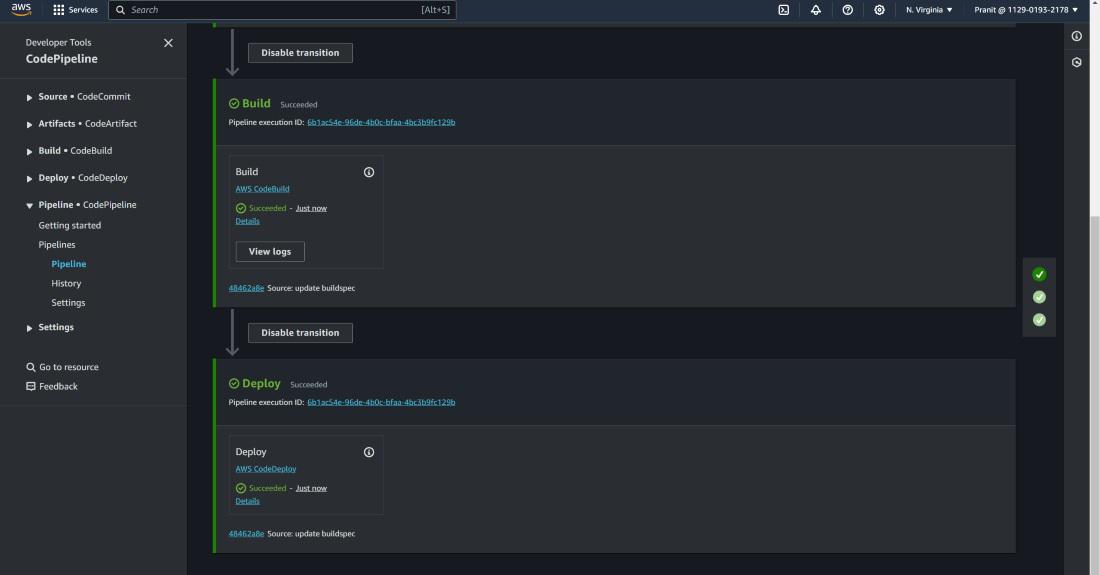
**Step 26: After this the pipeline will be executed successfully.
**Step 27: Now access the webpage using the Public IP of EC2 instance.

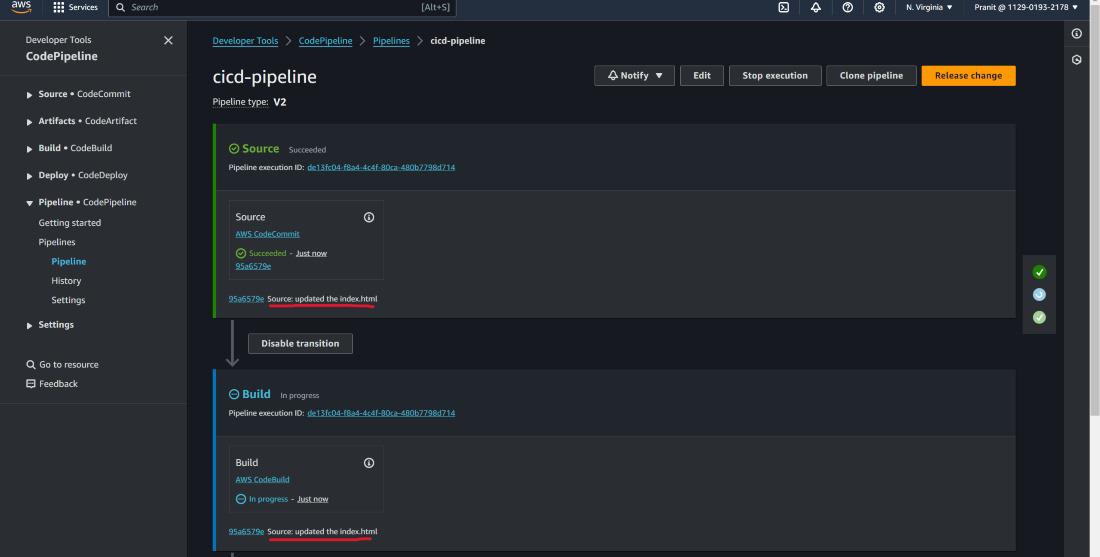
**Step 28: To check whether the AWS CodePipeline working properly or not make some changes in the index.html and push the changes to the AWS CodeCommit repository.
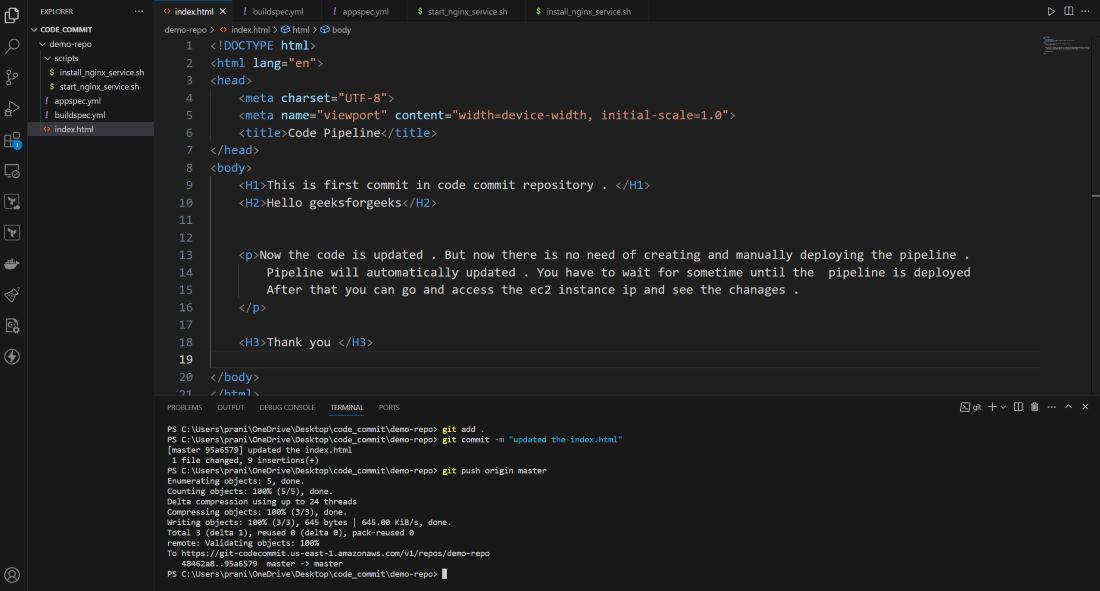
**Step 29: After changes are pushed to AWS CodeCommit repository, you will notice that pipeline will automatically start and can see the recent commit message also.
**Step 30: Finally access the updated webpage using the Public IP of EC2 instance.

Benefits of CodePipeline
- **No Need for Server Setup: CodePipeline eliminates the need to set up or provision servers manually enabling developers to focus on delivering high-quality code faster without worrying about infrastructure.
- **Enhanced Automation: From build to deploy CodePipeline automates every stage of the CI/CD process allowing teams to avoid repetitive manual tasks and streamline the release cycle.
- ****Seamless Integration with AWS Services:**CodePipeline integrates smoothly with AWS services like CodeBuild and CodeDeploy making it easier to manage resources and maintain security within a single platform.
- **Improved Version Control : With CodePipeline, rollback capabilities become simple ensuring teams can revert to previous versions quickly in case of bugs or deployment issues.
- **Multi-Environment Support: Deploying to multiple environments at once is easy with CodePipeline giving teams flexibility for staging, testing and also production in one streamlined process.
- **Enhanced Developer Productivity: By removing infrastructure concerns and manual deployment steps CodePipeline lets developers focus on writing code and building innovative features.
AWS CodePipeline Use Cases
- **Continuous Integration and Continuous Delivery (CI/CD): CodePipeline supports automated build, test, and deployment workflows helping teams implement CI/CD with ease. This is ideal for rapid and frequent software releases enhancing the speed and quality of product delivery.
- **Multi-Environment Deployments: With CodePipeline you can set up pipelines that deploy to multiple environments such as development, staging and also production. This is useful for applications that need different environments for testing and quality checks before production deployment.
- **Automated Testing and Quality Assurance: CodePipeline integrates with tools like AWS CodeBuild and third-party testing services allowing for automated testing during each phase of the pipeline. This helps catch issues early in the process reducing the risk of errors reaching production.
- **Microservices Architecture Support: CodePipeline is beneficial for deploying microservices, as each microservice can have its own pipeline with dedicated build, test and also deploy steps. This provides flexibility for updating individual services without impacting the entire application.
- **Rapid Feature Development and Deployment: CodePipeline allows teams to deploy new features and fixes quickly without manual intervention. This is valuable for teams adopting agile methodologies and aiming to provide frequent feature updates to users.
- **Rollback and Version Control: With CodePipeline you can roll back to previous versions if issues arise during deployment. This makes it easier to maintain stable and reliable application versions in production by swiftly reverting to a prior state.
- **Integration with Third-Party Tools: CodePipeline integrates with popular developer tools like GitHub, Jenkins and also Bitbucket allowing teams to use their preferred code repositories and CI/CD tools in one cohesive workflow.
- **Compliance and Auditing: CodePipeline offers logging and tracking capabilities, which help organizations meet compliance standards by recording every step in the deployment process ensuring accountability and traceability.
AWS CodePipeline Pricing
| Pipeline Type | Pricing Structure | Free Tier | Additional Charges |
|---|---|---|---|
| V1 | $1.00 per active pipeline per month. An active pipeline is one that has existed for more than 30 days and has at least one code change running through it during the month. | One free active pipeline per month | Additional charges may apply for storing and accessing pipeline artifacts in Amazon S3 and for triggering actions from other AWS and third-party services connected to your pipeline |
| V2 | $0.002 per action execution minute. Action execution duration is calculated in minutes, from the time an action in your pipeline starts executing until it reaches a completion state, rounded up to the nearest minute | 100 free action execution minutes per month, shared across all V2 pipelines in the account. Unused minutes do not carry over to the next month. | Additional charges may apply for storing and accessing pipeline artifacts in Amazon S3 and for triggering actions from other AWS and third-party services connected to your pipeline. |
Conclusion
So you have now learned why continuous integration and continuous deployment is important . Also we have gone through the various steps to automate the different stages like code commit , code build and code deploy using AWS CodePipeline . Finally we successfully accessed the website using the Public IP of EC2 instance .