What is a Container ? (original) (raw)
Last Updated : 23 Aug, 2025
A container is an isolated, stand-alone unit that encapsulates an application and all its dependencies. It runs consistently in any environment, independent of the host system.
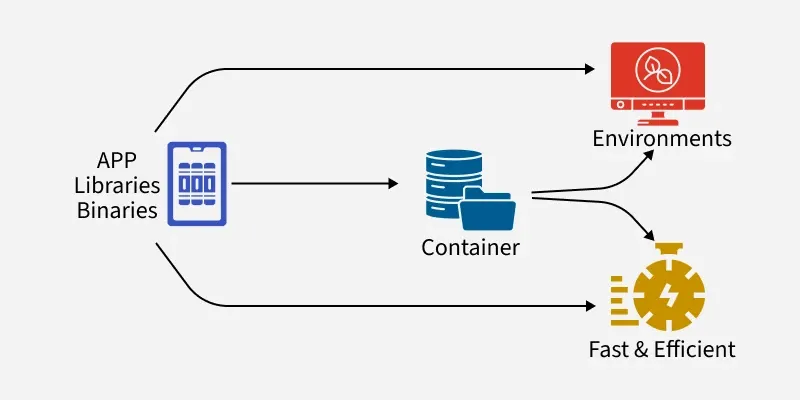
It is a light, executable software package that wraps everything an application needs libraries, configuration files, and binaries. This ensures the application behaves the same way whether on a developer’s laptop, testing environment, or production server. Unlike traditional virtual machines that carry a full OS, containers only pack what is required, making them faster and more efficient.
Containers vs. Virtual Machines (VMs)
Both containers and VMs allow running applications in isolated environments, but they differ in architecture, performance, resource usage, and startup time.
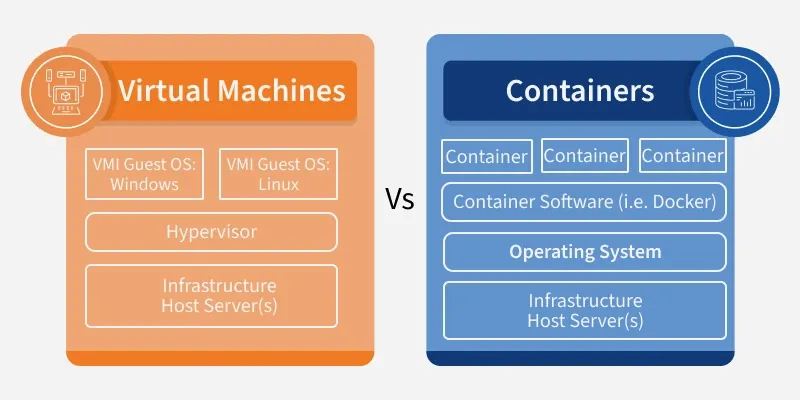
Containers
- **Architecture: All containers share the host OS kernel; however, the running user spaces are isolated, making them lightweight.
- **Boot Time: Containers have much less boot time typically in seconds, as they do not need to boot a full OS.
- **Isolation: Containers provide isolation at the process level, which is less strong compared to VMs, but for many use cases, this does not matter
- **Resource Usage: Containers consume fewer resources because they do not need an entire OS—only the necessary binaries and libraries.
Virtual Machines (VMs)
- **Architecture: A hypervisor that runs on the host OS includes a full guest OS with virtualized hardware.
- **Resource Usage: Very high, as the full OS overhead is incurred for each instance.
- **Isolation: Very good because each VM is a system on its own with its own OS.
- **Boot Time: VMs typically have longer boot times because the full OS in a VM needs to be initialized.
What is Containerization?
Containerization is the process of packing an application together with all its dependencies into a container in order to allow the application to run consistently from one computing environment to another, in simple terms containerization involves using the host OS kernel to run many isolated instances of applications on the same machine, making it very lightweight and efficient in deploying applications.
Use Cases for Containerization
- **Microservices Architecture: Containers are just the right fit for deploying microservices, where each service runs in its own container.
- **CI/CD Pipelines: Containers make CI/CD very easy by providing consistent environments from development to production.
- **Cloud-Native Applications: Containers are the underlying infrastructure for cloud-native applications, while at the same time being portable across various cloud providers.
- **Dev/Test Environments: Containers make it easier to set up consistent development and testing environments, significantly reducing the problems associated with "it works on my machine."
- **Legacy Application Modernization: Containers enable legacy applications to be packaged in a way that makes them easier to deploy and manage on modern infrastructure.
Step-by-Step Process: How Containers Work?
These steps to understand how containers are created, built into images, and run to deliver applications consistently across environments.
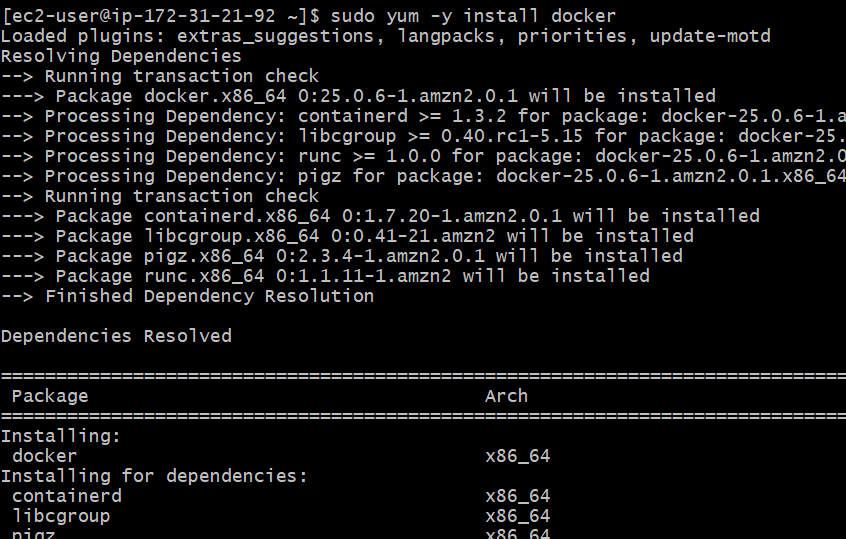
Step 1: Install Docker
- Use the following command to install Docker on your local machine.
sudo yum -y install docker
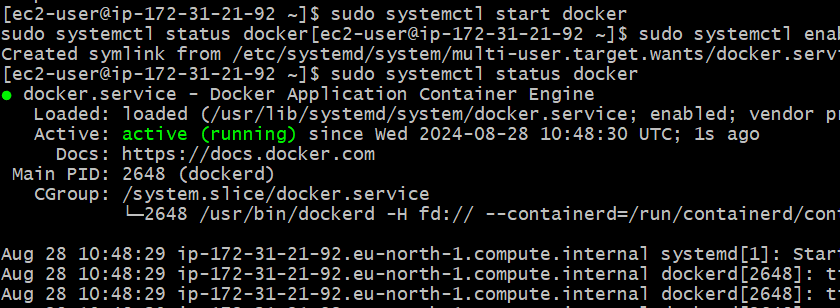
- Now start and enable docker
sudo systemctl start docker sudo systemctl enable docker sudo systemctl status docker
Step 2: **Create a Dockerfile
- A **Dockerfile is a script containing a series of instructions on how to build a container image.
- The Dockerfile typically starts with a base image (e.g., a specific version of Linux or an official image for a programming language like Python or Node.js).
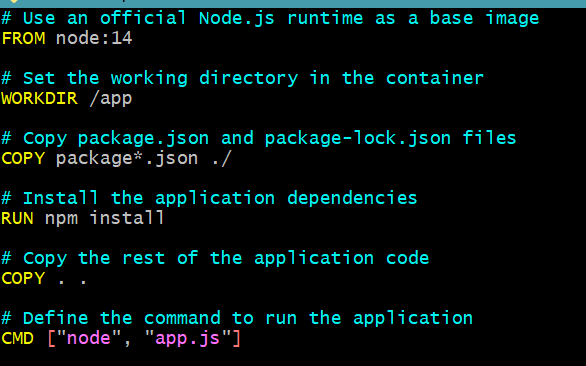
Example Dockerfile:
# Use an official Node.js runtime as the base image.
FROM node:14
# Specify the working directory inside the container.
WORKDIR /app
# Copy package.json and package-lock.json files
COPY package*.json ./
# Install the application dependencies
RUN npm install
# Copy the rest of the application code
COPY . .
# Define the command to run the application
CMD ["node", "app.js"]
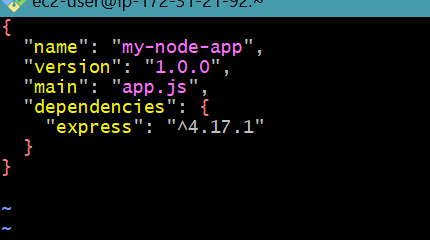
Step 3: Create package.json file
- Ensure that the
expressmodule is listed under thedependenciessection.
{
"name": "my-node-app",
"version": "1.0.0",
"main": "app.js",
"dependencies": {
"express": "^4.17.1"
}
}
Step 4: **Create the app.js File
- If you need to create the file, here's a basic example:
const express = require('express');
const app = express();
const port = 3000;
app.get('/', (req, res) => {
res.send('Hello, World!');
});
app.listen(port, () => {
console.log(`App running on http://localhost:${port}\`);
});

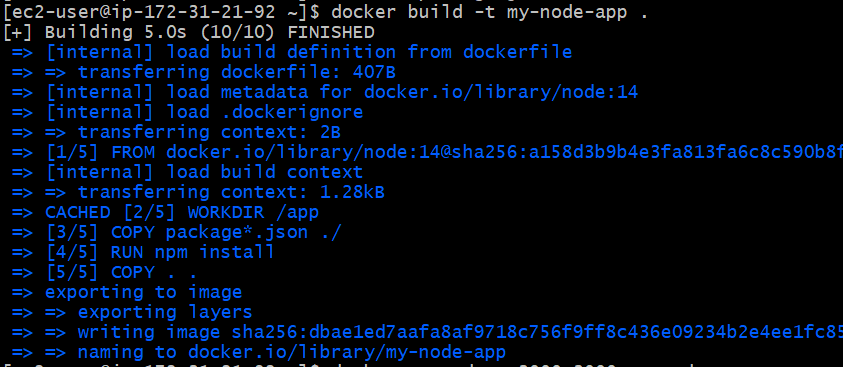
Step 5: **Build the Container Image
Use the Dockerfile to build the container image. This image includes the application code, all dependencies, and any necessary environment settings.
Command to build the image:
docker build -t my-node-app .
- The
-tflag tags the image with a name (my-node-app) and the . shows that the Dockerfile is located in the current directory.
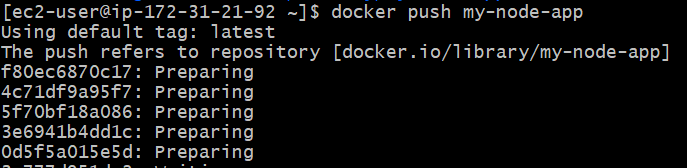
**Step 6: Store the Image
After building the image, it can be stored locally or pushed to a container registry (like Docker Hub or a private registry).
Command to push the image to Docker Hub:
docker push my-node-app
Step 7: **Run the Container
- Once the image is built (and optionally stored in a registry), it can be run as a container.
- The container runs the application in an isolated environment, ensuring consistency across different deployment environments.
- Command to run the container:
docker run -d -p 3000:3000 my-node-app
- The
-dflag runs the container in detached mode (in the background), and-p 3000:3000maps port 3000 on the host to port 3000 on the container.

- We can check container list by using following command
docker ps

Step 8: Access the Application
Finally, if everything is set up correctly, you should be able to access your Node.js application by navigating to http://<Public IP >:3000 in your web browser.

Benefits of Containers
- **Portability: Containers package all dependencies, enabling applications to run consistently across various environments.
- **Efficiency: Containers use fewer resources than VMs, allowing for higher density of applications on the same hardware.
- **Scalability: Containers can be easily scaled up or down, enabling efficient handling of dynamic workloads.
- **Faster Deployment: Due to their lightweight nature, containers can be deployed quickly, enhancing development and CI/CD processes.
- **Consistency: Containers ensure that the application runs the same way across development, testing, and production environments.